What to Do When Your Freezer Goes On the Fritz – A Guide to Common Freezer Problems and How to Fix Them

Freezers are essential appliances for preserving and storing food for extended periods. However, like any other household appliance, freezers can experience problems that may disrupt their functionality. Being aware of common freezer problems and their solutions can help you address these issues quickly and efficiently. Whether you have a standalone freezer or a freezer attached to your refrigerator, here are some common problems you may encounter.

  1. Frost Build-Up:One of the most common issues with freezers is the build-up of frost inside the unit. This can reduce the efficiency of the freezer and lead to increased energy consumption. To solve this problem, regularly defrost your freezer and make sure the seal on the door is intact and properly closing. You can also use a hairdryer to gently melt the frost.
  2. Temperature Fluctuations:If you notice that the temperature inside your freezer is fluctuating, it can be a sign of a malfunctioning thermostat or compressor. Check the thermostat settings and adjust them if necessary. Also, make sure the vents and air circulation are not blocked by food items. If the problem persists, it might be wise to seek professional help.
  3. Strange Noises:Unusual noises coming from your freezer can indicate a problem. It could be caused by a faulty fan motor, worn-out belts, or loose components. First, check if there are any loose objects inside the freezer that may be causing the noise. If not, it is best to call a technician to diagnose and fix the issue.
  4. Water Leakage:Leaking water from your freezer can not only damage your flooring but also indicate a problem with the appliance. The most common cause of water leakage is a clogged defrost drain. Clear the drain using a mixture of warm water and mild detergent. If the problem persists, it could be due to a faulty water inlet valve or damaged drain hose, which should be addressed by a professional.
  5. Failure to Start:If your freezer fails to start, check if it is properly connected to the power source and that the circuit breaker has not tripped. If everything seems fine, the issue may lie with the compressor or the electronic control board. In such cases, it is best to call a technician for a thorough inspection and repair.

By being aware of these common freezer problems and their solutions, you can troubleshoot and resolve any issues that arise. Regular maintenance and proper care can also help prevent many of these problems from occurring in the first place, ensuring that your freezer remains in optimal condition for a long time.

Common Issues with Freezers

Freezers are essential appliances for keeping food fresh and preserved for a long time. However, they can sometimes encounter issues that can affect their functionality. In this article, we will discuss some common issues that can arise with freezers and their possible solutions.

  1. Not cooling properly:One of the most common problems with freezers is when they fail to cool as effectively as they should. This can be caused by various factors, such as a dirty condenser coil, a faulty thermostat, or a malfunctioning compressor. To resolve this issue, you can start by cleaning the condenser coil and ensuring that it is not blocked by dirt or debris. If the problem persists, it is advisable to call a professional technician to inspect and repair the thermostat or compressor.
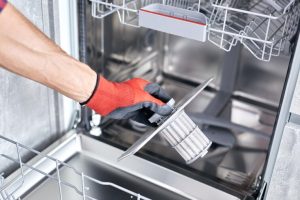
  2. Excessive frost buildup:Another common issue with freezers is the accumulation of frost on the walls or food items. This can occur due to a damaged door gasket, a faulty defrost timer, or an issue with the defrost heater. To address this problem, you can check the door gasket for any signs of wear or damage and replace it if necessary. Additionally, you can manually defrost the freezer and observe if the issue persists. If it does, it might be necessary to replace the defrost timer or heater.
  3. Unusual noises:Unusual noises coming from the freezer can be alarming and indicate a problem. These noises can occur due to a faulty evaporator fan motor, a damaged compressor, or a clogged drain tube. To fix this issue, you can start by cleaning the drain tube using a mixture of water and vinegar. If the noises continue, it is recommended to consult a professional to determine the cause and perform any necessary repairs or replacements.
  4. Door seal problems:A damaged or worn-out door seal can lead to air leaks and cause the freezer to work harder to maintain the desired temperature. To resolve this issue, you can inspect the door seal for any signs of damage and replace it if needed. Additionally, you should ensure that the door is always properly closed to prevent air leaks and ice buildup.
  5. Frequent power outages:Freezers can be affected by frequent power outages, especially in areas with unstable electrical supply. This can spoil the stored food and affect the freezer’s performance. To prevent this issue, it is advisable to invest in a backup power supply, such as a generator or an uninterruptible power supply (UPS), to keep the freezer running during power outages.

In conclusion, while freezers are generally reliable appliances, they can experience common issues that can hinder their performance. By following the suggested solutions for these issues, you can ensure that your freezer remains in optimal condition and continues to preserve your food effectively for a long time.

Freezer Not Cooling

If your freezer is not cooling properly, it can be a frustrating experience. Fortunately, there are several common problems that can cause this issue, and many of them can be fixed easily.

  1. Power Supply:Check if the freezer is plugged in and getting power. Make sure the outlet is working properly by testing it with another appliance. If the outlet is faulty, try plugging the freezer into a different outlet.
  2. Temperature Settings:Check the temperature settings on the freezer. Make sure it is set to the desired temperature and not accidentally turned off or set to a warmer temperature. Adjust the temperature settings if necessary.
  3. Door Seals:Inspect the door seals for any cracks, gaps, or tears. Damaged door seals can allow warm air to enter the freezer, causing it to not cool properly. Clean the door seals and replace them if necessary.
  4. Dirty Condenser Coils:Over time, the condenser coils can accumulate dust and dirt, causing the freezer to not cool properly. Clean the condenser coils using a vacuum cleaner or a soft brush to remove the debris.
  5. Frost Build-up:Excessive frost build-up can interfere with the freezer’s cooling ability. Defrost the freezer by unplugging it and letting it thaw for 24 hours. Remove any excess frost or ice using a plastic scraper, being careful not to damage the interior surfaces.
  6. Insufficient Air Circulation:Make sure there is enough space around the freezer for proper air circulation. Rearrange any items or furniture that may be blocking the airflow. Avoid overloading the freezer with too many items, as it can restrict the airflow and prevent proper cooling.
  7. Faulty Thermostat:If all else fails, the thermostat may be faulty. Contact a professional technician to inspect and replace the thermostat if necessary.

Remember, if you are unsure about any repairs or if the problem persists, it is always best to consult a professional technician to avoid causing further damage to the freezer.

Frost Build-Up in Freezer

One common problem that many people encounter with their freezers is frost build-up. Frost build-up can occur for several reasons, including a faulty door seal, frequent door openings, or a malfunctioning defrost system. If left unchecked, frost build-up can not only decrease the efficiency of your freezer but also make it difficult to find and access the items stored inside.

To address frost build-up in your freezer, there are a few steps you can take. First, check the door seal to ensure it is properly sealing the freezer. If you notice any gaps or tears in the seal, you may need to replace it. This will help prevent warm air from entering the freezer and causing frost to form.

Next, try to limit the number of times you open the freezer door. Each time the door is opened, warm air enters the freezer, causing the temperature to rise and potentially leading to frost build-up. Consider removing all the items you need from the freezer at once, instead of opening it multiple times throughout the day.

If the above steps do not resolve the issue, it is possible that your freezer’s defrost system is malfunctioning. The defrost system is responsible for melting any frost that accumulates on the evaporator coils. If the system is not working correctly, frost can build up rapidly. In this case, it may be necessary to call a professional technician to diagnose and repair the problem.

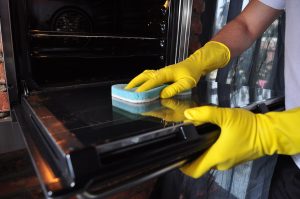
Regular maintenance can also help prevent frost build-up in your freezer. Make sure to clean the freezer regularly, removing any spilled food or ice. Additionally, defrosting the freezer periodically can help remove any existing frost and keep the appliance running efficiently.

By addressing frost build-up in your freezer promptly and taking preventive measures, you can ensure that your appliance runs smoothly and efficiently, keeping your frozen goods in optimal condition.

Strange Noises Coming from Freezer

If you are hearing strange noises coming from your freezer, it can be concerning and indicate a potential issue. Here are some common causes for these noises and their possible solutions:

  • Humming or buzzing noises: These noises are typically caused by the freezer’s compressor. If the noise is loud or continuous, it could be a sign of a faulty compressor. In this case, it is best to contact a professional technician to inspect and repair the compressor.
  • Rattling or vibrating noises: Rattling or vibrating noises can be caused by loose components or items inside the freezer. Make sure that all containers and food items are properly stored and secured. If the noise persists, check if the freezer is level and adjust the feet or leveling screws accordingly.
  • Clicking noises: Clicking noises may indicate a problem with the defrost timer or the start relay. If you hear repeated clicking sounds, it is recommended to have a professional technician inspect and possibly replace these components.
  • Dripping or splattering noises: These noises can be caused by ice melting or water dripping onto the defrost heater during the defrost cycle. This is a normal occurrence, and you should not be alarmed unless the noise becomes constant or excessive.
  • Gurgling or bubbling noises: Gurgling or bubbling noises are often heard when the refrigerant flows through the system. This is a normal sound and does not indicate any issue with the freezer.

If none of these solutions resolve the noise coming from your freezer or if you notice any other unusual symptoms, it is recommended to contact a professional technician for further diagnosis and repair.

Freezer Leaking Water

If you notice water pooling on the floor around your freezer, it can be a sign of a problem. There are several potential causes for a freezer leaking water, but the most common issues are a clogged defrost drain or a faulty water inlet valve.

Clogged Defrost Drain

Over time, the defrost drain in your freezer can become clogged with debris or ice, causing water to back up and leak out onto the floor. To resolve this issue, follow these steps:

  1. Unplug the freezer and locate the defrost drain, which is usually located at the bottom of the freezer compartment.
  2. Remove any debris or ice blocking the drain. You can use a pipe cleaner or a turkey baster filled with warm water to flush out the clog.
  3. Once the drain is clear, pour a mixture of warm water and mild detergent down the drain to clean it. Rinse with plain water.
  4. Plug the freezer back in and make sure the water is now properly draining into the pan or tray beneath it.

Faulty Water Inlet Valve

If your freezer has an ice maker or water dispenser, a faulty water inlet valve may be the cause of the water leak. The water inlet valve is responsible for supplying water to these components, and if it is defective, it can lead to leaks. To fix this problem:

  1. Turn off the water supply to the freezer.
  2. Locate the water inlet valve, usually located behind the freezer or refrigerator.
  3. Inspect the valve for any signs of damage or wear.
  4. If the valve is faulty, replace it with a new one. Refer to the manufacturer’s instructions or consult a professional if needed.
  5. Turn the water supply back on and check for any leaks. If the problem persists, it may be necessary to call a professional technician.

By addressing these common issues, you can stop your freezer from leaking water and prevent further damage to your appliance and surrounding area.

Freezer Door Won’t Seal Properly

One common problem with freezers is when the door does not seal properly. When this happens, warm air from the surrounding environment can enter the freezer, causing it to work harder and reducing its efficiency. In addition, improper sealing can lead to frost buildup inside the freezer and potential food spoilage.

Possible Causes

There are several possible causes for a freezer door that won’t seal properly:

  1. Worn or damaged door gasket: The gasket, which is the flexible strip that lines the perimeter of the door, can become worn out or damaged over time. This can prevent the door from sealing tightly.
  2. Misalignment: If the door is not aligned properly with the freezer body, it may not close fully and create a proper seal. This can occur if the hinges or the door itself are bent or damaged.
  3. Dirty or obstructed gasket: A buildup of dirt, debris, or food particles on the gasket can prevent it from forming a tight seal against the freezer body.

Steps to Solve the Problem

To fix a freezer door that won’t seal properly, you can follow these steps:

  1. Inspect the door gasket: Check the condition of the gasket for any signs of wear or damage. If necessary, replace the gasket with a new one.
  2. Realign the door: If the door is misaligned, you can try adjusting the hinges or the door itself to ensure it closes properly.
  3. Clean the gasket: Use a mild detergent and water solution to clean the gasket, removing any dirt or debris that may be hindering its sealing ability.

If none of these steps solve the problem, it may be necessary to call a professional appliance repair technician to diagnose and fix the issue.

Problem Solution
Door gasket is worn or damaged Replace the gasket
Misaligned door Adjust hinges or door
Dirty or obstructed gasket Clean with mild detergent and water solution
None of the above steps solve the problem Contact a professional appliance repair technician

Freezer Not Defrosting

If your freezer is not defrosting properly, there are several possible causes and solutions. Here are the most common ones:

1. Blocked Defrost Drain

One of the most common causes of a freezer not defrosting is a blocked defrost drain. Over time, this drain can become clogged with food particles or ice. To fix this issue, you will need to clear the blockage.

To clear the defrost drain, follow these steps:

  1. Unplug the freezer and remove all the items from it.
  2. Locate the defrost drain, which is usually found at the back of the freezer.
  3. Use hot water or a hairdryer to melt the ice blocking the drain.
  4. Clean the drain with a mixture of warm water and mild detergent.
  5. Flush the drain with hot water to ensure it is clear.
  6. Plug in the freezer and wait for it to defrost properly.

2. Faulty Defrost Timer

If the defrost drain is clear but the freezer is still not defrosting, the problem might be a faulty defrost timer. The defrost timer controls when the automatic defrost cycle begins and ends. If the timer is not working correctly, the freezer will not defrost.

To check if the defrost timer is faulty, follow these steps:

  1. Locate the defrost timer, which is usually located near the temperature control panel or in the freezer compartment.
  2. Using a multimeter, test the continuity of the defrost timer. If there is no continuity, the timer is faulty and needs to be replaced.
  3. Replace the defrost timer with a new one compatible with your freezer model.

3. Malfunctioning Defrost Heater

If the defrost drain is clear and the defrost timer is working properly, the issue might be a malfunctioning defrost heater. The defrost heater is responsible for melting the ice on the evaporator coils during the defrost cycle. If the heater is not functioning, the freezer will not defrost.

To check if the defrost heater is faulty, follow these steps:

  1. Unplug the freezer and remove the rear panel inside the freezer compartment.
  2. Locate the defrost heater, which is usually a metal coil located near the evaporator coils.
  3. Using a multimeter, test the continuity of the defrost heater. If there is no continuity, the heater is faulty and needs to be replaced.
  4. Replace the defrost heater with a new one compatible with your freezer model.

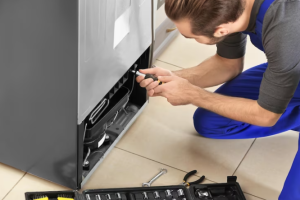
If none of these solutions fix the problem, it is recommended to contact a professional appliance repair technician to diagnose and repair the issue with your freezer.

Remember, before attempting any repairs, always unplug the freezer and follow proper safety precautions.

Freezer Over-Freezing

If you find that your freezer is constantly over-freezing, it can be a frustrating and inconvenient problem. Not only can over-freezing lead to freezer burn and spoilage of your food, but it can also affect the overall performance of your freezer.

One common cause of over-freezing is a faulty thermostat. The thermostat is responsible for regulating the temperature inside the freezer, and if it is malfunctioning, it can cause the freezer to constantly run at a colder temperature than necessary. Check the thermostat settings and adjust them if needed. If the problem persists, it may be necessary to replace the thermostat.

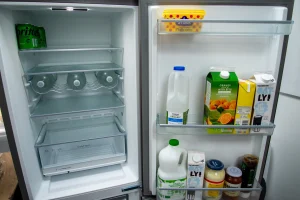
In some cases, a freezer may be over-packed with food, which can prevent the cold air from circulating properly. This can lead to pockets of colder air, causing certain areas of the freezer to over-freeze. Take some time to rearrange the items in your freezer, making sure there is enough space for air to circulate around each item. Consider removing any unnecessary items to create more room and improve airflow.

Another possible cause of over-freezing is a malfunctioning defrost timer. The defrost timer regulates the defrost cycle of the freezer, and if it is not working correctly, it can cause the freezer to over-freeze. You can manually initiate the defrost cycle by locating the defrost timer and turning the dial until you hear a click. If the freezer begins to defrost and the temperature returns to normal, then the defrost timer may need to be replaced.

Poor door seal is another potential culprit of over-freezing. If the freezer door seal is damaged or worn out, cold air can leak out, and warm air can make its way in. This can cause the freezer to run constantly in order to maintain the desired temperature, leading to over-freezing. Inspect the door seal for any signs of damage or wear and replace it if necessary.

If you have tried all the above solutions and your freezer is still over-freezing, it may be time to call a professional technician. They will have the expertise to diagnose and fix more complex issues that could be causing the problem.

Regular maintenance and cleaning can also help prevent over-freezing. Make sure to clean the coils behind or underneath the freezer regularly to improve its efficiency. Additionally, removing any excess ice buildup inside the freezer can help prevent over-freezing.

By identifying and addressing the underlying causes of over-freezing, you can ensure that your freezer functions properly and your food stays fresh for longer periods of time.

Freezer Not Running at All

If your freezer is not running at all, it can be a cause for concern. Here are a few common reasons why this might be happening and some possible solutions:

  • Power Supply: Check if the freezer is properly plugged into a working electrical outlet. Make sure that the circuit breaker or fuse connected to the freezer is not tripped. Try plugging in another appliance to the outlet to ensure that it is functioning correctly.
  • Temperature Control: Ensure that the temperature settings on the freezer are set correctly. If the temperature control is set too low, it may cause the freezer to turn off. Consult the user manual of the freezer to understand the proper temperature settings.
  • Defrost Timer: The freezer may not be running if the defrost timer is stuck in the defrost cycle. Locate the defrost timer, usually found near the control panel or the compressor, and manually advance it to see if the freezer starts running again. If it does, consider replacing the defrost timer.
  • Condenser Coils: Dust and debris on the condenser coils can prevent the freezer from running efficiently. Clean the coils using a vacuum cleaner or a soft brush to remove any accumulated dirt. This should help the freezer to run properly again.
  • Thermostat: A faulty thermostat can cause the freezer to not run at all. Use a multimeter to test the thermostat for continuity. If there is no continuity, replace the thermostat with a new one.
  • Compressor: The compressor is an essential component of the freezer’s cooling system. If it is not running, the freezer will not be able to cool properly. Check if the compressor is receiving power. If it is not, there may be an issue with the compressor itself, and it may need to be replaced.

If none of these solutions resolve the issue, it is recommended to contact a professional appliance repair technician to diagnose and fix the problem. Trying to fix complex issues without proper knowledge or experience may result in further damage to the freezer.

FAQ: Common Freezer Problems and Solutions

My freezer is not freezing properly. What could be the problem?

There are several possible reasons for a freezer not freezing properly. One common issue is a dirty or clogged condenser coil, which prevents the freezer from properly cooling. Another possibility is a malfunctioning thermostat or temperature control, which may need to be replaced. Finally, if the freezer is overfilled, it may not be able to circulate air properly, leading to inadequate cooling.

I notice a lot of frost buildup in my freezer. How can I fix this?

Frost buildup in a freezer can be caused by a few different factors. First, check to see if the freezer door is sealing properly. If there are gaps or cracks in the seal, warm moist air can enter the freezer and cause frost to form. If the door seal is fine, the problem may be with the defrost system. Check to see if the defrost heater and defrost thermostat are working properly. If not, they may need to be replaced.

Why is my freezer making strange noises?

Strange noises coming from a freezer can be concerning, but they are often a sign of a common problem. One possible cause is a malfunctioning evaporator fan motor. This motor helps circulate cold air throughout the freezer, and if it is not working properly, it can create unusual noises. Another potential cause is a faulty compressor or condenser fan motor. It is best to have a professional technician inspect the freezer to determine the exact cause and make any necessary repairs.

My freezer is leaking water. What should I do?

A leaking freezer can be a sign of several different issues. One possibility is a clogged or frozen drain tube. If this tube becomes blocked, water can back up and leak out of the freezer. Another potential cause is a malfunctioning water inlet valve, which may need to be replaced. Additionally, if the freezer is not level, water may be pooling and leaking. Check to ensure that the freezer is sitting level on the floor. If the problem persists, it is best to consult a professional technician for further diagnosis and repair.

What should I do if my upright freezer stops working suddenly?

If your upright freezer stops working suddenly, start by checking the freezer temperature to see if it’s cold enough. Then, troubleshoot the issue by inspecting the freezer parts, including the compressor, and checking for any visible signs of malfunction.

How can I troubleshoot freezer issues if my freezer isn’t freezing properly?

If your freezer isn’t freezing properly, begin troubleshooting by checking the freezer’s temperature. If it’s not cold enough, adjust the temperature settings accordingly. Additionally, inspect the freezer door gasket for any damage and ensure it’s sealing properly.

What are some troubleshooting tips for a freezer that’s too warm?

If your freezer is too warm, check the temperature settings and adjust them if necessary. Inspect the freezer door to ensure it’s closing properly and check for any obstructions around the door seal. Additionally, consider cleaning the walls of the freezer to improve airflow.

How can I prevent my freezer from malfunctioning?

To prevent your freezer from malfunctioning, regularly clean and maintain it according to the manufacturer’s recommendations. Check the temperature of the freezer periodically and ensure proper airflow around the appliance. Additionally, inspect the freezer door gasket for any wear or tear and replace it if necessary.

What steps should I take if my chest freezer stops working unexpectedly?

If your chest freezer stops working unexpectedly, first check the freezer temperature to see if it’s too warm. Troubleshoot the issue by inspecting the compressor and other freezer parts for any signs of damage or malfunction. Consider calling for freezer repair if needed.

How can I troubleshoot a freezer that’s making unusual noises?

If your freezer is making unusual noises, such as clicking or humming sounds, it could indicate a problem with the compressor or other freezer components. Check the freezer temperature and inspect the walls of the freezer for any signs of damage. If the issue persists, contact a professional for assistance.

What should I do if my refrigerator and freezer are both not working?

If both your refrigerator and freezer are not working, check the power supply to ensure the appliances are receiving electricity. Verify the temperature settings for both the refrigerator and freezer compartments and troubleshoot any issues with the compressor or other components.

How can I troubleshoot a freezer that stops working during a sale?

If your freezer stops working during a sale, check the power supply and ensure the appliance is plugged in properly. Verify the temperature settings and troubleshoot any issues with the compressor or freezer parts. If necessary, contact the retailer or manufacturer for assistance.

What could be the problem if my freezer door isn’t sealing properly?

If your freezer door isn’t sealing properly, it could be due to a damaged or worn freezer door gasket. Inspect the gasket for any signs of wear or tear and replace it if necessary. Additionally, check for any obstructions around the door that might prevent it from closing tightly.

How can I troubleshoot a freezer that’s too cold and causing frost buildup?

If your freezer is too cold and causing frost buildup, check the temperature settings and adjust them accordingly. Inspect the freezer door gasket for any damage and ensure it’s sealing properly. Consider cleaning the walls of the freezer to improve airflow and prevent frost buildup.

How can I troubleshoot my freezer if it isn’t working?

If your freezer isn’t working, start by checking the power supply and ensuring it’s plugged in properly. Then, inspect the temperature settings and troubleshoot any issues with the compressor or other freezer components.

What steps should I take if my freezer won’t maintain a cold temperature?

If your freezer won’t maintain a cold temperature, check the temperature settings and adjust them if necessary. Inspect the freezer door gasket for any damage and ensure it’s sealing properly. Additionally, consider cleaning the freezer section to improve airflow.

How can I keep my freezer from becoming too warm?

To keep your freezer from becoming too warm, regularly clean the coils and vents to ensure proper airflow. Check the temperature settings and adjust them as needed. Inspect the freezer door gasket for any wear or tear and replace it if necessary.

What should I do if my freezer can’t freeze food properly?

If your freezer can’t freeze food properly, check the temperature settings and adjust them to a colder setting if necessary. Inspect the freezer door for any obstructions and ensure it’s closing tightly. Consider defrosting the freezer to remove any ice buildup that might be affecting performance.

How can I troubleshoot a warm freezer during a Whirlpool appliance sale?

If your Whirlpool freezer is warm during a sale, check the temperature settings and adjust them accordingly. Inspect the freezer door gasket for any damage and ensure it’s sealing properly. Consider cleaning the coils and vents to improve airflow.

What steps should I take if my freezer is malfunctioning before the sale ends?

If your freezer is malfunctioning before the sale ends, check the temperature settings and adjust them as needed. Inspect the freezer door for any obstructions and ensure it’s closing properly. Consider contacting Whirlpool for assistance if the issue persists.


Is Your Stove Not Lighting? Here’s How to Troubleshoot and Find Solutions

Having a stove that won’t light can be a frustrating experience, especially when you’re in the middle of cooking a meal. However, there are several common issues that can cause this problem, and most of them can be easily fixed with a little troubleshooting.

One possible reason for a stove not lighting is a problem with the ignition system. This can occur if the igniter is dirty or damaged, or if there is a problem with the wiring. To fix this, you can start by cleaning the igniter with a soft brush or cloth to remove any dirt or debris. If that doesn’t work, you may need to replace the igniter or call a professional for assistance.

Another common cause of a stove not lighting is a lack of gas supply. If your stove runs on gas, it’s possible that the gas valve is closed or that there is a problem with the gas line. In this case, you can try checking the gas valve to make sure it’s open and turning on the gas supply. If the gas supply seems fine, but the stove still won’t light, it may be necessary to call a professional to check the gas line for any leaks or other issues.

In some cases, the problem with a stove not lighting can be related to the burner itself. Burners can become clogged with food particles or grease over time, which can prevent them from lighting properly. To fix this, you can remove the burner and clean it thoroughly with warm soapy water. Make sure to dry it completely before putting it back in place. If cleaning the burner doesn’t solve the problem, you may need to replace it.

Overall, troubleshooting a stove that won’t light can be a relatively straightforward process. By checking the ignition system, gas supply, and burner, you can often identify and fix the problem on your own. However, if you’re unsure or uncomfortable with performing these tasks yourself, it’s always best to consult a professional for assistance.

Gas Supply Issues

If your stove won’t light, one possible issue could be a problem with your gas supply. Here are a few things to check:

1. Gas Shut-Off Valve

Make sure that the gas shut-off valve is open. Sometimes, the valve may have been accidentally turned off, which can prevent gas from flowing to the stove. Locate the gas shut-off valve, usually located near the stove or in the basement, and ensure it is fully open. If the valve is closed, simply turn it counterclockwise to open it.

2. Gas Pressure

Check the gas pressure in your home. Low gas pressure can cause issues with your stove’s ignition. To do this, you may need to contact your gas company or a licensed plumber to measure the gas pressure. They will be able to determine if low gas pressure is the problem and make any necessary adjustments.

If your stove still won’t light after checking these gas supply issues, it is recommended to contact a professional technician to further diagnose and fix the problem. It’s important to remember that dealing with gas appliances can be dangerous, so it’s always best to seek professional help when needed.

Igniter Problems

If your stove won’t light, one of the most common issues is a faulty igniter. The igniter is responsible for creating a spark to ignite the gas in the burner. There are a few potential problems that can occur with the igniter, so here are some troubleshooting steps to help you identify and fix the issue.

1. Check for Physical Damage

Inspect the igniter for any physical damage such as cracks, breaks, or visible wear. If you notice any issues, the igniter may need to be replaced. Contact the manufacturer or a professional technician for assistance.

2. Clean the Igniter

Over time, the igniter can become dirty or covered in debris, which can prevent it from creating a strong spark. Use a soft brush or cloth to gently clean the igniter. Be careful not to apply too much pressure, as this could cause further damage.

3. Test the Igniter

If the igniter appears to be in good condition, it’s time to test its functionality. Disconnect the stove from the power source and remove the burner cap and grate. Remove the igniter wire from the igniter module and use a multimeter to test for continuity. If there is no continuity, the igniter may need to be replaced.

4. Check the Igniter Module

If the igniter has continuity but still doesn’t spark, the problem may be with the igniter module. Consult the stove’s manual or contact the manufacturer for guidance on how to test and replace the igniter module if necessary.

5. Consider Professional Repair

If you have tried the above steps and the igniter still isn’t working, it may be time to call a professional stove repair technician. They will have the knowledge and expertise to diagnose and fix the issue effectively.

Remember to always prioritize safety when troubleshooting and repairing your stove. If you ever feel unsure or uncomfortable with a particular step, it’s best to seek professional help.

Pilot Light Failure

If your stove has a pilot light and it fails to ignite, there are a few possible reasons for the issue.

Gas Supply

First, check if the gas supply to your stove is turned on. Make sure that the gas valve is in the “on” position and that the gas is flowing to the stove.

Dirty Pilot Orifice

A dirty pilot orifice can also prevent the pilot light from igniting. The orifice may become clogged with debris or buildup over time, restricting the flow of gas. To fix this, carefully clean the orifice with a small wire brush or needle, ensuring that it is free from any blockage.

Additionally, if the orifice is damaged or worn out, it may need to be replaced to restore proper functionality. In such cases, it is recommended to consult a professional technician.

Faulty Thermocouple

The thermocouple is a safety device that detects if the pilot light is lit. It generates a small electric current when heated by the flame, which allows the gas valve to stay open. If the thermocouple is faulty or not positioned correctly, it may not detect the heat from the pilot light and consequently shut off the gas supply, preventing ignition.

In this case, you can try to reposition the thermocouple or clean it gently with a soft cloth. However, if these measures do not resolve the issue, it is best to call a professional to replace the faulty thermocouple.

Remember to exercise caution when troubleshooting stove issues and always prioritize safety. If you are unsure or uncomfortable with any steps, it is recommended to seek professional assistance.

Electrical Connection Troubles

If your stove won’t light, it’s possible that you are experiencing electrical connection troubles. These issues can prevent the flow of electricity to the necessary components of the stove, preventing it from igniting.

Check the Power Cord

Start by checking the power cord. Ensure that it is securely plugged into a working electrical outlet. If the cord appears damaged or frayed, it may need to be replaced. Additionally, make sure that the circuit breaker for the stove’s electrical outlet has not tripped.

Inspect the Igniter

Next, inspect the igniter. This is the part responsible for generating the spark that ignites the gas. Over time, the igniter can become worn out or damaged, preventing it from producing a spark. If the igniter is visibly cracked or broken, it will need to be replaced.

It’s recommended to hire a professional to replace the igniter, as it involves working with the electrical connections of the stove.

Remember, when troubleshooting electrical connection troubles, always ensure that the stove is unplugged before examining any components or making repairs. Safety should be a priority at all times.

Gas Valve Malfunction

If your stove is not lighting up, a possible cause could be a gas valve malfunction. The gas valve is responsible for regulating the flow of gas to the burners. If it becomes faulty, it may not allow gas to flow properly, preventing the stove from igniting.

To troubleshoot a gas valve malfunction, follow these steps:

  1. Check the gas supply: Ensure that the gas supply to your stove is open and not interrupted. Sometimes, the gas valve may inadvertently get turned off, so make sure it is in the open position.
  2. Inspect the gas valve: Carefully examine the gas valve for any signs of damage or wear. Look for loose connections, corrosion, or debris that may obstruct the flow of gas. If any issues are found, it may be necessary to replace the gas valve.
  3. Test the gas valve: To test the functionality of the gas valve, you can use a multimeter. Set the multimeter to the ohms setting and connect the leads to the electrical terminals on the gas valve. If the multimeter shows a reading of infinite resistance, this indicates a faulty gas valve that needs replacement.
  4. Seek professional help: If you are not comfortable with performing these troubleshooting steps or if the issue persists despite your efforts, it is recommended to call a professional technician. They have the knowledge and expertise to diagnose and fix any gas valve malfunction effectively and safely.

Remember, dealing with gas appliances can be dangerous, so always prioritize your safety and well-being. If you suspect any major issues with the gas valve or any other component of your stove, it is best to seek professional assistance.

Clogged Burner Ports

If your stove won’t light or the flames are weak and uneven, the problem may be caused by clogged burner ports. Burner ports can become clogged over time with food debris, grease, or other cooking residue, preventing the proper flow of gas to the burner and affecting its performance. Luckily, this is a common issue that can easily be resolved with some simple cleaning.

1. Turn off the gas and unplug the stove

Before attempting to clean the burner ports, it is important to ensure your safety. Turn off the gas supply to your stove and unplug it from the power source to avoid any accidents or injuries.

2. Remove the burner caps and grates

Most stoves have removable burner caps and grates, which can be easily lifted off. Remove these components and set them aside. This will give you access to the burner ports and make the cleaning process easier.

3. Clean the burner ports

Using a small, soft-bristled brush or a toothbrush, gently scrub the burner ports to remove any debris or buildup. Be careful not to use too much force as it may damage the ports. If the ports are heavily clogged, you can also use a needle or a straightened paperclip to carefully unclog them.

Tip: You can also soak the burner caps and grates in warm, soapy water to remove any stubborn stains or grease.

4. Dry and reassemble

After cleaning the burner ports, make sure they are completely dry before reassembling the burner caps and grates. Any moisture left behind can interfere with the flow of gas and cause ignition problems. Once everything is dry, carefully place the burner caps and grates back onto the stove.

Note: If you are unsure about performing the cleaning yourself or if you continue to experience issues with your stove even after cleaning the burner ports, it is recommended to contact a professional technician for assistance.

By regularly cleaning and maintaining your stove’s burner ports, you can ensure optimal performance and prevent ignition problems. Remember to exercise caution and follow the manufacturer’s instructions when cleaning any appliance.

Faulty Control Board

If your stove won’t light, one possible cause could be a faulty control board. The control board is responsible for regulating the various functions of the stove, including igniting the burners. If the control board is malfunctioning, it may not send the necessary signals to the igniter to create a spark, preventing your stove from lighting.

To determine if the control board is indeed the issue, you can perform a visual inspection. Look for any signs of damage, such as burned or loose wires, or any visible cracks on the board itself. If any of these issues are present, it may indicate a faulty control board that needs to be replaced.

Another way to test the control board is to check for power output. Using a multimeter, carefully measure the voltage at the control board where the igniter wires connect. If there is no voltage detected, it could indicate a problem with the control board.

If you have determined that the control board is faulty, it is recommended to consult the manufacturer’s manual or contact a professional technician for assistance. They will be able to provide guidance on how to properly replace the control board or suggest any other necessary repairs.

Preventing Control Board Issues

To help prevent control board issues, it is important to ensure that your stove is properly maintained. Regular cleaning and inspection of the control board area can help identify any potential problems early on. Additionally, it is crucial to avoid any spills or moisture coming into contact with the control board, as this can cause damage.

Additionally, following the manufacturer’s guidelines for usage and care, such as not overloading the stove or using it for purposes it is not intended for, can help prolong the lifespan of the control board and other components of your stove.

Remember: If you are not comfortable working with electrical components or unsure of how to proceed, it is always best to seek professional assistance to ensure the safety and effectiveness of any repairs.

Other Potential Causes

While a faulty igniter or burner are common reasons why a stove won’t light, there are other potential causes to consider:

1. Gas Supply Issue

Make sure your stove is properly connected to the gas supply. Check the gas valve to ensure it is open and supplying gas to the stove. If you have recently moved the stove, it’s possible that the gas line may have been accidentally disconnected or kinked.

2. Pilot Light or Ignition Switch

For stoves with a pilot light or ignition switch, ensure that the pilot light is lit or the ignition switch is in the proper position. If the pilot light is not lit, you may need to relight it following the manufacturer’s instructions.

3. Control Panel Settings

Check the control panel settings on your stove. Sometimes the stove may not light if the settings are not properly adjusted. Make sure the burner knobs and any digital displays are set correctly for the desired cooking temperature.

4. Power Supply

If your stove has electronic controls or an electric igniter, verify that the stove is receiving power. Check the circuit breaker or fuse box to ensure that the stove is not on a tripped circuit or a blown fuse. If necessary, reset the breaker or replace the fuse.

Remember, always consult your stove’s user manual for specific troubleshooting steps and safety instructions. If you are unsure or uncomfortable performing any troubleshooting steps, it’s best to contact a professional appliance repair technician for assistance.

FAQ: Stove Not Lighting: Troubleshooting and Solutions

Why won’t my stove light?

There could be several reasons why your stove won’t light. One possibility is that the gas supply to the stove has been interrupted. This could be due to a problem with the gas line or a faulty gas valve. Another reason could be a malfunctioning igniter. If the igniter is not working properly, it will not produce the spark necessary to ignite the gas. Additionally, a dirty or clogged burner or blocked gas ports could prevent the stove from lighting.

What should I do if my stove won’t light?

If your stove won’t light, there are a few troubleshooting steps you can try. First, check to make sure that the gas supply is not interrupted. Make sure the gas valve is open and that there are no leaks in the gas line. If the gas supply is fine, check the igniter. If it is not producing a spark or is damaged, it may need to be replaced. Clean any dirty or clogged burners and make sure the gas ports are not blocked. If these steps don’t solve the problem, it may be best to call a professional technician to diagnose and repair the issue.

Why is my stove igniter not working?

There are several reasons why a stove igniter may not be working. One possibility is that the igniter is dirty or has become covered in grime or grease. In this case, cleaning the igniter with a soft brush or cloth may solve the problem. Another reason could be a faulty igniter. Over time, igniters can wear out and stop working properly. If the igniter is damaged or not producing a spark, it may need to be replaced. Finally, a problem with the ignition switch or control module could prevent the igniter from working.

How do I clean the burners on my stove?

To clean the burners on your stove, start by removing them from the stove surface. Soak the burners in warm, soapy water for about 15 minutes to loosen any baked-on food or grime. Use a soft brush or cloth to scrub away any remaining residue. Rinse the burners thoroughly and let them dry completely before reinstalling them on the stove. If the burners are still not working properly after cleaning, it may be necessary to replace them.

Why are the gas ports on my stove blocked?

The gas ports on your stove can become blocked due to a buildup of food debris or grease. When cooking, small particles of food or oil can accumulate in the gas ports and cause blockages. This can prevent the gas from flowing properly and result in a stove that won’t light. To unblock the gas ports, use a small pin or toothpick to gently dislodge any debris. Be careful not to damage the ports or push the blockages further into the stove. Regularly cleaning the burners and gas ports can help prevent blockages from occurring.

Why is my stove not lighting?

There could be several reasons why your stove is not lighting. One possibility is that the gas valve may be closed or not fully turned on. Another possibility is that the burner ports may be clogged with debris or food particles, preventing the gas from flowing properly. Additionally, the igniter electrode may be dirty or damaged, preventing it from creating a spark to ignite the gas. It is also possible that there is an issue with the gas supply, such as a leak or low pressure. It is recommended to check these potential causes and troubleshoot accordingly.

What should I do if my gas stove burner is not lighting?

If your gas stove burner is not lighting, it may be due to a few reasons. First, ensure the burner head is clean and free from any debris. Then, check the gas flow to the burner and verify if the igniter is sparking properly.

How can I fix a gas stove burner that clicks but doesn’t light?

If your gas stove burner is clicking but not lighting, there might be moisture in the burner or a problem with the spark igniter. Try drying the burner thoroughly and check the spark igniter connections for any issues.

My gas stove won’t ignite, what could be the problem?

If your gas stove won’t ignite, check if there’s a smell of gas coming from the stove. If so, there might be a problem with the gas flow or the igniter. It’s essential to troubleshoot the issue carefully to ensure safety.

How can I fix a gas stove that won’t light?

If your gas stove doesn’t light, try cleaning the burner thoroughly and checking for any obstructions around the burner head. Additionally, ensure the spark module and igniter are working correctly and that there’s no moisture in the burner.

What DIY fixes can I attempt if my gas stove burner is clicking but not lighting?

If your gas stove burner is clicking but not lighting, you can try cleaning the burner, checking the spark igniter connections, and ensuring there’s no moisture in the burner. These simple steps can often resolve the issue.

Is it easy to fix a gas stove burner that won’t light?

Fixing a gas stove burner that won’t light can be relatively easy, especially if the issue is minor. By following some troubleshooting steps, such as cleaning the burner and checking the igniter, you may be able to resolve the problem without professional help.

How do I troubleshoot a gas stove burner that smells gas but doesn’t light?

If your gas stove burner smells gas but doesn’t light, it’s crucial to first ensure safety by ventilating the area. Then, check for any gas leaks and inspect the burner and igniter for any issues that might prevent ignition.

What steps should I take if I see sparks but the gas stove burner doesn’t ignite?

If you see sparks but the gas stove burner doesn’t ignite, try cleaning the burner and ensuring there are no obstructions around it. Additionally, check the spark igniter connections and the gas flow to troubleshoot the issue further.

How can I get my stove burner working again?

To get your stove burner working again, start by cleaning the burner thoroughly and checking for any blockages or debris. Then, ensure the gas flow is adequate and that the igniter is sparking correctly. If necessary, you may need to replace the igniter or seek professional appliance service.

Are there any common issues with gas stove burners that are easy to fix?

Yes, some common issues with gas stove burners, such as clicking but not lighting or a smell of gas without ignition, can often be resolved with simple DIY fixes. These may include cleaning the burner, checking connections, and ensuring proper ventilation.

What should I do if my gas burner is not lighting?

If your gas burner is not lighting, start by ensuring the stove top is clean and free from any debris. Then, check for any obstructions around the burner and inspect the igniter for proper sparking.

How can I fix a stove that clicks but doesn’t light?

If your stove is clicking but not lighting, there might be an issue with the igniter or gas flow. Try cleaning the burner thoroughly and checking for any small holes or blockages that might be affecting ignition.

My gas stove is clicking but not lighting, what’s the easy fix?

If your gas stove is clicking but not lighting, one easy fix is to clean the burner and ensure there’s no moisture or debris hindering ignition. Additionally, check the spark igniter and consider replacing it if necessary.

What steps should I take if I smell gas coming from my stove burner but it still won’t light?

If you smell gas coming from your stove burner but it still won’t light, it’s crucial to first ensure safety by ventilating the area. Then, attempt to light the burner while observing for any sparks. If you see a spark but the burner doesn’t ignite, try thorough cleaning around the burner and inspecting for any gas leaks or blockages. If the issue persists, consult a troubleshooting guide or seek professional assistance.


Ultimate Guide to Dishwasher Cleaning – Tips and Tricks for Extending the Lifespan of Your Appliance

If you own a dishwasher, you know how much time and effort it can save you in the kitchen. It’s a true kitchen companion, handling all the dirty work so you can focus on more enjoyable tasks. But just like any other appliance, your dishwasher needs some love and care to keep it running smoothly for years to come.

In this ultimate dishwasher cleaning guide, we will walk you through the steps to ensure a longer lifespan for your dishwasher. From regular maintenance routines to deep cleaning tips, you’ll learn everything you need to know to keep your dishwasher in top-notch condition.

Step 1: Regular Maintenance

The first step in maintaining your dishwasher is to clean the filter. The filter collects food particles and debris, preventing them from clogging the drain. To clean the filter, remove it carefully and rinse it under running water. Use a brush to remove any stubborn residue.

Note: It’s recommended to check and clean the filter at least once a month, or more frequently if you use your dishwasher frequently or have hard water.

Step 2: Cleaning the Interior

To clean the interior of your dishwasher, start by removing any leftover food scraps from the bottom and sides. Then, wipe down the interior surfaces with a damp cloth and mild detergent. Pay extra attention to the door seal and the dishwasher’s spray arms, as these areas are prone to buildup and clogs.

Tip: Use a toothpick or a small brush to remove any debris from the spray arms’ nozzles.

The Importance of Regular Dishwasher Cleaning

A dishwasher is an essential kitchen appliance that helps to save time and effort by efficiently cleaning and drying our dishes. However, many people overlook the importance of regularly cleaning their dishwasher, which can lead to a shorter lifespan and poor performance.

Regular dishwasher cleaning not only helps to keep your dishes clean but also ensures that your machine operates at its best. Here are a few reasons why regular cleaning is essential:

Prevents Unpleasant Odors

Over time, food particles, grease, and soap scum can build up in your dishwasher, leading to unpleasant odors. Regular cleaning helps to remove these residues and keeps your dishwasher smelling fresh.

Improves Cleaning Efficiency

When your dishwasher is clean, it can efficiently remove food particles and stains from your dishes. A dirty dishwasher may not be able to clean your dishes as effectively, resulting in the need to rewash them by hand.

Cleaning the dishwasher’s filters, spray arms, and interior helps to remove any blockages and ensures that water can circulate freely, providing optimal cleaning power.

Prevents Limescale Build-up

Limescale is a common problem in areas with hard water. Over time, limescale can build up on the internal components of your dishwasher, affecting its performance and lifespan. Regular cleaning with vinegar or a descaling agent can help to remove limescale deposits and keep your dishwasher running smoothly.

Remember: Regular dishwasher cleaning is not only important for the appliance itself but also for your health. Bacteria and mold can grow inside a dirty dishwasher, potentially contaminating your dishes and utensils.

Take the time to clean your dishwasher regularly to ensure its longevity, efficiency, and to maintain the cleanliness of your dishes!

Tips for Proper Dishwasher Cleaning

Proper maintenance and cleaning of your dishwasher can help ensure its longevity and keep your dishes spotless. Here are some essential tips for properly cleaning your dishwasher:

  1. Clean the filters regularly: The filters in your dishwasher are responsible for trapping food particles and debris, preventing them from clogging the drain. It’s important to clean the filters at least once a month to keep your dishwasher running smoothly.
  2. Remove and clean the spray arms: Over time, the spray arms in your dishwasher can become clogged with mineral deposits and food particles. To clean them, remove them from the dishwasher and soak them in a mixture of vinegar and water. Use a soft brush or toothbrush to scrub away any residue.
  3. Inspect and clean the interior: Regularly inspect the interior of your dishwasher for any debris or buildup. Use a damp cloth and mild detergent to wipe down the interior walls, racks, and door. Pay special attention to the gasket around the door to remove any mold or mildew.
  4. Run a vinegar cycle: One of the easiest and most effective ways to clean your dishwasher is to run a cycle with vinegar. Fill a cup with white vinegar and place it on the top rack of the dishwasher. Run a hot water cycle without any dishes. The vinegar will help remove any grease or residue and eliminate odors.
  5. Clean the exterior: Don’t forget to clean the exterior of your dishwasher as well. Use a soft cloth and mild detergent to wipe down the control panel, door, and handle. Avoid using abrasive cleaners or scrub brushes that can scratch the surface.
  6. Check the spray arm nozzles: Over time, the spray arm nozzles can become clogged with mineral deposits or debris. Use a toothpick or small brush to clear any blockages from the nozzles. This will ensure that water can flow freely and provide optimal cleaning power.

By following these tips for proper dishwasher cleaning, you can help extend the lifespan of your appliance and keep it functioning at its best. Regular maintenance and cleaning will not only improve the performance of your dishwasher but also ensure that your dishes come out sparkling clean every time.

Tip Description
Clean the filters regularly Remove and clean the filters at least once a month to prevent clogs
Remove and clean the spray arms Soak the spray arms in vinegar and water to remove any clogs and residue
Inspect and clean the interior Wipe down the interior with a damp cloth and mild detergent, paying special attention to the gasket
Run a vinegar cycle Place a cup of vinegar on the top rack and run a hot water cycle to remove grease and odors
Clean the exterior Use a soft cloth and mild detergent to clean the exterior surfaces of the dishwasher
Check the spray arm nozzles Clear any blockages from the spray arm nozzles using a toothpick or small brush

Remove Food Residue

One of the most common issues with dishwashers is the presence of food residue after a wash cycle. Food particles can build up in the dishwasher and cause a foul odor, as well as affect the efficiency of the machine. To ensure your dishwasher lasts longer and performs at its best, it is important to regularly remove any food residue.

Here are some steps to effectively remove food residue from your dishwasher:

1. Scrape off excess food

Before loading your dishes into the dishwasher, it is important to scrape off any excess food. This will prevent large food particles from clogging the dishwasher’s filter and spray arms.

2. Clean the filter

The dishwasher’s filter is designed to trap food particles and prevent them from recirculating in the wash cycle. Regularly clean the filter to remove any trapped food residue. Refer to your dishwasher’s manual for instructions on how to remove and clean the filter properly.

3. Inspect spray arms

Check the spray arms for any clogs or blockages caused by food particles. Remove any debris and use a toothpick to clear the spray arm holes if necessary.

4. Run a vinegar cycle

Vinegar is an effective natural cleaner that can help dissolve stubborn food residue and remove odors. Fill a dishwasher-safe cup with white vinegar and place it on the top rack of the dishwasher. Run a cycle with only the cup of vinegar. This will help remove any remaining food residue and deodorize the dishwasher.

5. Use a dishwasher cleaner

In addition to vinegar, there are dishwasher cleaning products available in the market specifically designed to remove food residue and maintain the dishwasher’s performance. Follow the instructions on the cleaner’s packaging for best results.

By following these steps and regularly removing food residue, you can ensure that your dishwasher functions optimally and has a longer lifespan.

Clean the Filter

One of the most important steps in maintaining your dishwasher is cleaning the filter regularly. The filter helps to trap food particles and debris, preventing them from clogging the drain or recirculating back into the dishwasher.

Here’s how to clean the filter:

  1. Start by removing the bottom rack of the dishwasher to access the filter.
  2. Locate the filter, which is usually located at the bottom of the dishwasher near the spray arm.
  3. Remove the filter by lifting it out or twisting it counterclockwise, depending on the model of your dishwasher.
  4. Rinse the filter under running water to remove any loose debris.
  5. Use a soft brush, such as an old toothbrush, to scrub away any remaining dirt or residue.
  6. Make sure to clean all sides of the filter, including the mesh screen and the frame.
  7. Once clean, reinsert the filter back into the dishwasher.
  8. Replace the bottom rack and close the dishwasher.

By cleaning the filter regularly, you can ensure that your dishwasher operates efficiently and prolong its lifespan. Aim to clean the filter at least once a month or more frequently if you notice a buildup of debris.

Check the Spray Arms

The spray arms of your dishwasher are essential for proper cleaning. Over time, they can become clogged with food particles, grease, and other debris, reducing their effectiveness. Regularly checking and cleaning the spray arms can help prolong the lifespan of your dishwasher and ensure sparkling clean dishes. Here are a few simple steps to follow:

Step 1: First, turn off the dishwasher and unplug it from the power source to avoid any accidents.
Step 2: Locate the spray arms, which are typically located at the bottom and top of the dishwasher. They are responsible for spraying water throughout the dishwasher during the cleaning cycle.
Step 3: Check for any visible signs of clogging or blockage on the spray arms. Look for food particles, mineral deposits, or other debris that may be obstructing the spray holes.
Step 4: If you notice any blockage, use a toothpick or small brush to gently remove the debris from the spray holes. Be careful not to damage the spray arms in the process.
Step 5: After cleaning the spray arms, rinse them thoroughly with warm water to ensure all the debris is removed.
Step 6: Once the spray arms are clean, carefully reattach them to the dishwasher, making sure they are securely in place.

By regularly checking and cleaning the spray arms, you can help maintain the performance of your dishwasher and prevent any issues that may arise from clogged spray holes. This simple maintenance tip will ensure that your dishwasher continues to function effectively and provide you with sparkling clean dishes for years to come.

Descaling the Dishwasher

Over time, mineral buildup can occur in your dishwasher due to hard water. This can lead to reduced cleaning performance and potentially shorten the lifespan of your appliance. To prevent this, it’s important to regularly descale your dishwasher.

Why is descaling necessary?

Descaling is necessary to remove mineral deposits and limescale that can accumulate inside your dishwasher. These deposits can clog the dishwasher’s spray arms, filters, and other essential components, affecting its overall performance.

How often should you descale your dishwasher?

The frequency of descaling will depend on the hardness of your water. If you live in an area with hard water, you may need to descale your dishwasher every 3-6 months. In areas with soft water, descaling every 6-12 months may be sufficient.

Steps to descale your dishwasher:

  1. Empty the dishwasher: Remove all dishes, racks, and utensil holders from the dishwasher.
  2. Mix a descaling solution: Consult your dishwasher’s manual to determine the recommended descaling solution. Alternatively, you can create a homemade solution by mixing equal parts water and vinegar.
  3. Apply the solution: Pour the descaling solution into the dishwasher’s detergent compartment or place a cup of the solution on the top rack of the dishwasher.
  4. Run a cycle: Run a normal cycle on the hottest water setting. This will allow the descaling solution to work effectively and remove any mineral buildup.
  5. Clean the spray arms and filters: While the dishwasher is empty, remove and clean the spray arms and filters to ensure they are free from any residue.
  6. Wipe the interior: After the cycle is complete, use a damp cloth to wipe down the interior of the dishwasher, including the door, walls, and gaskets.
  7. Restart the dishwasher: Finally, run a rinse cycle to ensure any remaining descaling solution is thoroughly rinsed away.

Regular descaling will help keep your dishwasher running smoothly and extend its lifespan. Make it a part of your routine dishwasher maintenance to enjoy clean and spotless dishes with each wash.

Descaling Tips:
1. Always refer to your dishwasher’s manual for specific descaling instructions and recommended descaling solutions.
2. Avoid using bleach or other abrasive cleaners during the descaling process, as they can damage the dishwasher’s components.
3. Consider using water softeners or a water conditioner if you live in an area with hard water to prevent excessive mineral buildup.
4. Regularly check the spray arms, filters, and drain for any debris or blockages and clean them as needed.
5. If you notice any persistent issues with cleaning performance or unusual odors, it may be a sign that your dishwasher needs descaling.

Preventive Maintenance for Your Dishwasher

Preventive maintenance is key to ensuring a longer lifespan for your dishwasher. By following a few simple steps, you can keep your dishwasher running smoothly and efficiently for years to come.

Clean the Filter Regularly: The filter in your dishwasher traps food particles and debris, preventing them from clogging the dishwasher’s drain. It is important to clean the filter regularly to ensure proper drainage and prevent build-up. Refer to your dishwasher’s manual for instructions on how to remove and clean the filter.

Check the Spray Arms: The spray arms in your dishwasher are responsible for distributing water and detergent throughout the dishwasher. Over time, they can become clogged with debris or develop cracks. Inspect the spray arms regularly and clean or replace them as needed to maintain optimal performance.

Wipe Down the Interior: After each use, take a moment to wipe down the interior of your dishwasher with a damp cloth. This will help remove any lingering food particles or residue, preventing them from building up and causing odors or clogs.

Inspect the Door Seal: The door seal, also known as a gasket, creates a watertight seal when the dishwasher is running. Inspect the seal for any signs of wear or damage and replace it if necessary. A properly functioning seal will prevent leaks and ensure efficient operation.

Run Vinegar Cycle: To remove mineral deposits and keep your dishwasher smelling fresh, run a cycle with white vinegar. Place a cup of white vinegar in a dishwasher-safe container on the top rack and run a hot water cycle. The vinegar will help break down any residue and eliminate odors.

Use Dishwasher Cleaner: Periodically, use a dishwasher cleaner specifically designed to remove grease, grime, and limescale buildup. Follow the manufacturer’s instructions for best results. Regular use of a dishwasher cleaner will help maintain the performance of your dishwasher and prevent potential issues.

By implementing these preventive maintenance tips, you can extend the lifespan of your dishwasher and ensure its continued efficiency. Remember to consult your dishwasher’s manual for specific maintenance instructions and recommendations from the manufacturer.

Extending the Lifespan of Your Dishwasher

Your dishwasher is an essential appliance in your kitchen, and it’s important to keep it running smoothly for as long as possible. With proper care and maintenance, you can extend the lifespan of your dishwasher and save money on costly repairs or replacements.

Here are some tips to help you prolong the life of your dishwasher:

  1. Regularly clean the interior and exterior of your dishwasher. Wipe down the control panel, door seals, and spray arms to remove any food debris or mineral deposits that can interfere with its performance.
  2. Use the right dishwasher detergent. Avoid using regular dish soap or other cleaning agents that can damage the internal components of your dishwasher. Instead, use a dishwasher detergent specifically designed for use in automatic dishwashers.
  3. Load your dishwasher properly. Overloading can strain the dishwasher’s motor and decrease its efficiency. Be sure to follow the manufacturer’s recommendations for maximum capacity and proper loading techniques.
  4. Rinse your dishes before loading them. While most modern dishwashers are designed to remove food particles, heavy residue can clog the drain or filter, leading to poor performance and potential damage.
  5. Clean the filter regularly. Check the dishwasher’s user manual for instructions on how to locate and clean the filter. Cleaning it regularly can prevent clogging and improve water circulation.
  6. Avoid using excessive heat. Using higher temperature settings may seem like a good idea for better cleaning, but it can also accelerate wear and tear on the dishwasher’s components. Stick to the recommended settings for your dishes and dishwasher.
  7. Regularly inspect and replace faulty parts. Keep an eye out for any signs of wear or damage, such as loose seals, cracked hoses, or malfunctioning spray arms. Promptly replace any faulty parts to prevent further damage and ensure optimal performance.

By following these simple steps, you can help extend the lifespan of your dishwasher and keep it running efficiently for years to come.

Common Issues and Troubleshooting

Like any appliance, dishwashers can encounter problems that may affect their performance. Here are some common issues you might encounter and troubleshooting tips to help resolve them.

  1. Poor cleaning performance: If your dishes are not getting clean, check if the spray arms are clogged or damaged. Clean or replace them if necessary. Also, make sure that you are using the right amount and type of detergent. Hard water can also affect cleaning performance, so consider using a dishwasher cleaner to remove mineral deposits.
  2. Leaking water: If you notice water leaking from your dishwasher, check the door gasket for any signs of damage or wear. Replace it if necessary. Also, check the spray arms and the water inlet valve for any leaks or blockages.
  3. Foul odor: Over time, food particles and grease can build up inside your dishwasher, causing a foul odor. To eliminate the smell, remove the racks and clean the interior with a mixture of hot water and vinegar or dishwasher cleaner. Also, make sure to regularly clean the filter to prevent odor-causing buildup.
  4. Dishes not drying: If your dishes are not drying properly, check if the heating element is working. If it’s not, you may need to replace it. Also, ensure that you are using rinse aid to help with the drying process. Avoid overcrowding the dishwasher, as it can prevent proper airflow and drying.
  5. Dishwasher not turning on: If your dishwasher is not responding, first check if it’s properly plugged in and the circuit breaker hasn’t tripped. Also, make sure the door is latched securely, as most dishwashers won’t start if the door is not fully closed. If the problem persists, consult the appliance’s manual or contact a professional technician.

Remember, if you’re unsure about any troubleshooting or encounter more complex issues, it’s always best to consult the manufacturer’s manual or seek professional assistance. Regular maintenance and proper care can help prolong the lifespan of your dishwasher.

FAQ: How to Clean Your Dishwasher Cleaning for Extended Lifespan

What are some common problems with dishwashers?

Common problems with dishwashers include clogged spray arms, dirty filters, malfunctioning drain pumps, and faulty door latches.

How often should I clean my dishwasher?

You should clean your dishwasher at least once a month to prevent buildup of food particles, grease, and mineral deposits.

What is the best way to clean the interior of a dishwasher?

The best way to clean the interior of a dishwasher is to remove and clean the filter, wipe down the walls, spray arms, and door gasket with a mixture of vinegar and water, and run a cleaning cycle with a dishwasher cleaner.

What can I do to extend the lifespan of my dishwasher?

To extend the lifespan of your dishwasher, you should regularly clean and maintain it, avoid overloading it, scrape off excess food before loading dishes, and use the appropriate dishwasher detergent and rinse aid.

How can I clean the inside of my dishwasher?

To clean the inside of your dishwasher, you can use vinegar and baking soda. First, sprinkle 1 cup of baking soda on the bottom of the dishwasher. Then, pour 1 cup of white vinegar into a dishwasher-safe container and place it on the top rack. Run the dishwasher on a hot water cycle.

What’s the best way to clean a dishwasher with vinegar?

The best way to clean your dishwasher with vinegar is to pour 1 cup of distilled white vinegar into the bottom of the dishwasher and run a hot water cycle. This helps to remove any built-up grime, grease, and odors.

How often do I need to clean the dishwasher filter?

It’s recommended to clean the dishwasher filter at least once a month to ensure optimal performance. Simply remove the filter and rinse it under warm water to remove any trapped bits of food or debris.

What should I do if my dishwasher isn’t cleaning properly?

If your dishwasher isn’t cleaning properly, it may need a thorough cleaning. You can deep clean your dishwasher by running a cycle with vinegar and baking soda, ensuring to clean the filter and inspect the dishwasher door and gasket for any buildup.

How can I keep my stainless steel dishwasher clean?

To keep your stainless steel dishwasher clean, wipe down the exterior regularly with a soft cloth and mild detergent. For stubborn stains, you can use a stainless steel cleaner. Avoid abrasive cleaners that may scratch the surface.

What’s the recommended cleaning schedule for a dishwasher?

It’s recommended to clean your dishwasher once a month to prevent buildup and maintain optimal performance. Additionally, regularly wiping down the exterior and cleaning the filter can help keep your dishwasher in top condition.

Can I use bleach to clean my dishwasher?

While bleach can be effective for disinfecting, it’s not recommended for regular cleaning of dishwashers as it can damage the interior components and rubber seals. Stick to milder cleaning agents like vinegar and baking soda for routine maintenance.

How do I clean the dishwasher racks?

To clean the dishwasher racks, remove them from the dishwasher and soak them in a mixture of warm water and mild dish soap. Use a soft brush or sponge to scrub away any residue, then rinse thoroughly before placing them back in the dishwasher.

What’s the best way to clean the gasket on a dishwasher?

To clean the gasket on a dishwasher, use a soft cloth dampened with warm soapy water to wipe away any dirt or grime. Be sure to dry the gasket thoroughly to prevent mold or mildew growth.

How can I prevent my dishwasher from becoming smelly?

To prevent a smelly dishwasher, regularly run your dishwasher with hot water and vinegar to remove any buildup and odors. Additionally, ensure to clean the filter, door, and gasket regularly, and avoid leaving bits of food or debris inside the dishwasher.

How can I learn how to clean my dishwasher effectively?

You can learn how to clean your dishwasher effectively by following simple steps using common household items such as vinegar and baking soda. These natural cleaners can help keep your dishwasher running smoothly and odor-free.

When should I empty my dishwasher before cleaning it?

It’s best to empty your dishwasher of any dishes and utensils before cleaning it to ensure easy access to all interior surfaces. This allows for a thorough cleaning of both the interior and exterior of the dishwasher.

Can I use bleach to clean my dishwasher?

While bleach can be effective for disinfecting, it’s not recommended for regular cleaning of dishwashers as it can damage the interior components and rubber seals. Instead, opt for safer alternatives like vinegar and baking soda.

How often should I clean the filter in my dishwasher?

It’s important to clean the filter in your dishwasher regularly to maintain optimal performance. Depending on usage, aim to clean the dishwasher filter at least once a month to remove any trapped food particles and debris.

What’s the best way to clean the exterior of my dishwasher?

To clean the exterior of your dishwasher, simply wipe it down with a damp cloth and mild detergent. For stubborn stains, you can use a stainless steel cleaner for stainless steel dishwashers or a suitable cleaner for other materials.

How can I keep my dishwasher clean on a regular basis?

To keep your dishwasher clean and odor-free, it’s important to establish a regular cleaning routine. This may include running a cleaning cycle with vinegar and baking soda, wiping down the exterior, and regularly emptying and cleaning the filter.


Get the Best Appliance Repair Tips from the Experts to Keep Your Appliances Running Smoothly

Welcome to our comprehensive guide on how to fix common household appliances! Whether you are a professional repair technician or simply a DIY enthusiast, this article will provide you with expert tips and tricks to successfully repair a variety of appliances found in every home. From refrigerators and washing machines to ovens and dishwashers, we’ve got you covered. So, roll up your sleeves and get ready to save money and extend the lifespan of your appliances.

It’s no secret that appliances can break down at the most inconvenient times. Rather than rushing to buy a new one, learning how to fix them can be a cost-effective and sustainable solution. In this guide, we will not only show you how to diagnose the most common problems in household appliances but also guide you step-by-step through the repair process. No matter what your skill level is, we believe that everyone can master these essential appliance repair skills.

Throughout this article, you’ll discover insider tips and industry secrets from seasoned professionals. We’ll cover the most common issues you may encounter, such as leaks, strange noises, or malfunctions, and provide you with step-by-step instructions on how to fix them. Additionally, we will outline the essential tools you’ll need for any repair job and offer advice on where to find replacement parts. By the end of this guide, you will be equipped with the knowledge and skills to tackle a wide range of appliance repairs and save yourself from unnecessary expenses.

Why You Should Learn Appliance Repair

Learning how to fix common household appliances can save you time, money, and frustration. Instead of waiting for a repair technician to arrive or having to buy a new appliance, you can take matters into your own hands and troubleshoot the problem yourself.

Here are some reasons why learning appliance repair can be beneficial:

  1. Cost savings:

Hiring a professional to fix your appliances can be expensive, especially if the problem is minor. By learning how to repair appliances yourself, you can avoid unnecessary service charges and fix the issue for a fraction of the cost.

  1. Convenience:

Appliance breakdowns can happen at the most inconvenient times. If you know how to repair appliances, you can address the issue immediately without having to wait for a technician to become available. This means less downtime and disruption to your daily routine.

  1. Skill development:

Learning appliance repair not only allows you to fix immediate problems but also helps you develop valuable skills. You’ll become more knowledgeable about how appliances work and gain problem-solving abilities that can be applied to various other areas of life.

  1. Environmental impact:

Fixing appliances instead of replacing them is a more eco-friendly option. By learning how to repair them, you can extend their lifespan and reduce the amount of electronic waste that ends up in landfills.

  1. Empowerment:

Being able to fix your own appliances gives you a sense of empowerment and independence. You won’t have to rely on others to solve simple appliance issues, and you’ll feel a sense of accomplishment every time you successfully repair something.

In conclusion, learning appliance repair is a valuable skill that can save you money, provide convenience, help the environment, and empower you to take control of your own household. So why not start learning today?

The Importance of Regular Maintenance

Regular maintenance is crucial for keeping your household appliances in good working condition. By taking the time to perform routine maintenance tasks, you can extend the lifespan of your appliances and prevent costly repairs down the line.

Preventing Breakdowns

One of the main reasons why regular maintenance is important is that it can help prevent unexpected breakdowns. When you take the time to inspect and clean your appliances regularly, you can catch potential issues before they become major problems. By addressing small repairs or adjustments early on, you can avoid the inconvenience and expense of a complete breakdown.

Increasing Efficiency

Regular maintenance also helps to ensure that your appliances are running at their optimal efficiency. Over time, dust and debris can accumulate on various components, causing them to work harder and use more energy. By cleaning and lubricating parts regularly, you can keep your appliances operating efficiently, which can save you money on your energy bills.

Furthermore, regular maintenance can also help to improve the performance of your appliances. For example, cleaning out the lint trap in your dryer can improve drying times, while descaling your coffee maker can enhance the flavor of your morning brew. Taking the time to maintain your appliances can result in better overall performance and satisfaction.

Remember, regular maintenance is not only about fixing problems but also about preventing them from occurring in the first place. By following the manufacturer’s recommendations and performing routine maintenance tasks, you can ensure that your appliances are running smoothly and reliably for years to come.

So, don’t neglect regular maintenance. It may take a little time and effort, but the benefits far outweigh the inconvenience. By investing in regular maintenance, you can save yourself the headache of unexpected breakdowns, costly repairs, and higher energy bills.

Take care of your appliances, and they’ll take care of you.

Refrigerators

Refrigerators are an essential household appliance that helps to keep our food fresh and our drinks cold. However, they can sometimes encounter problems that require repair. Here are some common issues with refrigerators and how to fix them:

1. Refrigerator is not cooling

If your refrigerator is not cooling properly, the first thing you should check is the temperature settings. Make sure that the temperature is set correctly and adjust it if necessary. If the temperature settings are fine, the problem could be with the condenser coils. Dust and dirt can accumulate on the coils, reducing their efficiency. Clean the coils using a vacuum cleaner or a brush. Another possible cause could be a faulty thermostat or a malfunctioning compressor. In such cases, it is recommended to call a professional technician to diagnose and fix the issue.

2. Refrigerator is leaking

If you notice water pooling around your refrigerator, there could be a few reasons for the leakage. Check the water supply line connected to the refrigerator and make sure it is not damaged or leaking. Inspect the defrost drain to see if it is clogged. A clogged drain can cause water to overflow and leak onto the floor. Clear any blockages using a pipe cleaner or warm water. If the problem persists, it could be due to a faulty water inlet valve or a malfunctioning defrost drain pan. In such cases, it is best to seek professional assistance.

3. Refrigerator is making strange noises

If your refrigerator is making unusual noises such as buzzing, clicking, or rattling, it could be a sign of a problem. The condenser fan motor or the evaporator fan motor could be the culprit. Check these motors for any signs of damage or malfunctioning. The fan blades may be hitting something, causing the noise. Clean the fan blades and remove any obstructions. If the noise continues, it could indicate a problem with the compressor or the motor bearings. In such cases, it is advisable to consult a professional appliance repair technician.

4. Refrigerator door seal is broken

A broken or loose door seal can cause air leakage, leading to inefficient cooling and energy wastage. Check the door seal for any cracks or tears. If the seal is damaged, it will need to be replaced. You can purchase a new door seal from an appliance parts store. To replace the seal, carefully remove the old one and install the new one according to the manufacturer’s instructions. A properly sealed refrigerator door will help maintain the temperature inside the unit, ensuring optimal performance.

Remember, if you are unsure about any repair task or if the problem persists after attempting the fixes mentioned above, it is always best to call a professional appliance repair technician. They have the necessary expertise and tools to diagnose and repair refrigerator issues effectively.

Issue Possible Causes Solution
Refrigerator is not cooling – Incorrect temperature settings

– Dirty condenser coils

– Faulty thermostat or compressor

– Adjust temperature settings

– Clean condenser coils

– Call a professional technician if necessary

Refrigerator is leaking – Damaged water supply line

– Clogged defrost drain

– Faulty water inlet valve or defrost drain pan

– Check water supply line

– Clear defrost drain blockage

– Seek professional assistance if needed

Refrigerator is making strange noises – Damaged condenser or evaporator fan motor

– Obstructed fan blades

– Faulty compressor or motor bearings

– Check and clean fan motors and blades

– Consult a professional technician if noise persists

Refrigerator door seal is broken – Cracked or torn door seal – Replace the door seal following manufacturer’s instructions

How to Identify and Fix Common Refrigerator Problems

Refrigerators are essential appliances that help keep our food fresh and prevent spoilage. However, like any other household appliances, they can experience common problems that can disrupt their functionality. Here are some tips to help you identify and fix these common refrigerator issues:

  • Refrigerator not cooling: If your refrigerator is not cooling properly, the first thing you should check is the temperature settings. Make sure the temperature is set correctly and adjust it if needed. If the problem persists, it could be due to a faulty thermostat, compressor, or condenser fan motor. In such cases, it is best to call a professional technician for repair.
  • Water leaking: If you notice water pooling beneath your refrigerator, there could be several reasons for this. One common cause is a clogged defrost drain. Carefully remove any debris or ice buildup from the drain to ensure proper drainage. If this doesn’t solve the problem, it could be due to a faulty water inlet valve or a leak in the water line. It’s recommended to consult a professional technician for further assistance.
  • Weird noises: Unusual noises coming from your refrigerator can be alarming. One common culprit is a malfunctioning condenser fan motor or evaporator fan motor. Clean the fan blades and check for any obstructions that might be causing the noise. If the problem persists, it’s best to call a professional to diagnose and repair the issue.
  • Frost buildup: Excessive frost buildup in the freezer compartment is a common issue. This can be caused by a faulty defrost thermostat or defrost heater. Defrost the freezer manually and check if the problem persists. If it does, it’s advisable to consult a professional for repair.
  • Door seal problems: A damaged or worn-out door seal can cause air leaks, resulting in inefficient cooling and increased energy consumption. Inspect the door seal for any signs of wear or damage. If necessary, replace the seal to ensure a proper, airtight seal.

Remember, it’s always important to prioritize your safety when attempting to fix any appliance problems. If you’re unsure or uncomfortable with DIY repairs, it’s best to seek professional help to avoid any further damage to your refrigerator. Regular maintenance and timely repair can extend the lifespan of your refrigerator and keep it running efficiently for years to come.

Tips for Extending the Lifespan of Your Refrigerator

Your refrigerator is an essential household appliance that keeps your food fresh and prevents it from spoiling. To ensure that your refrigerator lasts for a long time and operates efficiently, it’s important to take proper care of it. Here are some tips for extending the lifespan of your refrigerator:

1. Keep it clean

Regular cleaning is essential to prevent dirt, dust, and grime from accumulating on the coils and other parts of your refrigerator. Use a soft cloth and mild detergent to clean the interior and exterior of your fridge. Be sure to also clean the condenser coils located either at the back or underneath the refrigerator to prevent them from becoming clogged with dust or debris.

2. Check the door seals

The door seals, also known as gaskets, are crucial for maintaining a tight seal and preventing air leaks. Over time, these seals can become worn or damaged, allowing cold air to escape and causing your refrigerator to work harder. Inspect the door seals regularly and replace them if you notice any cracks or gaps. To test the effectiveness of the door seals, try inserting a piece of paper between the door and the seals. If it can be easily pulled out, it’s a sign that the seals need replacing.

3. Set the right temperature

Keeping your refrigerator at the right temperature is important for preserving the freshness of your food and preventing bacterial growth. The ideal temperature for most refrigerators is between 35-38 degrees Fahrenheit (1-3 degrees Celsius). Use a refrigerator thermometer to monitor the temperature and adjust the setting accordingly. Avoid setting the temperature too low as it can cause unnecessary strain on the compressor.

4. Do not overload

It may be tempting to shove as much food as possible into your refrigerator, but overloading it can hamper its performance and airflow. Make sure there is enough space for the cool air to circulate and do not block the vents. Avoid placing hot or warm food directly into the refrigerator as it can raise the temperature and cause your fridge to work harder to cool down.

5. Regularly defrost

If you have a manual defrost refrigerator, it’s important to regularly defrost it to remove any excessive ice buildup. A thick layer of ice can reduce the efficiency of your fridge and strain the compressor. Follow the manufacturer’s instructions on how to defrost your refrigerator properly.

By following these simple tips, you can help extend the lifespan of your refrigerator and ensure that it continues to keep your food fresh and cool for years to come.

Washing Machines

Washing machines are an essential appliance in any household, but they can sometimes encounter issues that require repair. Here are some common problems you may encounter with your washing machine and how to fix them:

1. Washing Machine Does Not Start

If your washing machine does not start when you press the start button, there could be a problem with the power supply. Check if the machine is plugged in properly and if there are any loose connections. Additionally, ensure that the water supply is turned on and that the door is closed securely. If none of these solutions work, there may be an issue with the control board, and it is best to call a professional for further diagnosis and repair.

2. Washing Machine Does Not Drain

If your washing machine is not draining the water properly, it could be due to a clogged drain hose or pump. First, check if there are any obstructions in the drain hose, such as lint or foreign objects. Remove any blockages and check if the machine can now drain the water. If the problem persists, the pump may be faulty and needs to be replaced. It is recommended to seek professional help for this repair.

Remember, safety should always be a priority when attempting to fix any appliance. Always disconnect the power supply before starting any repair work and if you are unsure about any step, it is best to call a professional technician. With proper care and maintenance, your washing machine can serve you well for many years to come.

Problem Solution
Washing machine does not start Check power supply, connections, water supply, and door closure. Call a professional if necessary.
Washing machine does not drain Check for clogged drain hose or pump and remove any obstructions. Consider professional help if needed.

Common Issues with Washing Machines and How to Troubleshoot Them

Washing machines are an essential appliance in any household, and when they start to malfunction, it can be a major inconvenience. Here are some common issues that you may encounter with your washing machine and some troubleshooting tips to help you fix them:

1. Machine not starting

If your washing machine is not starting at all, the first thing you should check is the power supply. Make sure the machine is plugged in properly and that the power outlet is working. If the power supply is not the issue, check if the door or lid of the machine is fully closed. Some washers won’t start until the lid is securely closed. Additionally, check if the machine is getting water by turning on the faucet connected to the machine. If there is no water supply, the machine won’t start.

2. Leaking water

If you notice water leaking from your washing machine, the most common cause is a faulty or worn-out hose. Check all the hoses connected to your machine and look for any signs of wear or damage. If you find any leaks, you may need to replace the hose or tighten the connections. Another possible cause of leaking water is a clogged drain pump or filter. Clean these components to ensure proper drainage.

3. Strange noises

If your washing machine is making unusual noises, such as loud banging or squeaking sounds, it could be due to a few different issues. The most common cause is an unbalanced load. Make sure to distribute the clothes evenly in the drum to avoid imbalance. Another possible cause is a worn-out or faulty belt. Inspect the belt for any signs of damage or looseness. If necessary, replace the belt for smooth operation.

If these troubleshooting tips don’t solve the issues with your washing machine, it’s best to call a professional appliance repair technician. They have the knowledge and experience to diagnose and fix complex problems. Remember to always prioritize your safety when attempting any repairs and consult the user manual for specific instructions related to your washing machine model.

How to Clean and Maintain Your Washing Machine

Keeping your washing machine clean and properly maintained is essential for ensuring its longevity and optimal performance. Here are some expert tips on how to clean and maintain your washing machine:

  1. Clean the drum: Remove any dirt, lint, or residue from the drum after each use. Wipe down the interior with a cloth or sponge to remove any remaining debris. This will help prevent odors and maintain the cleanliness of your clothes.
  2. Descale the machine: Over time, mineral deposits can build up in your washing machine, affecting its performance. To descale the machine, mix equal parts water and white vinegar, and run a cycle with no clothes on the hottest setting. This will help remove any limescale and keep your machine running smoothly.
  3. Clean the detergent drawer: Remove the detergent drawer and rinse it under warm water to remove any built-up detergent residue. Use a toothbrush or a small scrub brush to remove any stubborn stains or debris. This will ensure that your detergent is properly dispensed during each wash.
  4. Check the hoses: Regularly inspect the hoses for any signs of damage, such as cracks or leaks. Replace any damaged hoses immediately to prevent potential flooding or water damage. It’s also a good idea to clean the filters on the hoses to remove any debris and improve water flow.
  5. Use the right detergent: Always use the recommended amount of detergent for your washing machine and the type of laundry you are washing. Using too much detergent can lead to a buildup of residue and affect your machine’s performance.
  6. Run regular maintenance cycles: Running a maintenance cycle once a month can help keep your washing machine in good working condition. Follow the manufacturer’s instructions for running a maintenance cycle, which may include using a specific cleaner or running a hot wash with no clothes.

By following these simple cleaning and maintenance tips, you can extend the life of your washing machine and ensure that it continues to perform at its best. A clean and well-maintained washing machine will not only give you cleaner clothes but also save you money on repairs or premature replacement.

Dishwashers

Dishwashers are a common household appliance that can sometimes encounter issues. Here are some expert tips on how to fix common dishwasher problems:

  1. Dishes not getting clean: If your dishes are not getting clean, it could be because the spray arms are clogged. Remove the spray arms and clean them thoroughly with hot soapy water. Also, check the filters and clean them if necessary. Ensure that the water temperature is set to the appropriate level for optimal cleaning.
  2. Dishwasher not draining: If your dishwasher is not draining, it could be due to a clogged drain hose or a faulty drain pump. Check the drain hose for any blockages and remove them if found. If the drain pump is faulty, it may need to be replaced.
  3. Dishwasher leaking: A leaking dishwasher can be caused by a faulty door seal or a damaged gasket. Inspect the door seal for any signs of wear or damage and replace it if needed. Also, check the gasket around the dishwasher’s door and replace it if necessary.
  4. Strange noises: If your dishwasher is making unusual noises, it could be due to a worn-out motor or a faulty pump. Inspect the motor and pump for any signs of damage or malfunction and replace them if required.
  5. Dishwasher not starting: If your dishwasher is not starting, check the power supply and ensure that it is properly connected. Also, check the door latch switch and replace it if needed.

Remember, always refer to the manufacturer’s instructions for specific troubleshooting steps and safety precautions when attempting to fix your dishwasher. If the problem persists or seems too complicated to handle on your own, it is best to call a professional appliance repair technician for assistance.

Troubleshooting Common Problems with Dishwashers

Dishwashers are incredibly convenient appliances, but they can experience a range of common problems. Knowing how to troubleshoot these issues can save you time and money by avoiding unnecessary repairs or replacements. Here are some common dishwasher problems and how to fix them:

1. Dishes Not Getting Clean

If your dishwasher isn’t cleaning your dishes properly, it could be due to a few different reasons. First, check the spray arms for clogs or blockages. Remove any debris that may be obstructing the spray arm holes. Next, make sure you’re using the right detergent and that it’s being dispensed correctly. Hard water can also cause dishes to appear dirty, so consider using a rinse aid or using a water softener if necessary.

2. Dishwasher Not Draining

If you find standing water in the bottom of your dishwasher after a cycle, it may not be draining properly. Check the drain hose for kinks or obstructions. Clear any debris or clogs that may be preventing water from draining out. It’s also important to ensure the dishwasher’s drain pump is functioning correctly. If these steps don’t solve the problem, you may need to consider calling a professional for further assistance.

Remember, safety should always be your top priority when troubleshooting and repairing appliances. If you’re unsure or uncomfortable with any repair process, it’s best to consult a professional appliance repair technician.

FAQ: Expert Appliance Repair Tips

How can I fix a leaking refrigerator?

If your refrigerator is leaking, there are a few possible causes. First, check the water supply line for any leaks or damage. If the supply line is fine, the next step is to inspect the drain pan and drain tube. A clogged drain tube or a cracked drain pan can cause leaks. Lastly, check the door gasket for any tears or gaps that may be allowing water to escape. Replace any damaged parts or clean out any clogs to fix the issue.

What should I do if my dishwasher isn’t cleaning dishes properly?

If your dishwasher isn’t cleaning dishes properly, there are a few troubleshooting steps you can take. First, check the spray arms to see if they are clogged. If they are, clean them out with a toothpick or small brush. Next, check the dishwasher filter for any debris and clean it if necessary. You should also ensure that you are using the correct amount of detergent and that the water temperature is hot enough. If the issue persists, it may be best to call a professional appliance repair service.

My washing machine won’t start. What could be the problem?

If your washing machine won’t start, there are a few potential problems to consider. First, check the power supply to make sure the machine is receiving power. If the power supply is fine, the next step is to check the door latch. If the door is not securely closed, the machine will not start. Additionally, check the control panel for any error codes or indicator lights that may provide clues as to the issue. If none of these solutions work, it may be best to contact a professional technician.

How can I fix a microwave that isn’t heating food?

If your microwave isn’t heating food, there are a few possible causes. First, check to make sure the microwave is plugged in properly and receiving power. If it is, the next step is to test the high voltage diode, capacitor, and magnetron. These components can fail and cause the microwave to stop producing heat. If any of these parts are faulty, they will need to be replaced. It’s important to note that working on a microwave can be dangerous, so it may be best to leave repairs to a professional technician.

How can I troubleshoot a burner that is not working on my stove?

If a burner on your stove is not working, start by unplugging the appliance and checking the burner connection. Use a screwdriver to tighten any loose connections and ensure the burner is properly seated in its socket.

What steps should I take to safely unplug a malfunctioning home appliance?

To safely unplug a malfunctioning home appliance, first, turn off the appliance and unplug it from the electrical outlet. If necessary, trip the circuit breaker to cut power to the appliance before attempting any repairs.

When should I consider DIY appliance repair versus calling a professional appliance service?

You should consider DIY appliance repair when dealing with minor issues such as loose connections, clogged vents, or simple part replacements. For major appliance malfunctions or if you’re unsure about the repair process, it’s best to call a professional appliance repair company.

How can I ensure proper maintenance of my home appliances to prevent breakdowns?

To ensure proper maintenance of your home appliances and prevent breakdowns, regularly clean or replace filters, seals, and gaskets, and perform routine maintenance tasks such as cleaning refrigerator coils and dryer exhaust vents every six months.

What should I do if my air conditioner is not cooling properly?

If your air conditioner is not cooling properly, start by checking the air filter and cleaning or replacing it if necessary. Ensure proper air flow by removing any obstructions from the vents and coils, and consider calling an appliance repair company for further diagnosis and repair.

How can I troubleshoot a malfunctioning garbage disposal in my kitchen?

To troubleshoot a malfunctioning garbage disposal, start by unplugging the appliance and using a flashlight to check for any visible obstructions in the disposal unit. Use a screwdriver to manually turn the disposal blades and clear any debris.

What factors should I consider when deciding whether to repair or replace a major home appliance?

When deciding whether to repair or replace a major home appliance, consider the age of the appliance, the cost of repairs versus replacement, and the frequency of breakdowns. If the appliance is older, requires frequent repairs, or the cost of repair is close to the cost of a new appliance, it may be more cost-effective to replace it.

How can I safely clean small appliances like coffee makers or toasters?

To safely clean small appliances like coffee makers or toasters, unplug the appliance and wipe down the exterior with a damp cloth. Use a solution of soap and water to clean any removable parts, and ensure they are completely dry before reassembly.

What are some common signs that indicate it’s time to call for professional appliance service?

Some common signs that indicate it’s time to call for professional appliance service include unusual noises, burning smells, erratic behavior, or if the appliance is not working properly despite DIY repair attempts. These signs may indicate a more serious issue that requires professional diagnosis and repair.

How can I ensure I have the right tools for DIY appliance repair?

To ensure you have the right tools for DIY appliance repair, invest in a basic toolkit that includes a screwdriver set, adjustable wrench, pliers, and a multimeter for testing electrical components. Additionally, refer to appliance repair manuals or online tutorials for guidance on specific repair tasks.

How can I ensure proper care and maintenance of my home appliances?

Proper care and maintenance of home appliances involve regular cleaning, checking for signs of wear or damage, and performing routine maintenance tasks such as cleaning dryer vents and refrigerator coils.

Where can I find appliance repair help if I encounter a malfunctioning appliance?

If you encounter a malfunctioning appliance, you can find appliance repair help by contacting a professional appliance repair service. They can diagnose the issue and provide expert repair solutions to get your appliance back in working order.

What are some appliance maintenance tips to prevent potential issues?

Some appliance maintenance tips to prevent potential issues include keeping appliances clean, ensuring they are properly plugged in, and checking for any spills or leaks that could pose a fire hazard. Additionally, regularly inspecting and cleaning dryer vents and oven doors can help prevent problems.

How can I diagnose and repair a plugged appliance?

To diagnose and repair a plugged appliance, start by ensuring the appliance is properly plugged into a functioning electrical outlet. Check for any tripped circuit breakers or blown fuses that may be causing the issue, and reset or replace them as needed.

What steps should I take to clean a dryer vent to prevent fire hazards?

To clean a dryer vent and prevent fire hazards, start by unplugging the dryer and disconnecting the vent hose. Use a vent brush or vacuum attachment to remove lint and debris from the vent hose and exhaust duct. Reconnect the hose and plug in the dryer before testing its operation.

How can I ensure the safety of my fridge and freezer to avoid potential hazards?

To ensure the safety of your fridge and freezer, always make sure the appliances are properly plugged in and positioned on a stable surface. Regularly check for spills or leaks that could pose a fire hazard, and promptly clean or repair any issues to prevent potential problems.


A Comprehensive Kitchen Appliances Cleaning Guide – Tips and Tricks for Keeping Your Appliances Sparkling Clean and Efficient

Cleaning kitchen appliances can be a daunting task, but it’s an essential part of maintaining a clean and healthy kitchen. Over time, grease, food particles, and grime can accumulate on your appliances, affecting their performance and even causing them to break down. In this ultimate guide, we will walk you through the steps to effectively clean all your kitchen appliances, from your oven and refrigerator to your dishwasher and blender.

Why is it important to clean your kitchen appliances?

Cleaning your kitchen appliances regularly not only helps to keep your kitchen looking its best, but it also ensures that your appliances function properly. Grease and food residue can build up on surfaces and filters, reducing their efficiency and causing them to work harder and use more energy. Additionally, a clean kitchen is crucial for maintaining good hygiene and preventing the spread of bacteria and foodborne illnesses.

How to clean your oven:

The oven is one of the most heavily used appliances in the kitchen and can quickly accumulate grease, food spills, and burnt-on residue. To clean your oven, start by removing the racks and soaking them in warm, soapy water. While they soak, use a damp cloth or sponge to wipe away loose debris from the oven walls and bottom. Then, spray a commercial oven cleaner or make your own mixture of baking soda and water onto the surfaces, being careful to avoid the heating elements. Let the cleaner sit for the recommended time, usually around 15-20 minutes, before wiping it away with a clean cloth or sponge. Finally, rinse the racks and reinsert them into the oven.

How to clean your refrigerator:

A clean refrigerator is not only visually appealing but also crucial for food safety. Start by emptying the fridge and removing all shelves and drawers. Wash them with warm, soapy water and set them aside to dry. Use a solution of equal parts water and vinegar to wipe down the interior walls, shelves, and drawers of the fridge. Pay special attention to any spills or sticky residues. For stubborn stains, make a paste using baking soda and water and apply it to the affected area. Let it sit for a few minutes before scrubbing with a soft brush or cloth. Finally, wipe down the exterior of the refrigerator with a damp cloth and reassemble the shelves and drawers.

Why Cleaning Kitchen Appliances is Important

Cleaning kitchen appliances regularly is essential for maintaining a healthy and functional kitchen. Neglecting to clean your appliances can lead to a buildup of dirt, grime, and bacteria, which can affect the performance and lifespan of your appliances.

1. Food Safety

One of the primary reasons to clean kitchen appliances is to ensure food safety. Appliances like refrigerators, ovens, and microwaves often come into contact with raw food, spills, and leftovers. If these surfaces are not properly cleaned, bacteria can multiply and contaminate your food, putting you and your family at risk of foodborne illnesses.

2. Efficiency and Performance

Regular cleaning of kitchen appliances improves their efficiency and performance. Over time, food debris and grease can accumulate on surfaces, vents, and filters, causing appliances to work harder and consume more energy. By keeping your appliances clean, you can ensure they operate at their optimal level, saving you money on utility bills and preventing potential breakdowns.

3. Improved Durability

Cleaning your kitchen appliances regularly can help prolong their lifespan. Dirt, dust, and grime that accumulate on surfaces and inside the machinery can cause components to deteriorate faster. By removing these contaminants, you can prevent unnecessary wear and tear, allowing your appliances to last longer and function properly for years to come.

4. Maintaining Aesthetics

Clean kitchen appliances contribute to an aesthetically pleasing kitchen environment. Grease, stains, and fingerprints can make your appliances look dirty and unappealing. Regular maintenance and cleaning can help keep your appliances looking shiny and new, maintaining the overall cleanliness and visual appeal of your kitchen.

In conclusion, cleaning your kitchen appliances is vital for various reasons, including food safety, efficiency, durability, and aesthetics. By implementing regular cleaning routines, you can ensure your appliances stay in excellent condition, enhance their performance, and create a healthy and pleasant kitchen space.

Essential Tools for Cleaning Kitchen Appliances

When it comes to keeping your kitchen appliances clean and in top shape, having the right tools can make all the difference. Here are some essential tools you should have in your cleaning arsenal:

  • Dish soap: A good quality dish soap is essential for cleaning various kitchen appliances. It can help remove grease, grime, and food residues from surfaces without causing any damage.
  • All-purpose cleaner: An all-purpose cleaner is versatile and can be used on a wide range of kitchen appliances, including countertops, range hoods, and stovetops. Look for one that is effective against grease and stains.
  • Microfiber cloths: These soft, lint-free cloths are a must-have for cleaning kitchen appliances. They are gentle on surfaces and can effectively trap dust and dirt, leaving appliances shiny and spotless.
  • Scrub brush: A scrub brush with stiff bristles is ideal for tackling tough stains and grime on surfaces like stove grates, oven racks, and sink basins. Look for one with an ergonomic handle for easy use.
  • Vinegar: Vinegar is a natural and effective cleaner for removing hard water stains and mineral deposits. Mix equal parts vinegar and water in a spray bottle for an easy-to-use cleaning solution.
  • Toothbrush: A toothbrush can be used to reach small, hard-to-clean areas such as the crevices of appliances or the corners of a blender. Opt for one with soft bristles to avoid scratching surfaces.
  • Magic eraser: A magic eraser is a handy tool for removing tough stains and marks on surfaces like stainless steel or glass. It requires minimal effort and can make appliances look brand new.
  • Gloves: Protect your hands from harsh chemicals and hot water by wearing gloves while cleaning. Choose gloves that are durable, waterproof, and comfortable to wear.

With these essential tools in your cleaning kit, you’ll be well-equipped to tackle any dirt, grime, or stains that accumulate on your kitchen appliances. Remember to follow manufacturer’s instructions and safety precautions when using cleaning products.

Step-by-Step Guide to Cleaning Oven and Stove

Cleaning your oven and stove regularly is essential for keeping your kitchen looking its best and maintaining the longevity of your appliances. Follow these step-by-step instructions to tackle this sometimes challenging task:

Gather Your Supplies

Before getting started, gather all the necessary supplies:

  • A pair of rubber gloves
  • A scrub brush or sponge
  • A non-abrasive cleaner
  • A carbon filter mask (optional)
  • A garbage bag

Prep the Oven

Begin by removing the oven racks and setting them aside. If they are heavily soiled, submerge them in warm, soapy water while you clean the rest of the oven. Next, use a damp cloth to wipe away any loose debris or crumbs from the inside of the oven.

Apply the Cleaner

Apply a generous amount of non-abrasive cleaner to the inside of the oven, focusing on areas with built-up grease or food stains. Be sure to follow the manufacturer’s instructions for the specific cleaner you are using.

For stubborn stains, create a paste by mixing baking soda and water, and apply it to the affected areas. Allow the cleaner or paste to sit for the recommended amount of time to break down grease and grime.

Scrub Away Grime

Put on your rubber gloves and use a scrub brush or sponge to scrub away the cleaner and any remaining grease or grime. Start from the top of the oven and work your way down, being thorough in your cleaning. Use circular motions for optimal results.

For hard-to-reach areas, such as the oven door hinges or the burner knobs, use a toothbrush or a cotton swab to clean away dirt and grime.

Clean the Oven Racks

After allowing the oven racks to soak, use the scrub brush or sponge to remove any remaining grime. Rinse them thoroughly with warm water and dry them completely before placing them back in the oven.

Tackle the Stovetop

For electric stovetops, remove any removable burner coils or pans and clean them separately. Use a non-abrasive cleaner and a sponge or cloth to wipe down the stovetop, paying attention to areas around the burners.

If you have a gas stovetop, be cautious around the burner grates. Remove them and clean them separately with warm, soapy water and a scrub brush. Wipe down the stovetop with a non-abrasive cleaner, being careful not to let any cleaner seep into the gas burners.

Dispose of the Waste

Collect all the waste and debris in a garbage bag, making sure to seal it tightly. Remove the bag from your kitchen and dispose of it properly.

Following these step-by-step instructions will leave your oven and stovetop looking shiny and clean. Remember to clean your appliances regularly to maintain their performance and prevent grease buildup.

Tips for Cleaning Refrigerator and Freezer

Keeping your refrigerator and freezer clean is essential for maintaining food safety and ensuring the longevity of your appliances. Here are some tips to help you effectively clean and maintain your refrigerator and freezer:

  1. Empty and unplug the appliances:Before starting the cleaning process, empty out all the contents of your refrigerator and freezer. Unplug them from the power source to ensure your safety.
  2. Remove shelves and drawers:Take out all removable shelves, drawers, and compartments from your refrigerator and freezer. These can be washed separately for a thorough clean.
  3. Use a gentle cleaner:Choose a mild cleaner or make a mixture of warm water and dish soap to clean the interior of your refrigerator and freezer. Avoid using harsh chemicals that may damage the surfaces.
  4. Wipe down surfaces:Start by wiping down the inside surfaces of your refrigerator and freezer with a soft cloth or sponge. Pay special attention to areas with spills or stains. Don’t forget to clean the door seals and handles as well.
  5. Clean shelves and drawers:Wash the removable shelves, drawers, and compartments with warm, soapy water. You can use a brush to scrub off any stubborn stains or residue. Rinse them thoroughly before placing them back in your appliances.
  6. Defrost the freezer:If your freezer has built-up ice, it’s important to defrost it. Turn off the freezer and let the ice melt naturally. Use towels to soak up the water or place a tray underneath to catch the melting ice.
  7. Vacuum the condenser coils:The condenser coils, located at the back or bottom of your refrigerator, can accumulate dust and debris over time. Use a vacuum cleaner with a brush attachment to gently remove any buildup and improve the efficiency of your appliance.
  8. Check the door gaskets:Inspect the door gaskets for any signs of wear or damage. Wipe them down with warm, soapy water and ensure a tight seal when closing the doors. Replace the gaskets if necessary.
  9. Maintain proper organization:After cleaning your refrigerator and freezer, organize the contents properly. Store leftovers in airtight containers, dispose of expired items, and make sure similar items are grouped together for easy access.
  10. Clean the exterior:Lastly, don’t forget to clean the exterior of your refrigerator and freezer. Wipe down the doors, handles, and control panels with a suitable cleaner. Polish stainless steel surfaces using a microfiber cloth and stainless steel cleaner.

By following these tips for cleaning your refrigerator and freezer regularly, you can ensure their optimal performance, prevent odors, and maintain a safe and hygienic kitchen environment.

How to Clean Dishwasher – Easy and Effective Methods

Keeping your dishwasher clean is essential for maintaining its performance and ensuring that your dishes come out spotless every time. Here are some easy and effective methods for cleaning your dishwasher:

1. Regular Cleaning

Regularly cleaning your dishwasher helps prevent build-up and ensures optimal performance. Follow these steps:

  1. Remove any large food particles or debris from the dishwasher’s filter and drain.
  2. Wipe down the interior of the dishwasher with a damp cloth or sponge to remove any dirt or residue.
  3. Run an empty cycle with a dishwasher cleaner or a cup of white vinegar to eliminate odors and remove stains.
  4. Once the cycle is complete, wipe down the interior again and make sure all areas are clean and dry.

2. Deep Cleaning

Deep cleaning your dishwasher is recommended every few months to remove stubborn stains and hard water deposits. Follow these steps:

  1. Remove the racks and any removable parts, such as the spray arms or silverware basket.
  2. Soak the removable parts in warm soapy water and scrub them with a brush to remove any debris or mineral deposits.
  3. Use a toothbrush or a small brush to clean around the door gasket and other hard-to-reach areas.
  4. Run a deep cleaning cycle with a dishwasher cleaner specifically designed for removing mineral deposits.
  5. Once the cycle is complete, reassemble the dishwasher and wipe down the interior to make sure it is clean and dry.

Following these easy and effective methods for cleaning your dishwasher will help keep it in optimal condition and ensure that your dishes come out clean and sparkling every time.

Best Practices for Cleaning Microwave

Cleaning your microwave regularly is essential for maintaining its performance and preventing the buildup of food residue or odors. By following these best practices, you can ensure that your microwave stays clean and functional for years to come.

  1. Wipe down the interior:Start by removing any loose debris or food particles from the interior of your microwave. Use a damp cloth or sponge to wipe down the walls, ceiling, and floor of the microwave. Avoid using abrasive cleaners or scrub brushes that can damage the interior surface.
  2. Remove and clean the turntable:If your microwave has a removable turntable, take it out and wash it with warm, soapy water. Rinse it thoroughly and dry it before placing it back in the microwave. This will help to prevent any food residue from building up on the turntable.
  3. Clean the door and control panel:Use a gentle cleaner and a soft cloth to wipe down the exterior of the microwave, including the door and control panel. Take care not to get the control panel wet, as this can cause damage to the electronics.
  4. Steam clean:To remove stubborn stains and odors, you can steam clean your microwave. Fill a microwave-safe bowl with water and add a few slices of lemon or a tablespoon of vinegar. Heat the bowl in the microwave for several minutes until the water comes to a boil. The steam will help to loosen any dried-on food, making it easier to wipe away.
  5. Freshen with baking soda:If your microwave has lingering odors, you can freshen it up by placing a small container of baking soda inside. Leave it in the microwave overnight, and the baking soda will absorb any unwanted smells.
  6. Regular maintenance:Make it a habit to wipe down your microwave after each use to prevent the buildup of food residue. Additionally, avoid using metal or aluminum foil in the microwave, as these can cause sparks and damage the interior.

By following these best practices for cleaning your microwave, you can ensure that it remains in optimal condition and continues to provide you with delicious meals for years to come.

Cleaning Small Appliances: Coffee Maker, Blender, and Toaster

Small kitchen appliances such as coffee makers, blenders, and toasters are essential for our daily routines. However, they can quickly accumulate dirt, grease, and grime if not cleaned regularly. In this section, we will guide you on how to clean these small appliances effectively, ensuring their longevity and optimal performance.

1. Cleaning a Coffee Maker

Coffee makers can accumulate mineral deposits and coffee residue over time, affecting the taste and quality of your brew. Here’s how you can clean your coffee maker:

  1. Begin by removing and washing the carafe, filter, and filter basket with warm soapy water. Rinse them thoroughly and set them aside to dry.
  2. Fill the water reservoir halfway with equal parts of white vinegar and water. Run a brew cycle without any coffee grounds. This will help remove mineral deposits.
  3. Once the brew cycle is complete, discard the vinegar-water mixture, and run another brew cycle with just water to rinse the machine.
  4. Finally, clean the exterior of the coffee maker with a damp cloth or sponge. Pay attention to any built-up stains or spills.

2. Cleaning a Blender

Blenders can accumulate food debris and odors, especially if used for blending strong-flavored ingredients. Follow these steps to clean your blender:

  1. Start by unplugging the blender and disassembling it. Remove the blades, sealing gasket, and any other detachable parts.
  2. Wash the detachable parts with warm soapy water, using a sponge or brush to remove any stuck-on food particles. Rinse them thoroughly.
  3. For the blender jar, fill it halfway with warm water and add a few drops of dish soap. Use a brush or sponge to clean the interior of the jar thoroughly.
  4. Rinse the blender jar with clean water, ensuring all soap residue is removed.
  5. Dry all the parts and reassemble the blender.

3. Cleaning a Toaster

Toasters can accumulate crumbs and greasy residue, which can affect their performance and even pose a fire hazard. Follow these steps to clean your toaster:

  1. Start by unplugging the toaster and removing the crumb tray, if applicable. Dispose of any crumbs.
  2. Turn the toaster upside down and gently shake to remove any loose crumbs.
  3. Clean the exterior of the toaster with a damp cloth or sponge. Use a mild cleaning solution for stubborn stains.
  4. For stainless steel toasters, use a stainless steel cleaner or a mixture of vinegar and water to remove fingerprints and smudges.
  5. Allow all the parts to dry completely before reassembling the toaster.

By regularly cleaning your small kitchen appliances like coffee makers, blenders, and toasters, you can ensure their longevity and maintain their performance. Remember to always refer to the manufacturer’s instructions for specific cleaning recommendations.

Maintaining the Cleanliness of Kitchen Appliances

Keeping your kitchen appliances clean is essential for their longevity and optimal performance. By following some simple tips and incorporating regular cleaning into your routine, you can ensure that your appliances stay in top condition. Here are some guidelines to help you maintain the cleanliness of your kitchen appliances:

1. Refrigerator

  • Regularly clean the interior of the refrigerator by removing all the food items and wiping down the shelves and drawers with a mild detergent and water solution.
  • Wipe the exterior of the refrigerator with a damp cloth to remove any spills or stains.
  • Remove and clean the refrigerator’s condenser coils at least twice a year to prevent dust buildup and improve energy efficiency.
  • Check the door seals regularly and clean them with a mixture of baking soda and water to maintain their effectiveness.

2. Oven and Stovetop

  • For regular oven cleaning, remove the oven racks and clean them separately using warm soapy water.
  • Use a commercial oven cleaner or a mixture of baking soda and water to clean the interior of the oven.
  • Wipe down the stovetop with a damp cloth or sponge after each use to prevent grease buildup.
  • For stubborn stains and grease, use a non-abrasive cleaner or a paste made from baking soda and water.

3. Dishwasher

  • Empty the dishwasher and remove any food debris before starting the cleaning process.
  • Use a dishwasher cleaner or run a cycle with white vinegar to remove any buildup or odors.
  • Wipe down the exterior of the dishwasher with a damp cloth or sponge to remove any grime or stains.
  • Regularly clean and unclog the dishwasher filter to ensure optimal performance.

Remember, regular cleaning and proper maintenance of your kitchen appliances not only keeps them looking great but also helps to extend their lifespan and efficiency. Incorporate these cleaning tasks into your routine to enjoy a clean and functional kitchen for years to come.

FAQ: Kitchen Appliances Cleaning Guide

How often should I clean my kitchen appliances?

It is recommended to clean your kitchen appliances once a week to maintain their functionality and appearance.

What is the best way to clean a microwave?

To clean a microwave, start by wiping the interior with a damp cloth to remove any loose debris. Then, mix a solution of equal parts water and vinegar in a microwave-safe bowl and heat it for 5 minutes. This will create some steam that will help loosen any stuck-on grime. Afterward, carefully remove the bowl and wipe down the interior with a sponge or cloth.

How can I clean my coffee maker?

To clean a coffee maker, start by emptying any remaining coffee grounds from the filter or pod. Then, mix equal parts water and vinegar and pour it into the water reservoir. Run a brew cycle with the vinegar mixture, and halfway through, turn off the coffee maker and let it sit for about 10 minutes. After the 10 minutes, turn it back on and let the cycle finish. Finally, run a couple of cycles with just water to rinse out any leftover vinegar taste.

What is the best way to clean a blender?

To clean a blender, start by filling it halfway with warm water and a few drops of dish soap. Put the lid on and blend it on high for 30 seconds. Then, remove the lid and rinse the blender thoroughly with warm water. If there are any stubborn stains or residue, you can use a soft sponge or brush to scrub them away. Just be careful not to scrub too hard and scratch the blender jar.

How can I maintain the cleanliness of my dryer for optimal performance?

To maintain the cleanliness of your dryer for optimal performance, regularly clean the lint trap after each use and periodically clean the exhaust vent to prevent lint buildup. Additionally, wipe down the exterior of the dryer with a damp cloth to remove any dust or debris.

What steps should I take to clean my washing machine and ensure it functions efficiently?

To clean your washing machine and ensure it functions efficiently, run a cleaning cycle with vinegar or a washing machine cleaner to remove any residue or buildup. Additionally, wipe down the exterior of the machine and clean the detergent dispenser drawer regularly.

How can I find the best appliance cleaning service for my needs?

To find the best appliance cleaning service for your needs, research reputable companies in your area and read reviews from previous customers. Look for a company that offers a range of services, uses eco-friendly cleaning products, and provides free estimates.

What are the benefits of professional appliance cleaning for my cooktop and oven?

Professional appliance cleaning for your cooktop and oven can help remove stubborn grease and food residue, improve energy efficiency, and prolong the lifespan of your appliances. Additionally, professional cleaners have the expertise and tools to ensure a thorough and effective cleaning.

How often should I clean the inside of my oven to maintain optimal performance?

To maintain optimal performance, it’s recommended to clean the inside of your oven regularly, ideally every three to six months, depending on how frequently you use it. This helps prevent buildup of food residue and grease, which can affect cooking performance and produce unpleasant odors.

What are the benefits of hiring a professional appliance cleaning service for my kitchen appliances?

Hiring a professional appliance cleaning service for your kitchen appliances can save you time and effort, ensure a thorough and effective cleaning, and help maintain the appearance and performance of your appliances. Additionally, professional cleaners use specialized equipment and techniques to achieve superior results.

How can I learn how to clean my home appliances effectively?

You can learn how to clean your home appliances effectively by researching online tutorials, reading appliance care manuals, or consulting with professional cleaners. Additionally, many appliance manufacturers provide guidelines and recommendations for cleaning and maintenance.

Why is routine maintenance and care important for residential and commercial appliances?

Routine maintenance and care are important for residential and commercial appliances to ensure optimal performance, prevent breakdowns, and prolong the lifespan of the appliances. Regular cleaning and maintenance help keep appliances running smoothly and reduce the need for costly repairs.

What are some common cleaning needs for home appliances?

Common cleaning needs for home appliances include removing food residue and grease from ovens and cooktops, cleaning lint traps and exhaust vents in dryers, and descaling washing machine drums and detergent dispensers. Additionally, wiping down the exterior of appliances helps maintain their appearance and cleanliness.

How can I contact a professional cleaning service to meet my appliance cleaning needs?

You can contact a professional cleaning service to meet your appliance cleaning needs by researching companies in your area and reaching out for a free estimate. Look for companies that offer comprehensive cleaning services for a range of appliances and provide convenient scheduling options.

How can I ensure my kitchen appliances receive proper care and cleaning?

To ensure your kitchen appliances receive proper care and cleaning, regularly wipe down the exterior with soap and water, clean the interior components as needed, and schedule professional appliance cleaners for thorough maintenance.

What are the benefits of hiring a professional oven cleaning service for my kitchen?

Hiring a professional oven cleaning service for your kitchen offers numerous benefits, including thorough cleaning of both the interior and exterior, removal of stubborn grease and food residue, and improved energy efficiency of your oven.

How can I incorporate appliance care and cleaning into my spring cleaning routine?

To incorporate appliance care and cleaning into your spring cleaning routine, create a checklist of tasks for each appliance, such as wiping down surfaces, cleaning filters, and inspecting for signs of wear. Schedule professional cleaners for deeper maintenance as needed.

What steps should I take to ensure my laundry appliances remain in top condition?

To ensure your laundry appliances remain in top condition, clean the lint trap after each use, periodically clean the inside and outside of the machines with soap and water, and schedule professional appliance repair or maintenance as needed.

How can I contact a company that provides professional appliance repair and cleaning services?

You can contact a company that provides professional appliance repair and cleaning services by visiting their website and filling out a contact form, calling their office directly, or sending an email to request more information or schedule an appointment.

Why is it important to clean both the inside and outside of my appliances regularly?

Cleaning both the inside and outside of your appliances regularly is important for maintaining their appearance, functionality, and longevity. Dust, grease, and debris can accumulate on exterior surfaces, while food residue and grime can build up inside, affecting performance and efficiency. Regular cleaning helps prevent these issues and ensures your appliances continue to run smoothly.


Refrigerator Not Cooling? Quick Tips to Fix Common Refrigerator Problems

Is your refrigerator not staying cool? Don’t panic! We’ve got you covered with some easy solutions to common refrigerator problems. Whether your refrigerator is not cooling at all or is not cooling enough, we have the answers you need to get it back to its optimal cooling performance.

Firstly, check the temperature settings. It’s possible that the temperature control knob or digital display might have been accidentally adjusted. Make sure the refrigerator is set to the recommended temperature for food storage, which is typically between 35°F (1.7°C) and 38°F (3.3°C). If it’s set too high or too low, adjust it accordingly and wait a few hours to see if the cooling improves.

Secondly, examine the refrigerator’s condenser coils. These coils are usually located at the back or underneath the fridge and can accumulate dust and debris over time. This can obstruct the heat transfer process and prevent proper cooling. Use a vacuum cleaner or a brush to gently clean the coils and remove any accumulated dirt. This simple maintenance task can work wonders for your refrigerator’s cooling efficiency.

Thirdly, ensure that the refrigerator’s door seals are in good condition. If the seals are worn out or damaged, warm air can enter the fridge, causing it to work harder and struggle to maintain the desired temperature. Check the seals for any signs of wear or gaps. If necessary, replace them with new ones to create an airtight seal. This small step can make a big difference in your refrigerator’s cooling performance.

Finally, if none of these solutions seem to fix the problem, it’s time to call a professional technician. They will be able to diagnose the issue and determine if any parts need to be repaired or replaced. Remember, attempting advanced repairs without proper knowledge can further damage your refrigerator.

Don’t let a malfunctioning refrigerator spoil your food or inconvenience your daily life. With these easy solutions, you can get your refrigerator cooling again and keep your groceries fresh for longer. Take action today and enjoy the benefits of a properly functioning refrigerator!

Common Refrigerator Problems

Refrigerators are one of the hardest working appliances in our homes, and these machines can sometimes experience issues that prevent them from keeping our food cool. Here are some common refrigerator problems you may encounter:

  1. No cooling: If your refrigerator fails to keep the food cool, check the temperature settings first. It’s possible that someone accidentally changed the settings, causing the lack of cooling. If the settings are correct, check the condenser coils for dust and debris. Dirty coils can prevent proper cooling.
  2. Excessive cooling: On the opposite end of the spectrum, if your refrigerator is freezing your food, the temperature settings may be too low. Adjust the settings and give the unit some time to stabilize. If the problem persists, the thermostat or temperature control board may be faulty.
  3. Water leakage: If you notice water pooling around your refrigerator, it could be due to a clogged or frozen defrost drain. This can prevent the water from properly draining out of the unit. Try clearing the drain with a mixture of hot water and mild detergent.
  4. Strange noises: Unusual noises coming from your refrigerator can indicate a problem. Rattling or banging sounds may suggest a loose or worn-out compressor fan. Grinding or squealing noises may be a sign of a faulty motor. If you encounter any strange noises, it’s best to have a professional technician inspect the appliance.
  5. Ice maker problems: If your refrigerator includes an ice maker, you may occasionally encounter issues with it. Common problems include ice cubes not ejecting or the ice maker not producing any ice. Check the water supply line for any obstructions, and ensure the ice maker is properly connected and receiving power.

Remember, if you’re unsure about how to fix any issues with your refrigerator, it’s always best to consult a professional appliance technician. They have the knowledge and experience to diagnose and repair problems safely and efficiently.

Refrigerator Not Cooling: Possible Causes

If your refrigerator is not cooling properly, there could be several potential causes. It’s important to troubleshoot and identify the issue in order to fix it and get your refrigerator cooling again. Here are some possible reasons why your refrigerator may not be cooling:

1. Dirty Condenser Coils

One common cause of a refrigerator not cooling is dirty condenser coils. Over time, dust and debris can accumulate on the coils, preventing the refrigerator from dissipating heat properly. To fix this issue, you can use a vacuum cleaner or a brush to clean the coils and ensure proper airflow.

2. Faulty Evaporator Fan Motor

The evaporator fan motor plays a crucial role in circulating cold air throughout the refrigerator. If this motor becomes faulty or stops working, it can lead to a lack of cooling. To determine if the fan motor is the issue, you can listen for any unusual noises coming from the refrigerator or check if the fan is spinning. If necessary, you may need to replace the motor to restore proper cooling.

3. Defective Thermostat

A defective thermostat can also cause a refrigerator to not cool properly. The thermostat controls the temperature inside the refrigerator and if it malfunctions, it may not signal the compressor to run, preventing the refrigerator from reaching the desired temperature. In this case, you may need to replace the thermostat to resolve the issue.

4. Insufficient Refrigerant

If your refrigerator is low on refrigerant, it can lead to insufficient cooling. A refrigerant leak or improper installation can cause this issue. It’s important to contact a professional technician to inspect and fix any refrigerant-related problems as handling refrigerant requires specialized knowledge and equipment.

5. Blocked or Damaged Air Vents

Blocked or damaged air vents can limit the airflow inside the refrigerator, disrupting the cooling process. Make sure to check if any items are blocking the vents and remove them if necessary. Additionally, inspect the vents for any signs of damage and replace them if needed.

In conclusion, a refrigerator not cooling properly can be caused by various factors including dirty condenser coils, a faulty evaporator fan motor, a defective thermostat, insufficient refrigerant, or blocked/damaged air vents. By identifying and addressing the specific issue, you can fix the problem and restore your refrigerator’s cooling capabilities. If you’re unsure about the cause or unable to fix the problem yourself, it’s recommended to seek professional assistance.

Possible Causes
Dirty condenser coils
Faulty evaporator fan motor
Defective thermostat
Insufficient refrigerant
Blocked or damaged air vents

How to Diagnose Refrigerator Problems?

If your refrigerator is not cooling properly or is experiencing other issues, it can be frustrating and inconvenient. However, diagnosing the problem and finding a solution doesn’t have to be difficult. By following these steps, you can quickly and easily identify common refrigerator problems:

  1. Check the power supply: Ensure that your refrigerator is properly plugged in and that the power outlet is functioning correctly. Additionally, check the circuit breaker or fuse to make sure there are no power interruptions.
  2. Inspect the temperature settings: Make sure that the temperature settings on your refrigerator are set correctly. If the temperature is set too high or too low, the unit may not cool properly.
  3. Test the door seals: Check the rubber seals around the refrigerator doors for any cracks, tears, or gaps. Damaged door seals can allow warm air to enter the refrigerator, affecting its cooling efficiency.
  4. Clean the condenser coils: Dust and dirt can accumulate on the condenser coils, reducing their efficiency and causing the refrigerator to work harder to cool. Use a vacuum or a soft brush to remove any debris and improve airflow.
  5. Check the freezer vents: Make sure that the vents in the freezer compartment are not blocked by food items. Blocked vents can restrict airflow and impact the refrigerator’s cooling ability.
  6. Listen for unusual noises: If you notice any unusual noises coming from your refrigerator, such as grinding, clicking, or buzzing sounds, it may indicate a problem with the compressor or other components. Contact a professional technician for further diagnosis and repair.
  7. Test the defrost system: If you find excessive frost or ice buildup in the freezer compartment, it could indicate a problem with the defrost system. Consult the refrigerator’s manual for instructions on how to manually defrost the unit or contact a professional for assistance.

By performing these checks and troubleshooting steps, you can often identify and resolve common refrigerator problems without the need for professional help. However, if the issue persists or you are unsure about performing any repairs yourself, it is recommended to contact a qualified technician for assistance.

Quick and Easy Fixes for a Refrigerator Not Cooling

If you’ve noticed that your refrigerator is no longer cooling properly, it can be a frustrating issue to deal with. However, there are a few quick and easy fixes that you can try before calling a professional. These simple solutions may save you time and money.

Check the Temperature Settings

One of the first things you should do when your refrigerator isn’t cooling is to check the temperature settings. Sometimes, the temperature control dial or buttons can accidentally get adjusted, causing the fridge to warm up. Make sure that the temperature is set to the recommended level for optimal cooling. Typically, the ideal temperature range for a refrigerator is between 35 and 38 degrees Fahrenheit (2 and 3 degrees Celsius).

Clean the Condenser Coils

Over time, dust and dirt can accumulate on the condenser coils located on the back or bottom of your refrigerator. When these coils are coated in debris, they can’t efficiently release heat, which can lead to cooling problems. To fix this issue, unplug the refrigerator and use a vacuum cleaner or a brush to gently clean the coils. Be cautious and gentle to avoid damaging the coils.

In addition to cleaning the coils, it’s also important to ensure that there is proper airflow around the refrigerator. Make sure that nothing is blocking the vents or hindering the circulation of air. Keeping the coils clean and the airflow unobstructed can significantly improve the cooling performance of your refrigerator.

If these quick fixes don’t solve the problem and your refrigerator still isn’t cooling properly, it may be time to call a professional technician. They can diagnose and repair more complex issues such as a malfunctioning compressor or a refrigerant leak. Remember, always prioritize safety and consult the manufacturer’s manual or seek professional help if you’re unsure about any repair steps.

Refrigerator Cooling Again: Tips and Tricks

Is your refrigerator not cooling properly? Don’t worry! We have some easy tips and tricks to get your refrigerator cooling again in no time. Follow these suggestions to troubleshoot the problem and fix it yourself.

Clean the Condenser Coils

Dirty condenser coils can prevent your refrigerator from cooling efficiently. Over time, dust and debris can accumulate on the coils, causing them to become less effective. To clean the coils, first, unplug the refrigerator. Locate the coils either at the back or underneath the unit. Use a vacuum cleaner with a brush attachment or a coil brush to gently remove the dirt and dust.

Check the Temperature Settings

Make sure that the temperature settings in your refrigerator are set correctly. The ideal temperature for a refrigerator is between 35 and 38 degrees Fahrenheit (2 and 3 degrees Celsius). If the temperature is too high, adjust it accordingly and wait for a few hours to see if the cooling improves.

Issue Possible Solution
Frost build-up in the freezer Defrost the freezer by turning it off and letting the ice melt. Clean any excess water and turn it back on.
Door doesn’t close properly Check for any obstructions in the door seal and clean it. If necessary, adjust the door hinges or replace the seal.
Frequent power outages Invest in a power surge protector or a battery backup to protect your refrigerator from sudden power interruptions.
Blocked vents or air circulation Make sure that there is sufficient space around the refrigerator for proper air circulation. Clear any obstructions, both inside and outside.

If none of these tips solve the cooling issue, it may be time to call a professional technician to assess and repair the problem. They will have the expertise and tools necessary to diagnose the issue and fix it correctly.

When to Call a Refrigerator Repair Professional?

While many refrigerator problems can be fixed with simple solutions, there are times when it’s best to call a professional for help. Here are some situations when you should consider contacting a refrigerator repair professional:

  • Strange noises: If your refrigerator is making loud or unusual noises, such as humming, buzzing, or rattling, it’s a sign that something is not right. A professional can diagnose and fix the problem before it gets worse.
  • Leaking water: If you notice water pooling around or inside your refrigerator, there could be a problem with the water line or the defrost drain. A professional can identify the source of the leak and repair it properly.
  • Constant cycling: If your refrigerator seems to be constantly running or cycling on and off, it could be a sign of a faulty thermostat or compressor. A professional can determine the cause and replace any necessary parts.
  • Temperature fluctuations: If your refrigerator’s temperature is not consistent, it can lead to spoilage of food. A professional can check the temperature control system and ensure that it is working properly to maintain the desired temperature.
  • Frost buildup: If you notice excessive frost or ice buildup in your refrigerator or freezer, it could indicate a problem with the defrost system. A professional can identify the issue and fix it to prevent further frost accumulation.
  • Electrical issues: If your refrigerator is not receiving power or experiencing frequent power outages, it could be due to electrical problems. A professional can diagnose the issue and make any necessary electrical repairs.

Remember, attempting to fix complex refrigerator problems without the proper knowledge and tools can be dangerous and may cause further damage. In these situations, it’s best to rely on the expertise of a refrigerator repair professional to ensure a safe and effective repair.

Preventive Maintenance for Your Refrigerator

Regular preventive maintenance is essential to keep your refrigerator running smoothly and extend its lifespan. By following these simple steps, you can avoid major problems and costly repairs.

  1. Clean the condenser coils: Over time, dust and debris can accumulate on the condenser coils, causing the refrigerator to work harder and consume more energy. Use a vacuum cleaner or a brush to gently remove the dirt and ensure that the coils are clean and free from any obstructions.
  2. Check the door seals: Faulty door seals can lead to air leaks, causing your refrigerator to work harder and preventing it from cooling properly. Inspect the seals for any signs of damage or gaps. If necessary, clean them with warm soapy water and replace any worn-out or torn seals.
  3. Keep the temperature consistent: Fluctuating temperatures can affect the overall performance of your refrigerator. Ensure that the temperature is set correctly and monitor it regularly. Avoid opening the door frequently and limit the amount of warm food you put inside, as this can raise the internal temperature and strain the cooling system.
  4. Clean the interior: Regularly clean the shelves, drawers, and compartments of your refrigerator. Remove any spoiled or expired food and wipe down the surfaces with a mild detergent. This will help prevent odors and maintain a hygienic environment inside the fridge.
  5. Defrost the freezer: If your refrigerator has a freezer compartment, it’s important to defrost it regularly. Ice buildup can restrict airflow and affect the cooling performance. Follow the manufacturer’s instructions to defrost the freezer and remove any ice or frost that has accumulated.
  6. Keep the fridge well-ventilated: Ensure that there is enough space around the refrigerator for proper ventilation. Dust and debris can accumulate on the back of the appliance, obstructing airflow and affecting cooling efficiency. Regularly vacuum or dust the area behind the refrigerator to keep it clean.

By taking these preventive maintenance steps, you can keep your refrigerator running smoothly and avoid unexpected breakdowns. Remember to consult the manufacturer’s guidelines for any specific maintenance requirements for your model.

Q&A: How to Fix Fridge Problems

My refrigerator is not cooling properly. What could be the problem?

There are several possible reasons why your refrigerator may not be cooling properly. One possibility is that the condenser coils are dirty and need to be cleaned. Another possibility is that the evaporator fan motor is not running properly. It could also be a problem with the thermostat, the door seal, or the compressor. It’s best to troubleshoot and identify the specific issue before attempting any repairs.

How often should I clean the condenser coils of my refrigerator?

It is recommended to clean the condenser coils of your refrigerator at least once a year. However, if you have pets that shed a lot or if you live in a dusty environment, you may need to clean the coils more frequently. Dirty condenser coils can make the refrigerator work harder and can lead to cooling problems, so regular cleaning is important for optimal performance.

The freezer section of my refrigerator is too cold, but the refrigerator section is not cool enough. What should I do?

If the freezer section of your refrigerator is too cold while the refrigerator section is not cool enough, it could be a problem with the airflow. Check to see if there is any obstruction in the vents that could be preventing air from circulating properly between the two sections. Also, make sure that the thermostat settings are correct. If these troubleshooting steps do not solve the problem, it’s best to call a professional technician to diagnose and repair the issue.

My refrigerator is making loud noises. What could be causing this?

There are several possible reasons why your refrigerator may be making loud noises. One common cause is a faulty condenser fan motor, which can create a buzzing or rattling noise. Another possible cause is a worn-out evaporator fan motor. If the noise is more of a hissing or gurgling sound, it could indicate a problem with the refrigerant. It’s best to have a professional technician diagnose and fix the issue to ensure proper functioning of your refrigerator.

What should I do if my refrigerator’s water dispenser is not working properly?

If your refrigerator’s water dispenser is malfunctioning, it could be due to a clogged or frozen water supply line. Try using warm water to thaw out any ice blockages, and check for any kinks or obstructions in the water line that may need to be replaced.

What are the most common reasons for warm water coming out of the refrigerator dispenser?

Warm water from the refrigerator dispenser is often caused by a faulty water inlet valve. This component controls the flow of water into the dispenser and may need to be replaced if it is malfunctioning.

How can I troubleshoot common refrigerator problems without calling an appliance repair technician?

There are several common refrigerator issues that can be easily fixed without the need for a repair technician. These include checking the temperature settings, cleaning the coils, and ensuring proper ventilation around the fridge and freezer.

What are 7 common refrigerator problems and how can I fix them myself?

Some of the most common refrigerator problems include a fridge that isn’t cooling properly, a leaking refrigerator, and a malfunctioning water dispenser. Solutions may involve cleaning the coils, replacing the water inlet valve, or thawing out a clogged water line.

What should I do if my refrigerator is leaking water?

If your refrigerator is leaking water, unplug the fridge and check for any visible leaks or blockages. Replace the water inlet valve if necessary, and ensure that the refrigerator is properly leveled to prevent leaks.

How can I troubleshoot a fridge that isn’t cooling properly?

If your fridge isn’t cooling properly, start by checking the temperature settings and cleaning the coils. Ensure that the vents inside the appliance are not blocked and that the door seals are in good condition. If the problem persists, you may need to call a professional refrigerator repair technician.

What steps should I take if my fridge is still not cooling after troubleshooting?

If your fridge is still not cooling properly after troubleshooting, it may indicate a more serious issue that requires professional attention. Contact a refrigerator repair technician to diagnose and repair the problem.

What are some common refrigerator issues that can be fixed by simply unplugging the fridge and plugging it back in?

Common refrigerator issues such as erratic temperature fluctuations or malfunctioning sensors can sometimes be resolved by unplugging the fridge and plugging it back in. This can reset the appliance’s internal systems and resolve minor issues.

Where should I check for leaks if my refrigerator is leaking water?

If your refrigerator is leaking water, check behind the fridge and at the bottom of the appliance for any signs of leaks. Inspect the water supply line, water inlet valve, and drainage pan for any damage or obstructions that may be causing the leak.

When should I consider calling a professional refrigerator repair technician?

If you have tried troubleshooting common refrigerator problems and the issue persists, or if you are unsure of how to safely repair the appliance yourself, it’s best to call a professional refrigerator repair technician. They have the knowledge and expertise to diagnose and fix more complex issues, ensuring that your fridge is restored to optimal working condition.

What steps should I take if I notice water leaking from the bottom of my fridge?

If you notice water leaking from the bottom of your fridge, start by unplugging the appliance and carefully inspecting the water supply line, drainage pan, and water inlet valve for any damage or blockages. Clean or replace any components as needed to prevent further leaks.

How can I troubleshoot common issues with my refrigerator door not sealing properly?

If you’re experiencing issues with your refrigerator door not sealing properly, check the door seals for any damage or wear. Replace the seals if necessary, and ensure that the door is properly aligned and closes tightly to prevent temperature fluctuations and energy inefficiency.

What should I do if my fridge is not cooling properly and basic troubleshooting steps don’t resolve the issue?

If your fridge is not cooling properly despite basic troubleshooting steps, it may indicate a more serious issue that requires professional attention. Contact a refrigerator repair service to diagnose and fix the problem, which may involve repairing or replacing malfunctioning components.

Is it advisable to unplug my fridge as a troubleshooting step for common issues like temperature fluctuations?

Yes, unplugging your fridge can be an effective troubleshooting step for common issues like temperature fluctuations. This allows the appliance’s internal systems to reset and may resolve minor issues. However, if the problem persists, it’s best to seek professional repair service for further evaluation.

Simple Solutions to Resolve Wolf Oven Not Heating Issues

If you own a Wolf oven, you know how frustrating it can be when it suddenly stops heating. A malfunctioning oven can disrupt your cooking routine and even ruin a perfectly good meal. However, before you panic and call a technician, there are some quick fixes you can try to get your Wolf oven back in working order.

Check the Power Supply

The first thing you should do is check the power supply to your oven. Make sure the oven is plugged in securely and that the circuit breaker or fuse hasn’t tripped or blown. Sometimes, a loose connection or a power outage can cause the oven to stop heating. If everything seems to be in order, move on to the next step.

Inspect the Heating Elements

The heating elements in your Wolf oven are responsible for generating the heat necessary for cooking. If one or more of the heating elements are not working, it could be the reason why your oven is not heating. Carefully inspect each heating element for any signs of damage or corrosion. If you notice any issues, they may need to be replaced.

Reset the Oven

If checking the power supply and inspecting the heating elements didn’t solve the problem, try resetting your oven. Locate the oven’s reset switch, which is usually found on the control panel. Press and hold the reset switch for a few seconds, then release it. This will reset the oven’s electronics and may resolve any minor issues that were causing the oven not to heat.

Call a Professional

If none of the above quick fixes work, it may be time to call a professional technician. They will have the necessary knowledge and tools to diagnose and fix the problem with your Wolf oven. Trying to repair the oven yourself without the proper expertise can be dangerous and may void your warranty.

In conclusion, a Wolf oven not heating can be a frustrating problem to deal with. However, by checking the power supply, inspecting the heating elements, resetting the oven, and calling a professional if necessary, you can quickly resolve the issue and get back to enjoying delicious meals cooked in your reliable Wolf oven.

Common Wolf Oven Problems

While Wolf ovens are known for their quality and durability, like any appliance, they can experience issues from time to time. Understanding common problems that may arise with your Wolf oven can help you troubleshoot and find solutions quickly.

1. Oven Not Heating

One common issue is an oven not heating properly or not heating at all. This can be caused by a malfunctioning heating element, a faulty thermostat, or a problem with the control board. Check the heating element for any signs of damage, such as visible cracks or breaks. If the element looks fine, you may need to replace the thermostat or seek professional assistance to diagnose and fix the issue.

2. Uneven Temperature

If your Wolf oven is heating unevenly, with some areas cooking faster than others, there may be an issue with the convection fan or the oven’s calibration. Make sure the convection fan is working properly and not obstructed. You can also try recalibrating the oven to ensure the temperature is accurately displayed and maintained. Refer to your Wolf oven’s manual for instructions on how to recalibrate the temperature.

Remember, if you are unsure about how to troubleshoot or fix any of these common problems with your Wolf oven, it is always best to consult a professional technician or contact Wolf customer service for assistance. They have the expertise and knowledge to help you resolve any issues and get your Wolf oven back up and running smoothly.

Wolf Oven Not Heating

If your Wolf oven is not heating up, it can be frustrating and put a damper on your cooking plans. However, there are several quick fixes you can try before calling a professional technician. Here are some troubleshooting tips to help you get your Wolf oven heating up again:

Check the Power Source

First, make sure that the oven is receiving power. Check if the oven is plugged in properly or if there are any tripped circuit breakers or blown fuses. If needed, reset the circuit breaker or replace the fuse.

Inspect the Igniter

The igniter is an important part of the oven that is responsible for igniting the gas and starting the heating process. If the igniter is not working, the oven will not heat up. Inspect the igniter for signs of damage or wear. It should glow red or orange when heating. If the igniter is not glowing, it may need to be replaced.

Clean the Oven

Over time, food debris, grease, and other residues can accumulate in the oven and affect its performance. Remove any food spills or debris from the oven cavity, racks, and burners. Clean the oven with a mild detergent and water, following the manufacturer’s instructions.

If the oven still does not heat up after trying these quick fixes, it may be necessary to contact a professional technician for further assistance. They can diagnose and repair any underlying issues with your Wolf oven.

Troubleshooting Wolf Oven Not Heating

If you’re experiencing issues with your Wolf oven not heating up, there are a few troubleshooting steps you can take before contacting a professional appliance repair service. The following are some common causes and solutions for a Wolf oven that is not heating properly:

1. Check the Power Supply

The first step is to ensure that the oven is receiving power. Check if the oven is plugged in properly and if the circuit breaker or fuse for the oven is not tripped. If the oven is connected to a plugged outlet, try plugging in another appliance to see if the outlet is functioning correctly.

2. Inspect the Heating Elements

If the oven is getting power but still not heating up, it’s possible that one or more of the heating elements may be faulty. Use caution and make sure the oven is turned off before inspecting the elements. Look for signs of damage or burning, such as visible cracks or breaks. If you find any issues with the heating elements, they will need to be replaced.

3. Test the Oven Temperature Sensor

The oven temperature sensor ensures that the oven reaches and maintains the set temperature. If the sensor is faulty, it may be causing the oven not to heat properly. To test the sensor, you will need a multimeter. Disconnect the sensor from the oven and use the multimeter to check its resistance. If the sensor’s resistance reading is significantly different from the appropriate range, it should be replaced.

4. Reset the Oven

In some cases, a simple reset can fix minor issues with the oven not heating. Turn off the oven and unplug it from the power source. Wait for a few minutes, then plug it back in and turn it on. This can help reset the oven’s internal components and potentially resolve the heating issue.

5. Call a Professional

If you’ve tried the above steps and your Wolf oven still isn’t heating properly, it’s best to contact a professional appliance repair service. They will have the expertise and specialized tools to diagnose and fix the problem correctly. Attempting to repair the oven yourself without the necessary knowledge and experience can lead to further damage or even safety hazards.

By following these troubleshooting steps, you can hopefully identify and resolve the issue with your Wolf oven not heating. Remember to exercise caution when inspecting or working with any electrical appliance, and when in doubt, it’s always best to seek the help of a professional.

Check the Power Supply

One of the first things to check when your Wolf oven is not heating properly is the power supply. Make sure that the oven is properly connected to a working power source. Check the power cord for any damage or fraying, and ensure that it is securely plugged into a functional electrical outlet. Additionally, ensure that no breakers have tripped in your home’s electrical panel and that the circuit is properly supplying power to the oven. If there are any issues with the power supply, it can cause the oven to not heat up properly or at all. Addressing and resolving any power supply problems can often fix the heating issue with your Wolf oven.

Inspect the Heating Elements

If your Wolf oven is not heating properly, one of the potential issues could be a problem with the heating elements. The heating elements are responsible for distributing and generating the heat necessary for cooking or baking. Over time, these elements may become worn out or damaged, resulting in uneven heating or a complete failure to heat.

To inspect the heating elements, start by turning off the oven and allowing it to cool down completely. Once cooled, locate the heating elements inside the oven. They are typically located at the top and bottom of the oven cavity. Visually examine the elements for any signs of damage, such as visible cracks or blisters. Additionally, check for any loose or disconnected wires that could be affecting the heating performance.

If you notice any visible damage or loose connections, it may be necessary to replace the heating element. Contact a professional technician or refer to the manufacturer’s instructions for guidance on replacing the element. Keep in mind that electrical components should only be handled by qualified individuals to ensure safety.

Testing the Heating Elements

If the heating elements appear to be in good condition, but the oven still does not heat properly, you can perform a simple test to check their functionality. Start by preheating the oven to a specific temperature, such as 350 degrees Fahrenheit. Once the oven reaches the desired temperature, carefully place an oven-safe thermometer on the middle rack and close the door. Allow the oven to run for about 15 minutes, and then check the thermometer reading.

If the thermometer reading matches the set temperature, it indicates that the heating elements are working properly. However, if the thermometer shows a significantly lower or higher temperature, it could indicate a problem with the heating elements. In this case, it is recommended to consult a professional technician for further inspection and troubleshooting.

Test the Oven Igniter

If your Wolf oven is not heating, one possible cause could be a faulty oven igniter. The igniter is responsible for igniting the gas and creating the heat necessary for the oven to work properly. To determine if the igniter is the issue, you can perform a simple test.

Materials Needed

Before testing the oven igniter, gather the following materials:

  • Multimeter (or an ohmmeter)
  • Protective gloves

Steps to Test the Oven Igniter

Follow these steps to test the oven igniter:

  1. Disconnect the oven from the power supply by unplugging it or turning off the circuit breaker.
  2. Remove the oven racks and any obstacles obstructing access to the igniter.
  3. Locate the oven igniter. It is usually located at the back of the oven, attached to the bake burner.
  4. Put on protective gloves to avoid any accidents during the testing process.
  5. Disconnect the wiring harness that connects the igniter to the oven.
  6. Using the multimeter or ohmmeter, set it to the lowest ohms setting.
  7. Touch the multimeter probes to the two igniter terminals. A properly functioning igniter should read around 100 to 300 ohms of resistance. If the readings are significantly higher or lower, it indicates a faulty igniter.
  8. If the igniter fails the resistance test, it needs to be replaced. Contact a professional technician or refer to the manufacturer’s instructions for replacing the igniter.

Testing the oven igniter is a relatively simple process that can help diagnose and fix the issue of your Wolf oven not heating. However, if you are unsure or uncomfortable performing the test yourself, it is always recommended to seek assistance from a qualified professional.

Common Oven Igniter Readings

Igniter Model Resistance Reading (ohms)
Model A123 150-200
Model B456 250-350
Model C789 100-150

Verify the Oven Control Board

If your Wolf oven is not heating, one of the possible culprits could be a malfunctioning oven control board. The control board is responsible for regulating various functions of the oven, including temperature control and timing.

To verify if the oven control board is causing the issue, start by checking if all the buttons and knobs on the control panel are working properly. Make sure none of them are stuck or unresponsive. If any buttons or knobs are faulty, it could indicate a problem with the control board.

Next, inspect the oven display for any error codes. Error codes can indicate a specific issue with the oven and can provide useful information for troubleshooting. Consult the oven’s user manual to identify the meaning of any error codes displayed.

If you don’t see any error codes or if the display appears normal, reset the oven by turning off the power at the circuit breaker for a few minutes. Then, turn the power back on and check if the oven starts heating. Sometimes, a simple reset can resolve temporary glitches in the control board.

Professional Assistance

If the oven control board continues to be unresponsive or if there are persistent heating issues, it may be necessary to seek professional assistance. A qualified technician will have the expertise to diagnose and repair the problem, ensuring the oven functions properly.

Remember, working with oven electrical components can be dangerous, so it’s always best to rely on trained professionals for any repairs or replacements.

By verifying the oven control board and taking appropriate action, you can troubleshoot and resolve issues with your Wolf oven not heating effectively.

Call a Professional Repair Service

If you have tried all the quick fixes mentioned above and your Wolf oven is still not heating properly, it may be time to call a professional repair service. Professional repair technicians have the knowledge, tools, and experience to diagnose and fix complex oven heating problems.

When choosing a professional repair service, look for a company that specializes in Wolf appliances or has experience repairing high-end ovens. A reputable repair service will be able to quickly identify the root cause of the heating problem and provide you with a solution.

Before scheduling a repair service, gather information about your oven, such as the model number and a description of the issue you are experiencing. This will help the technician assess the situation more accurately and come prepared with any necessary parts.

While it may be tempting to try to fix the problem yourself, especially if you are handy around the house, it is important to remember that ovens can be complex appliances. Trying to repair the oven without proper knowledge and expertise may cause further damage or even pose a safety risk. It is always best to leave oven repairs to the professionals.

By calling a professional repair service, you can ensure that your Wolf oven is properly diagnosed and repaired, allowing you to get back to enjoying its reliable performance and delicious cooking results.

Q&A: Quick Fixes for Wolf Oven Not Heating Problems

Why is my Wolf oven not heating up?

There could be several reasons why your Wolf oven is not heating up. One possibility is a faulty heating element, which may need to be replaced. Another potential cause could be a malfunctioning thermostat, in which case it might need to be recalibrated or replaced. Additionally, a broken igniter or a problem with the gas supply could also prevent your oven from heating up.

What should I do if my Wolf oven is not heating up?

If your Wolf oven is not heating up, you can try a few things before calling a professional. First, check if the oven is receiving power and the circuit breaker is not tripped. Next, make sure the oven is set to the desired temperature and mode. If these basic checks don’t solve the issue, you can try resetting the oven by turning off the power for a few minutes and then turning it back on. If none of these steps work, it’s best to contact a qualified technician for further assistance.

Can I fix my Wolf oven if it’s not heating on my own?

If you have some experience with appliance repairs and feel comfortable working with potentially hazardous components, you can try fixing your Wolf oven if it’s not heating. However, it’s important to note that ovens can be complex appliances, and attempting repairs without the necessary knowledge and skills can be dangerous. It’s always recommended to seek assistance from a professional technician to accurately diagnose and fix the problem.

How much does it cost to repair a Wolf oven that’s not heating?

The cost to repair a Wolf oven that’s not heating can vary depending on the specific problem and the region you’re in. In general, you can expect to pay anywhere from $100 to $500 for repairs. However, more complex issues or the need for replacement parts can increase the cost. It’s always a good idea to get a quote from a reputable repair service before proceeding with the repair.

Are there any quick fixes I can try before calling a professional for my Wolf oven not heating problem?

There are a few quick fixes you can try before calling a professional for your Wolf oven not heating problem. First, check if the oven’s temperature sensor is working properly by testing its resistance with a multimeter. You can also try cleaning the heating elements, as a buildup of grime can reduce their effectiveness. Additionally, checking the oven’s gas supply or the electrical connections can help identify and resolve the issue. However, if these quick fixes don’t work, it’s best to consult a trained technician.

What should I do if my Wolf oven is not heating properly?

If your Wolf oven is not heating properly, there are a few things you can check before calling a professional. First, make sure the oven is plugged in and receiving power. Next, check if the circuit breaker or fuse for the oven has tripped or blown. If it has, reset the breaker or replace the fuse. Additionally, make sure the oven door is closed tightly, as an improperly closed door can prevent the oven from heating properly. If none of these solutions fix the issue, it may be time to call a professional oven repair technician.

Why is my Wolf oven not heating up to the desired temperature?

If your Wolf oven is not heating up to the desired temperature, there could be a few possible causes. One common cause is a faulty thermostat or temperature sensor. These components may need to be replaced to restore proper heating. Another possible cause is a malfunctioning heating element. If the heating element is not working properly, it may need to be replaced. Finally, a dirty or obstructed oven cavity can affect the oven’s ability to heat up properly. Make sure to clean the oven cavity and remove any obstructions to ensure proper heating.

Is your gas oven not heating properly?

If your gas oven isn’t heating properly, it could be due to issues with the gas valve, bake element, or thermostat. Check these components for any signs of malfunction.

How can I fix my electric oven if it’s not heating?

If your electric oven isn’t heating, start by checking the bake element for any visible damage. Additionally, ensure that the oven thermostat is functioning correctly and that the temperature readings are accurate.

What should I do if my oven isn’t heating at all?

If your oven won’t heat at all, check to see if both the gas or electric supply is functioning properly. Inspect the oven safety valve or electrical connections for any issues that may be preventing heating.

How can I determine if my oven is getting hot enough?

To determine if your oven is reaching the correct temperature, use an oven thermometer placed inside the oven cavity. Compare the temperature readings to the desired setting to ensure accuracy.

What are some common reasons for an oven not heating correctly?

Common reasons for an oven not heating correctly include issues with heating elements, thermostat malfunctions, or problems with the gas or electric supply. Inspect these components to identify the cause of the issue.

How do I troubleshoot a gas oven that won’t heat?

If your gas oven won’t heat, check the main gas supply and ensure that the gas valve is open. Additionally, inspect the oven safety valve and other heating components for any issues that may be causing the malfunction.

How can I fix an oven that won’t heat up to the correct temperature?

If your oven isn’t heating up to the correct temperature, check the thermostat calibration and adjust if necessary. Ensure that both heating elements are functioning correctly and that there are no obstructions preventing proper heating.

What steps should I take if my oven isn’t getting hot enough?

If your oven isn’t getting hot enough, verify that both heating elements are working properly. Check for any buildup or debris at the bottom of your oven that may be obstructing airflow and causing reduced heating.

How can I get my oven back to heating correctly?

To get your oven back to heating correctly, start by troubleshooting common issues such as faulty heating elements or thermostat malfunctions. Clean the oven cavity and ensure proper airflow to improve heating performance.

What could be the cause of my oven not heating, and how can I fix it?

The cause of your oven not heating could be due to various factors, including issues with heating elements, thermostat calibration, or gas/electric supply. To fix it, carefully inspect these components and replace any faulty parts as needed.

Why is my electric oven not heating properly?

If your electric oven is not heating properly, it could be due to a malfunctioning oven element. Check the element for signs of damage or wear and replace it if necessary. Additionally, ensure that the thermostat is functioning correctly to regulate the oven’s heating.

How can I determine if my oven is heating to the correct temperature?

To determine if your oven is heating to the correct temperature, use an oven thermometer placed inside the oven cavity. Allow the oven to preheat fully, then compare the thermometer reading to the set temperature on the oven’s control panel.

What are some common reasons why an oven may not be heating?

Some common reasons why an oven may not be heating include issues with heating elements, thermostat malfunctions, or problems with the gas or electric supply. It’s essential to inspect these components and troubleshoot accordingly to resolve the issue.


Subzero Ice Maker Not Working? Steps to Fix the Issue

If you have a Subzero refrigerator with an ice maker, it can be frustrating when it suddenly stops working. Thankfully, there are a few steps you can take to troubleshoot and fix the issue before calling for professional help. By following these simple steps, you can save time and money and have your ice maker up and running again in no time.

  1. Check the water supply:The first step is to ensure that your refrigerator is receiving an adequate water supply. Double-check the water line connection to make sure it is secure and not kinked or blocked. If necessary, turn off the water supply, remove the line, and clean it before reattaching it.
  2. Inspect the water inlet valve:The water inlet valve controls the flow of water into the ice maker. Inspect it for any signs of damage or clogging. If you notice any issues, you may need to replace the valve. Consult the manufacturer’s manual or contact a professional technician for guidance.
  3. Clear ice blockage:If your ice maker produces ice but it’s not dispensing properly, there may be an ice blockage. Look for any obstructions in the ice chute or dispenser. Use warm water or a hairdryer on a low heat setting to melt any ice that may be causing the blockage.
  4. Reset the ice maker:Sometimes, a simple reset can resolve the issue. Locate the ice maker’s power switch or circuit breaker and turn it off for a few minutes. Then, turn it back on and wait for the ice maker to cycle through and start producing ice again.

Remember, if these troubleshooting steps do not resolve the issue, it’s best to consult a professional technician to diagnose and repair the problem. Attempting to fix more complex issues on your own may cause further damage to your Subzero refrigerator.

Troubleshooting Subzero Ice Maker Not Working

If your Subzero ice maker is not working properly, it can be frustrating and inconvenient. However, there are several troubleshooting steps you can take to try and resolve the issue before calling for professional help. Here are a few common problems that could be causing your ice maker to stop working and how to fix them:

  1. Check the Power Supply:

The first thing you should do is make sure that your ice maker is receiving power. Check the power cord and ensure that it is properly plugged into a working outlet. You can also try resetting the circuit breaker or replacing any blown fuses that may be affecting the power supply.

  1. Inspect the Water Supply Line:

Ensure that the water supply line to the ice maker is properly connected and not kinked or twisted. If the line is damaged, replace it with a new one. You should also check the water pressure to make sure it is reaching the recommended level for proper ice making.

  1. Clean the Ice Maker:

A common issue that can cause the ice maker to stop working is a buildup of debris or mineral deposits. Take the time to clean the ice maker thoroughly, including the ice tray, water inlet valve, and any filters or screens. Use warm water and a mild cleaning solution to remove any dirt or buildup that may be interfering with the ice making process.

  1. Check the Temperature Settings:

If the temperature in the freezer is too warm, it can affect the ice maker’s ability to produce ice. Make sure that the freezer is set to the appropriate temperature, usually around 0 degrees Fahrenheit (-18 degrees Celsius). If necessary, adjust the temperature settings accordingly and give the ice maker a few hours to start producing ice.

  1. Reset the Ice Maker:

Resetting the ice maker can sometimes resolve minor issues. To reset the ice maker, locate the reset button or switch on the unit (usually found on the ice maker itself or the control panel) and hold it down for a few seconds. This will restart the ice maker and may resolve any temporary glitches or malfunctions.

By following these troubleshooting steps, you may be able to resolve the issue of your Subzero ice maker not working. If the problem persists, it is recommended to contact a professional technician or the manufacturer for further assistance.

Checking Power and Connections

The first step in troubleshooting a Subzero ice maker not working issue is to check the power and connections. Make sure that the ice maker is properly plugged in and that the power switch is turned on. Additionally, ensure that there are no loose or disconnected wires or cables.

If the ice maker is not receiving power, try plugging it into a different outlet or resetting the circuit breaker. It’s also a good idea to check if the power cord is damaged or frayed. If it is, it may need to be replaced.

Next, inspect the water supply line to ensure that it is properly connected and not kinked or blocked. If the water supply line is damaged or there are any leaks, it should be repaired or replaced.

Issue Steps to Check
No power to the ice maker
  • Ensure the ice maker is properly plugged in
  • Check if the power switch is turned on
  • Try a different outlet or reset the circuit breaker
  • Inspect the power cord for damage
Water supply line issues
  • Check if the water supply line is properly connected
  • Inspect for any kinks or blockages in the line
  • Repair or replace any damaged or leaking parts

By checking the power and connections, you can ensure that the ice maker is receiving the necessary power and water supply to function properly. If the issue persists after checking these components, further troubleshooting may be required.

Properly Adjusting Ice Maker Arm

One common issue that may cause the Subzero ice maker to stop working is a misaligned or improperly adjusted ice maker arm. The ice maker arm is responsible for controlling the ice-making process, so if it is not in the correct position, it can prevent ice from being produced.

To properly adjust the ice maker arm, follow these steps:

  1. Locate the ice maker arm: The ice maker arm is usually located on the side or at the top of the ice maker unit. It is a plastic arm that can be moved up and down.
  2. Check the current position: First, check the current position of the ice maker arm. It should be in the down position to enable ice production. If it is up or in the off position, gently push it down until it clicks into place.
  3. Test for proper adjustment: Once the ice maker arm is in the down position, wait for a few hours and check if ice is being produced. If ice is produced, the arm is properly adjusted. If not, proceed to the next step.
  4. Adjust the arm level: If the ice maker is still not producing ice, the arm may need further adjustment. Move the arm up slightly and wait for a few hours to see if ice production begins. Continue adjusting the arm until ice production is restored.

Remember to handle the ice maker arm with care to avoid any damage. If these steps do not resolve the issue, it is recommended to contact a professional technician for further assistance.

Clearing Ice Maker Blockage

If your Subzero ice maker is not working, one possible cause could be a blockage in the ice maker system. Ice blockages can occur due to frozen water or debris such as mineral deposits or bits of food. Here are the steps to clear the blockage:

1. Turn off the Ice Maker

The first step is to turn off the ice maker to avoid any potential injuries. Locate the power switch or control panel and switch it off. This will prevent the ice maker from attempting to make ice while you are working on clearing the blockage.

2. Remove Ice and Water

Next, remove any ice and water that may be currently in the ice maker. This can be done by emptying the ice bin and draining any water in the ice maker’s reservoir. Use a towel or sponge to soak up the water and remove any remaining ice.

3. Check for Blockages

Inspect the ice maker for any visible blockages. Look for ice that may be stuck, debris, or anything obstructing the normal functioning of the ice maker. Use a flashlight if necessary to identify any hard-to-reach areas.

4. Clear the Blockage

If you find a blockage, carefully remove it using a soft cloth, sponge, or brush. Be gentle to avoid damaging any of the ice maker components. If the blockage is due to frozen water, you can use a hairdryer set to a low heat setting to thaw the ice and remove it more easily.

5. Clean and Reassemble

After removing the blockage, take the time to clean any remaining debris from the ice maker components. Use a mild detergent and warm water to wipe down the ice maker and remove any lingering dirt or mineral deposits. Once clean, reassemble the ice maker and make sure all parts are properly secured.

6. Turn on the Ice Maker

Finally, turn the ice maker back on by switching the power switch or control panel to the on position. Allow the ice maker a few minutes to start up and begin making ice. Check to ensure that the ice maker is now working properly and producing ice as expected.

By following these steps to clear an ice maker blockage, you can often resolve the issue and get your Subzero ice maker back to working order. If the problem persists, it may be necessary to call a professional technician to diagnose and repair any underlying issues with the ice maker.

Inspecting Water Supply

One of the first steps to take when troubleshooting a Subzero ice maker that is not working is to inspect the water supply. Make sure the water supply valve is turned on and that there are no obstructions in the water line. Check for kinks or leaks in the water line that could be affecting the flow of water to the ice maker.

If the water supply appears to be fine, you can also check the water filter. Subzero ice makers are equipped with water filters to ensure that the ice produced is clean and free from impurities. Over time, these filters can become clogged or dirty, affecting the flow of water. Check the filter and replace it if necessary.

Additionally, it’s essential to inspect the water pressure. Subzero ice makers require a certain level of water pressure to function correctly. If the water pressure is too low, the ice maker may not be able to produce ice. You can test the water pressure using a water pressure gauge or by contacting a professional plumber for assistance.

During the inspection, it’s also important to check if the ice maker’s water inlet valve is working properly. This valve controls the flow of water into the ice maker. Test the valve by disconnecting the water line and activating it. If there is no water flow, the valve may need to be replaced.

By thoroughly inspecting the water supply, including the water supply valve, water line, water filter, water pressure, and water inlet valve, you can identify and address any issues that may be causing your Subzero ice maker to not work properly.

Cleaning Ice Maker Components

Regular cleaning of the ice maker components is essential to ensure the smooth operation of your Subzero ice maker. Over time, minerals, bacteria, and other impurities can accumulate in the ice maker, affecting the quality and taste of the ice it produces. Follow these steps to clean the ice maker components effectively:

  1. Turn off the ice maker:

Before cleaning the ice maker, make sure to turn it off or unplug it from the power source. This step is crucial for your safety.

  1. Remove the ice bin:

Take out the ice bin from your Subzero refrigerator. Empty it and set it aside for cleaning.

  1. Clean the ice bin:

Wash the ice bin with warm soapy water. Use a sponge or cloth to scrub away any residue or build-up. Rinse thoroughly and allow it to air dry completely before placing it back in the refrigerator.

  1. Clean the ice maker tray:

Locate the ice maker tray inside the refrigerator. Remove it carefully and wash it with warm soapy water. Scrub away any mineral deposits or debris with a sponge or brush. Rinse well and ensure it is completely dry before putting it back.

  1. Unclog the water line:

If the ice maker is not working properly, there might be a clog in the water line. Gently remove the water line and check for any obstructions. Use a cloth or a small brush to unclog it if necessary.

  1. Wipe down the exterior:

Using a damp cloth, wipe down the exterior of the ice maker, paying attention to any stains or sticky areas. Dry it thoroughly with a clean cloth.

  1. Reassemble and turn on the ice maker:

Once all the components are completely dry, reassemble the ice maker by putting back the ice bin and tray. Plug it back in or turn it on, and allow the ice maker to run a full cycle to ensure everything is functioning correctly.

By cleaning the ice maker components regularly, you can extend its lifespan and continue enjoying fresh, clean ice from your Subzero refrigerator.

Resetting Ice Maker

If your Subzero ice maker is not working properly, one of the first troubleshooting steps you can try is resetting the ice maker. Performing a reset can help resolve any minor issues or glitches that may be affecting the ice maker’s functionality.

Here are the steps to reset your Subzero ice maker:

  1. Turn off the ice maker:

Locate the on/off switch or button on your ice maker and switch it to the “off” position. This will power off the ice maker and stop it from making ice.

  1. Unplug the ice maker:

Once the ice maker is turned off, unplug it from the power source. This will completely disconnect the ice maker from the electrical supply.

  1. Wait for a few minutes:

Give the ice maker some time to fully reset. Waiting for a few minutes allows any residual power in the ice maker to dissipate.

  1. Plug in the ice maker:

After the waiting period, plug the ice maker back into the power source. Make sure it is securely connected.

  1. Turn on the ice maker:

Once the ice maker is plugged in, switch the on/off switch or button back to the “on” position. This will power on the ice maker and initiate the ice-making process.

Additional Tips:

– Check the water supply: Ensure that the ice maker is receiving a proper water supply. Make sure the water valve supplying the ice maker is open and the water line is not kinked or obstructed.

– Clean the ice maker: Regularly clean the ice maker to remove any mineral deposits or debris that may be affecting its performance. Refer to the manufacturer’s instructions for the recommended cleaning procedure.

Performing a reset and following these additional tips should help resolve the issue of your Subzero ice maker not working. If the problem persists, it may be necessary to contact a professional technician for further assistance.

Contacting Subzero Customer Support

If you have tried all the troubleshooting steps mentioned above and your Subzero ice maker is still not working, it is recommended to contact Subzero’s customer support for further assistance. The Subzero customer support team consists of highly trained professionals who can provide expert guidance and solutions to any issues you may be experiencing with your ice maker.

Here are the steps to contact Subzero customer support:

  1. Locate the Subzero customer support phone number: The customer support phone number can usually be found in the documentation that came with your appliance. If you cannot find it, you can visit the Subzero website and navigate to the support section to find the appropriate contact information.
  2. Call the customer support number: Once you have the customer support phone number, give them a call and explain the issue you are facing with your ice maker. Make sure to provide them with all the necessary details so that they can assist you effectively.
  3. Follow the instructions provided by the customer support representative: The customer support representative will guide you through the troubleshooting process over the phone. They may ask you to perform certain tests or provide additional information to diagnose the problem accurately.
  4. Consider scheduling a service appointment: If the customer support representative determines that your ice maker needs professional service, they will help you schedule a service appointment with an authorized Subzero technician. The technician will then visit your home to assess and fix the issue.

Remember to be patient and polite while dealing with the customer support team. They are there to assist you and resolve any problems you may have. By following the above steps and contacting Subzero customer support, you can get your ice maker back up and running smoothly in no time.

FAQ: Common Ice Maker Problems

Why is my Subzero ice maker not working?

There can be several reasons why your Subzero ice maker is not working. It could be due to a clogged water line, a faulty water inlet valve, a malfunctioning ice maker assembly, or a problem with the ice maker switch.

How can I fix a clogged water line in my Subzero ice maker?

If you suspect that the water line is clogged, you can try to clear it by using a turkey baster filled with hot water. Squeeze the hot water into the water line to melt any ice or debris that may be blocking it. You can also try using a hairdryer to gently thaw the water line.

What should I do if the water inlet valve in my Subzero ice maker is faulty?

If the water inlet valve is faulty, it will need to be replaced. You can purchase a new water inlet valve from a Subzero authorized dealer or contact a professional technician who can replace it for you.

Why is my Subzero ice maker not making enough ice?

If your ice maker is not making enough ice, it could be due to a problem with the water pressure or temperature. Make sure that the water pressure is within the recommended range and that the temperature in the freezer is set to the appropriate level. You should also check if the ice maker is properly aligned and not obstructed by any objects.

Is it possible to fix the ice maker switch in my Subzero refrigerator?

Yes, it is possible to fix the ice maker switch if it is not working. First, make sure that the switch is in the “on” position. If it still doesn’t work, you can try cleaning the switch with a damp cloth or using compressed air to remove any debris that may be causing the issue. If the switch is damaged, it may need to be replaced.

What are some common reasons why a refrigerator ice maker may stop working, and how can you troubleshoot these issues?

Common reasons include low water pressure, a frozen water line, or a faulty ice maker control. Troubleshoot by checking the water flow, inspecting for a frozen water line, and testing the ice maker control.

How can you determine if your ice maker isn’t working due to a problem with the water supply, and what steps can you take to address this issue?

Check the water flow to the ice maker and inspect the water filter for clogs. If necessary, replace the water filter and ensure proper water pressure to the ice maker to resolve any supply issues.

What are some common ice maker problems specific to Samsung and Whirlpool refrigerators, and how can you troubleshoot them?

For Samsung refrigerators, common issues may include a faulty ice maker control or a frozen water line. For Whirlpool refrigerators, problems may arise with the ice maker assembly or water flow. Troubleshoot by following manufacturer-specific guidelines and consulting the owner’s manual.

How can you fix an ice maker that isn’t making ice despite having water flow and proper temperature settings in the freezer?

Inspect the ice maker assembly for any obstructions or malfunctions, such as a broken ice cube tray or faulty ice maker control. Replace any damaged components and ensure the ice maker is properly aligned and connected.

What steps should you take if your refrigerator ice maker stops working suddenly, and how can you prevent future issues with ice production?

Check for any visible signs of damage or malfunction in the ice maker assembly and test the water flow to the ice maker. Regularly replace the water filter and perform routine maintenance to ensure proper functioning and prevent future ice maker issues.

How do I troubleshoot my ice maker if it’s not making ice?

If your ice maker isn’t producing ice, first check the freezer temperature to ensure it’s set correctly. Then, inspect the ice maker for any visible issues such as a clogged water line or a faulty water inlet valve.

What steps should I take if my refrigerator ice maker isn’t working?

Start by checking the ice maker’s assembly for any obstructions or malfunctions. Verify that the ice maker is receiving water and that the water supply line isn’t blocked. Additionally, inspect the ice mold for any signs of damage or wear.

How can I fix my broken ice maker if it’s not making ice?

Begin by examining the ice maker assembly for any loose or damaged components. Clean the ice mold and surrounding areas to ensure proper ice production. If necessary, replace any faulty parts such as the water inlet valve or ice maker motor.

What should I do if there’s ice in the bin but the ice maker isn’t making new ice?

Check the ice maker’s operation by manually initiating a cycle. Ensure that the water inlet valve is functioning correctly and that the water supply line isn’t frozen or obstructed. If needed, defrost the freezer to improve airflow and ice production.

How do I replace the ice maker in my refrigerator?

To replace the ice maker, first disconnect the power and water supply to the refrigerator. Remove the old ice maker assembly by following the manufacturer’s instructions. Install the new ice maker, reconnect the power and water, and test for proper operation.

What steps can I take to increase the production of ice in my ice maker?

Clean the ice maker and surrounding components regularly to remove any buildup or debris. Ensure that the freezer temperature is set appropriately and that the water supply line is unobstructed. If necessary, consider upgrading to a higher-capacity ice maker.

How do I check the ice maker inside the freezer?

To inspect the ice maker inside the freezer, locate the ice maker assembly and remove any access panels or covers. Visually inspect the components for any signs of damage or malfunction, and ensure that the ice mold is free of obstructions.

What should I do if my ice maker is still not working after troubleshooting?

If your ice maker remains non-functional after troubleshooting, consider contacting a professional appliance repair service for further assistance. They can diagnose and repair any underlying issues with the ice maker or related components.

Can I replace the ice maker myself, or should I seek professional help?

While replacing the ice maker can be a DIY project for some individuals, it’s essential to consider your level of experience and comfort with appliance repairs. If you’re unsure or uncomfortable, it’s best to enlist the help of a qualified technician.

How can I ensure my ice maker continues to work efficiently?

Regular maintenance is key to ensuring the continued operation of your ice maker. Clean the ice maker and surrounding areas, check the freezer temperature regularly, and promptly address any issues that arise to prevent further damage.

Essential Refrigerator Maintenance Tips to Keep Your Appliance Running Smoothly

Refrigerators are an essential appliance in every household, helping us keep our food fresh and our beverages cold. To ensure that your refrigerator continues to perform at its best for years to come, regular maintenance is crucial. Here are some top tips to help you maintain your refrigerator and extend its lifespan.

  1. Keep it clean:Regularly cleaning the interior and exterior of your refrigerator is essential to keep it running efficiently. Wipe down the shelves, drawers, and door seals to remove any spills or stains. Also, ensure that the condenser coils at the back or bottom of the refrigerator are cleaned to improve its cooling performance.
  2. Check the temperature:It’s important to regularly check the temperature settings of your refrigerator. The ideal temperature range for a refrigerator is between 35°F (2°C) and 38°F (3°C), while the freezer should be set between 0°F (-18°C) and 5°F (-15°C). Adjust the settings accordingly to ensure your food stays fresh and safe from spoilage.
  3. Organize effectively:Proper organization of your refrigerator can not only help you find items easily but also improve its performance. Keep similar items together and avoid overpacking the shelves and drawers, as this can restrict proper airflow and affect cooling efficiency. Also, make sure to leave enough space around the refrigerator for adequate ventilation.
  4. Regularly defrost the freezer:If your refrigerator has a manual defrost option, it’s important to defrost the freezer regularly. Ice buildup can reduce airflow and cause the refrigerator to work harder, consuming more energy. Follow the manufacturer’s instructions for defrosting to prevent any damage to the appliance.
  5. Check the door seals:Damaged or worn-out door seals can lead to air leaks, causing the refrigerator to work harder to maintain the desired temperature. Regularly check the door seals for any signs of damage and replace them if necessary. To test the seals, close the door on a piece of paper and try to pull it out. If it slides out easily, it’s time to replace the seals.

By following these top refrigerator maintenance tips, you can ensure that your appliance continues to operate efficiently, saving you energy and money in the long run. Remember to consult the manufacturer’s manual for specific maintenance instructions and always prioritize safety when performing any maintenance tasks.

Regular Cleaning

Regular cleaning is essential for maintaining the performance and longevity of your refrigerator. It helps remove dirt, dust, and food particles that can build up and affect its efficiency. Follow these tips to ensure your fridge stays clean and in optimal condition.

Clean the Interior

Start by emptying the refrigerator and removing all the shelves and drawers. Use a mild detergent mixed with warm water to scrub the interior thoroughly. Pay extra attention to spills, stains, and sticky residue. Rinse with clean water and dry with a soft cloth before putting everything back in place.

Declutter and Organize

Regularly decluttering and organizing your fridge is important for efficient storage and easy access to food. Remove expired items, leftovers, and any spoiled produce. Wipe down food containers and jars before putting them back. Use clear containers and labels to keep track of the contents and expiry dates of your food items.

Tip: Rotate your food items to ensure older products are used first and nothing goes to waste.

Tip: Keep raw meats separate from other food to prevent cross-contamination.

Additionally, make sure to check and clean the gaskets around the refrigerator door. These rubber seals can accumulate dirt and grime, leading to air leaks that affect the fridge’s efficiency. Use a mixture of water and mild detergent to clean the gaskets, and dry them thoroughly.

Note: Remember to turn off and unplug your refrigerator before cleaning any electrical components.

Regular cleaning of your refrigerator not only keeps it looking good but also ensures it runs efficiently, which can save you money on energy bills. Aim to clean the interior and organize the contents at least once a month, and clean the gaskets every three months. By following these maintenance tips, your fridge will continue to perform optimally and have a longer lifespan.

Proper Temperature Control

Proper temperature control is essential for keeping your refrigerator working efficiently and preserving your food. By maintaining the right temperature, you can help extend the lifespan of your refrigerator and prevent any potential food spoilage.

Setting the Temperature

It is recommended to set your refrigerator’s temperature between 35 and 38 degrees Fahrenheit (1.7 to 3.3 degrees Celsius). This temperature range ensures that your food stays cold enough to prevent bacterial growth while avoiding freezing.

Checking the Thermostat

Regularly check the thermostat in your refrigerator to ensure it is set to the desired temperature. If you notice any fluctuations or inconsistencies, it may indicate a problem with the thermostat, which should be addressed by a professional technician.

  • Place a thermometer in your refrigerator to monitor and verify that the temperature is consistently within the recommended range.
  • Make sure that the thermostat is not blocked or obstructed by any food items or other objects inside the refrigerator.

Avoiding Temperature Fluctuations

Temperature fluctuations can occur due to several factors, including frequent opening and closing of the refrigerator door, placing hot food directly into the refrigerator, or overloading the refrigerator with too many items. These fluctuations can affect the performance of your refrigerator and the quality of your food.

To minimize temperature fluctuations:

  1. Avoid opening the refrigerator door unnecessarily and keep it closed as much as possible.
  2. Allow hot food to cool down to room temperature before placing it in the refrigerator.
  3. Do not overload the refrigerator with too many items as it can hinder proper air circulation.
  4. Regularly clean the condenser coils at the back of the refrigerator to ensure efficient heat dissipation and prevent overheating.

By following these proper temperature control practices, you can ensure that your refrigerator remains in optimal condition and your food stays fresh for longer.

Keep the Coils Clean

One of the most important maintenance tasks for ensuring the long-lasting performance of your refrigerator is keeping the coils clean. The coils, located either behind or underneath the fridge, are responsible for releasing heat and keeping the appliance cool. Over time, dust, dirt, and pet hair can accumulate on the coils, inhibiting their ability to dissipate heat efficiently. This can result in the compressor working harder and the refrigerator consuming more energy.

To clean the coils, first, unplug the refrigerator from the power source. Locate the coils by referring to your refrigerator’s manual or contacting the manufacturer. Once you find the coils, use a soft brush or vacuum cleaner with a brush attachment to gently remove the accumulated debris. Take care not to damage or bend the coils while cleaning. If the coils are heavily soiled, you may need to use a coil cleaning solution recommended by the manufacturer. After cleaning, plug the refrigerator back in and observe if there is any improvement in its cooling performance.

It is recommended to clean the coils at least twice a year or more frequently if you have pets that shed or live in a dusty environment. Regular coil cleaning not only helps in maintaining the efficiency of the refrigerator but also extends its lifespan. By keeping the coils clean, you can prevent costly repairs and save on energy costs.

Organize and Stock Smartly

Proper organization and smart stocking of your refrigerator can help maximize its performance and efficiency. Here are some tips to help you organize and stock your refrigerator in a way that keeps your food fresh and minimizes energy waste.

1. Clean and Clear

Start by thoroughly cleaning out your refrigerator. Remove any expired or spoiled food items, and wipe down all the shelves and drawers with a mild cleaning solution. This will create a clean and fresh base for organizing your food.

2. Zone your Fridge

Create different zones within your refrigerator for different types of food. For example, designate one area for dairy products, another for fruits and vegetables, and a separate zone for leftovers and prepared foods. This will make it easier to locate items and maintain their freshness.

3. Use Storage Containers

Invest in a variety of storage containers to help organize your refrigerator. Use clear containers with tight-fitting lids for storing leftovers and pre-prepared meals. These containers will help keep food fresh and also prevent spills and odors from spreading.

4. Optimize Shelf Space

Arrange your shelves in a way that maximizes space and prevents overcrowding. Use shelf dividers and organizers to create separate sections for different food items. This will make it easier to see what you have and prevent items from getting hidden and forgotten.

5. Utilize the Door Shelves

The door shelves in your refrigerator are ideal for storing condiments and frequently used items. Make use of the adjustable door bins to fit different-sized containers. Just be mindful not to overcrowd the door, as this can hinder proper cooling.

6. Label and Date

Label your food containers with the date they were prepared or opened. This will help you keep track of how long items have been stored and identify when they need to be used or discarded. It’s especially important for items with short shelf lives, such as dairy products and leftovers.

By organizing and stocking your refrigerator smartly, you can enhance its performance and keep your food fresh for longer. Follow these tips to create a well-structured and efficient fridge that supports a healthy and sustainable lifestyle.

Check and Replace Seals

One important aspect of refrigerator maintenance is checking and replacing the seals or gaskets on the doors. The seals are responsible for creating an airtight seal when the doors are closed, which helps to keep the cold air inside and prevent warm air from entering. Over time, the seals can become worn, torn, or loose, compromising their effectiveness.

To check the seals, simply close the refrigerator door on a dollar bill or a piece of paper. If you can easily remove the paper without any resistance, it may be a sign that the seals are not sealing properly. Additionally, you can visually inspect the seals for any visible signs of wear and tear or damage.

If you notice any issues with the seals, it is important to replace them as soon as possible. To replace the seals, you will need to purchase replacements that are compatible with your refrigerator model. Most gaskets can easily be removed by pulling them away from the door. Be careful not to damage the door or any other components while doing so.

Before installing the new seals, make sure to clean the area thoroughly to remove any dirt or debris. Once the area is clean, position the new seals in place and push them firmly onto the door to ensure a proper seal. Check that they are aligned correctly and that there are no wrinkles or gaps.

Regularly checking and replacing the seals on your refrigerator doors can help to maintain the optimal performance of your appliance. It will not only ensure that the cold air stays inside the refrigerator but also improve energy efficiency and prevent the compressor from overworking. By taking care of this simple maintenance task, you can extend the lifespan of your refrigerator and avoid costly repairs in the future.

Keep the Fridge Full

Believe it or not, keeping your refrigerator full can actually help improve its performance and energy efficiency. When there is less empty space inside the fridge, it takes less time for it to cool down when you open the door, as the food items inside act as insulators. This means that your fridge doesn’t have to work as hard or use as much energy to stay at the desired temperature.

To maximize the benefits of a full fridge, consider storing water jugs or containers in the empty spaces. This not only helps to keep the fridge full but also serves as a backup water supply in case of emergencies.

Another way to keep your fridge full is to plan your grocery shopping accordingly. Make a list of the items you need before you go shopping and try to buy in bulk when possible. By keeping your fridge well-stocked, you will not only save energy but also reduce the frequency of opening and closing the door, which can lead to temperature fluctuations inside.

However, be mindful not to overcrowd the fridge, as this can impede the circulation of air and affect the cooling efficiency. Make sure that the airflow vents inside the fridge are not blocked by food items or containers.

Benefits of Keeping the Fridge Full:
– Improved cooling performance
– Energy efficiency
– Reduced frequency of door openings
– Backup water supply

By keeping your fridge full and maintaining proper airflow, you can extend the lifespan of the appliance and enjoy its optimal performance for years to come.

Avoid Overloading the Fridge

One common mistake many people make is overloading their refrigerators. It may be tempting to cram as much food as possible into the fridge, but this can actually hinder its performance and lead to various problems.

When a refrigerator is overloaded, there is less room for air to circulate, which can prevent proper cooling. This can lead to uneven temperatures inside the appliance, with some areas being too cold and others not cold enough.

Additionally, overloading the fridge can put a strain on its compressor. The compressor is responsible for maintaining the internal temperature by removing heat from the refrigerator. When it is overworked, it may not be able to keep up with the demand, leading to decreased efficiency and potential breakdowns.

To avoid overloading your fridge, it is important to be mindful of its capacity. Check the manufacturer’s instructions or the fridge’s manual to determine its recommended load. Try to organize the contents in a way that allows for proper airflow and circulation. This may mean removing unnecessary items or rearranging the shelves to maximize space.

Another good practice is to regularly clean out and declutter your fridge. Get rid of expired or spoiled food, as it not only takes up valuable space but can also negatively affect the overall air quality inside the refrigerator.

Signs of an Overloaded Fridge

If you suspect that your fridge is overloaded, there are a few signs to look out for. One indication is if the temperature inside the refrigerator fluctuates or is consistently too warm. This could indicate that there is insufficient airflow due to too many items obstructing the vents.

You may also notice that the compressor is running more frequently or for longer periods of time. This can be a sign that it is struggling to maintain the desired temperature and is working overtime.

If you experience any of these issues, it is important to address the problem as soon as possible. Consider removing some items or reorganizing the contents to allow for better airflow. If the issue persists, it may be necessary to consult a professional technician for further assistance.

Conclusion

Avoiding overloading your fridge is essential for maintaining its optimal performance and longevity. By being mindful of its capacity, organizing the contents effectively, and regularly decluttering, you can ensure that your refrigerator operates efficiently and keeps your food fresh for longer periods of time.

Do: Don’t:
– Check the recommended load capacity. – Overstuff the fridge with food and drinks.
– Allow for proper airflow and circulation. – Keep expired or spoiled food in the fridge.
– Clean out and declutter the fridge regularly. – Ignore signs of an overloaded fridge.

Monitor and Adjust the Freezer Settings

One important aspect of maintaining your refrigerator is properly monitoring and adjusting the freezer settings. The freezer temperature should be set to around 0 degrees Fahrenheit (-18 degrees Celsius). This will help ensure the longevity and performance of your appliance.

Regularly check the temperature of your freezer with a thermometer to ensure it is maintaining the correct temperature. If you notice that the temperature is too high or too low, adjust the settings accordingly. Keep in mind that a freezer that is too cold can lead to frost buildup, while a freezer that is too warm can lead to food spoilage.

Additionally, ensure that the freezer door seal is in good condition. A faulty seal can cause warm air to enter the freezer, leading to an increase in temperature. Regularly clean the seal and check for any signs of wear or damage. If necessary, replace the seal to maintain optimal temperature levels inside the freezer.

Finally, avoid overloading the freezer. An overcrowded freezer can restrict airflow and lead to uneven cooling. This can also put strain on the compressor, reducing its efficiency and lifespan. Try to organize and declutter your freezer regularly to improve its functionality.

By monitoring and adjusting the freezer settings, you can ensure that your refrigerator maintains optimal performance and longevity. Taking these simple steps can help prevent malfunctions, food spoilage, and unnecessary energy consumption.

FAQ: Refrigerator Maintenance Tips

How often should I clean my refrigerator?

You should clean your refrigerator at least once every three months to prevent the buildup of dirt and bacteria.

What is the best way to defrost a refrigerator?

The best way to defrost a refrigerator is to turn it off and leave the doors open for 24-48 hours. Make sure to remove all the food and place towels underneath to catch the melting ice.

How can I prevent unpleasant odors in my refrigerator?

To prevent unpleasant odors in your refrigerator, you should regularly clean it with a mixture of baking soda and water. You can also place an open box of baking soda in the refrigerator to absorb any odors.

What should I do if my refrigerator is making strange noises?

If your refrigerator is making strange noises, you should first check if it is level. Uneven flooring can cause the refrigerator to make noises. If the noises persist, you should contact a professional technician to diagnose and fix the problem.

Is it necessary to vacuum the coils of my refrigerator?

Yes, it is necessary to vacuum the coils of your refrigerator every six months. Dust and dirt can accumulate on the coils, causing the refrigerator to work less efficiently.

How often should I clean the condenser coils of my refrigerator?

It is recommended to clean the condenser coils of your refrigerator at least twice a year. However, if you have pets or live in a dusty environment, you may need to clean them more frequently. Dirt, dust, and pet hair can accumulate on the condenser coils, reducing their efficiency and making your refrigerator work harder to maintain the desired temperature. Cleaning the coils will help improve energy efficiency and prevent potential cooling problems.

How often should you replace the water filter in your refrigerator, and why is this important for proper maintenance?

Replace the water filter in your refrigerator according to the manufacturer’s recommendations, typically every six months. This ensures clean and fresh-tasting water, as well as optimal performance of your refrigerator’s water dispenser.

What role does the door gasket play in refrigerator maintenance, and how can you ensure it remains effective?

The door gasket forms a seal around the refrigerator and freezer doors, preventing cold air from escaping and warm air from entering. Regularly clean the gasket with mild soap and water to remove dirt and debris, ensuring a tight seal.

How can regular refrigerator maintenance help extend the life of your appliance, and what are some key maintenance tasks to perform?

Regular maintenance, such as cleaning coils, checking door seals, and replacing water filters, can extend the life of your refrigerator by ensuring it operates efficiently and reduces strain on its components.

What steps should you take if your refrigerator isn’t running properly, and when should you consider calling for professional appliance repair?

Troubleshoot common issues such as temperature inconsistencies or unusual noises by checking the thermostat settings and cleaning the coils. If problems persist, consult your owner’s manual or contact a professional repair service for assistance.

What is included in a comprehensive maintenance checklist for refrigerators, and how often should these tasks be performed?

A comprehensive maintenance checklist may include cleaning coils, inspecting door seals, checking and adjusting temperature settings, and deep cleaning interior compartments. Perform these tasks regularly, ideally every three to six months, to ensure proper refrigerator function and efficiency.

What are the key components of a guide to refrigerator maintenance, and why is regular maintenance important for keeping your appliance running smoothly?

Regular maintenance tasks such as cleaning coils, checking door seals, and adjusting temperature settings are essential for ensuring the efficiency and longevity of your refrigerator.

How can you help your refrigerator run efficiently, and what preventative maintenance measures should you take?

Help your refrigerator run efficiently by cleaning coils regularly with a coil brush and ensuring proper ventilation by keeping it away from the wall. Perform preventative maintenance tasks such as cleaning crisper drawers and checking refrigerator temperature regularly.

What role do refrigerator coils play in the performance of your appliance, and why is it important to keep them clean?

Refrigerator coils are responsible for dissipating heat, and dirty coils can cause your fridge to work harder and consume more energy. Regular cleaning of coils on the back of the fridge is crucial for maintaining optimal performance.

How can you ensure your refrigerator is level, and why is this an important part of maintenance?

Make sure your refrigerator is level by adjusting its feet using a level tool. This is important to ensure proper function of the compressor and prevent excessive wear on the appliance.

What are some common maintenance tasks for the freezer and refrigerator compartments, and how do they contribute to the overall life of your appliance?

Common maintenance tasks include cleaning the interior compartments, checking the refrigerator thermometer, and organizing items in the fridge. These tasks help maintain proper temperature levels and extend the life of your appliance by reducing strain on its components.

How can proper refrigerator maintenance contribute to the efficiency of your appliance, and what are some key maintenance tasks to keep your fridge running smoothly?

Regular maintenance tasks such as cleaning coils, checking door seals, and organizing items in the fridge and freezer compartments help maintain optimal efficiency and extend the life of your fridge.

Why is it important to ensure that your fridge is level, and how does this factor into maintenance?

Ensuring that your fridge is level helps prevent strain on its components and ensures proper function of the compressor. Adjusting the feet to keep the fridge level is an essential part of refrigerator maintenance.

What are some important cleaning and maintenance tasks for the back and top of your fridge, and how do they contribute to its overall performance?

Cleaning the back of your fridge regularly, including the coils and other components, helps prevent dust buildup and allows for proper ventilation. Additionally, cleaning the top of the fridge prevents debris from falling into the appliance and affecting its performance.

How does cleaning the interior of your fridge, including the crisper drawers and shelves, play a part in overall maintenance, and what are some tips for keeping your fridge clean?

Cleaning the interior of your fridge helps maintain proper temperature levels and prevents food contamination. Regularly cleaning the crisper drawers, shelves, and surfaces with mild soap and water is an important part of fridge maintenance to ensure food safety and longevity of your appliance.

Solving Common Dishwasher Problems – A Comprehensive Guide to Troubleshooting and Maintenance

Having a dishwasher in your kitchen can be a real time-saver, but what happens when it stops working properly? Dishwashers can experience a range of problems, from not draining properly to leaving dishes dirty or even causing leaks. However, with a little troubleshooting, you can often find a solution to get your dishwasher up and running smoothly again.

One common issue is a dishwasher that is not draining properly. If you find standing water in the bottom of your dishwasher after a cycle, there may be a clog in the drain line or the drain pump itself. To address this, start by checking the drain hose for any kinks or obstructions. If the hose appears to be clear, it may be a problem with the drain pump. In this case, you can try cleaning the pump or replacing it if necessary.

Another problem you may encounter is dishes that are coming out dirty after a cycle. This can be frustrating, as it defeats the purpose of having a dishwasher in the first place. One possible cause of this issue is a clogged spray arm. Over time, food particles and debris can build up in the spray arm, preventing it from distributing water effectively. To fix this, remove the spray arm and clean it thoroughly with warm, soapy water. Once it is clean, reattach it and run a cycle to see if the problem is resolved.

If your dishwasher is leaking, it is important to address the issue as soon as possible to prevent water damage to your kitchen. Leaks can occur for a variety of reasons, such as a loose or damaged door seal, a faulty pump or valve, or a cracked hose. Carefully inspect the dishwasher for any visible signs of damage or wear, paying close attention to the door seal and hose connections. If you identify the source of the leak, you can often repair or replace the faulty part to fix the problem.

Remember, when troubleshooting dishwasher problems, safety should always be your top priority. Before attempting any repairs, be sure to turn off the power and water supply to the dishwasher. If you are unsure about how to fix the problem or if it requires more advanced repairs, it is always best to consult a professional dishwasher technician.

By following these troubleshooting tips, you can save time and money by getting your dishwasher running smoothly again. Don’t let dishwasher problems disrupt your daily routine – take action and bring your kitchen back to its full functionality.

Common Dishwasher Problems

Dishwashers are convenient appliances that can make our lives easier, but they can also encounter problems from time to time. Here are some common dishwasher problems that homeowners might face:

1. Not cleaning dishes properly

If your dishwasher is not cleaning your dishes properly, it could be due to a variety of reasons. One common cause is clogged spray arms, which can prevent water from reaching all areas of the dishwasher. Another possible cause is a worn-out or broken spray arm, which might need to be replaced.

2. Not draining properly

A dishwasher that is not draining properly can be frustrating and messy. One possible cause for this problem is a clogged drain hose or filter. Cleaning or replacing these components can often solve the issue. Additionally, a malfunctioning drain pump can also prevent proper drainage and might need to be repaired or replaced.

3. Leakages

Leakages can lead to water damage and should be addressed as soon as possible. One of the most common causes of dishwasher leakages is a faulty door gasket. The gasket can wear out over time and might need to be replaced. Another possible cause is a loose or damaged water inlet valve.

Other common dishwasher problems include issues with the detergent dispenser, problems with the control panel, and strange noises during operation. It’s important to address these problems promptly to avoid further damage and to keep your dishwasher running smoothly.

Dishwasher Not Draining Properly

One common problem with dishwashers is when they don’t drain properly. This can be frustrating and inconvenient, but there are a few potential solutions to try before calling a professional.

Clean the Filter

One of the most common causes of a dishwasher not draining properly is a clogged or dirty filter. The filter is designed to catch food particles and debris to prevent them from clogging the drain. Over time, the filter can become clogged and cause drainage issues.

To clean the filter, locate it at the bottom of the dishwasher and remove any particles or debris. Rinse it under running water and scrub it gently with a brush if necessary. Once clean, reinsert the filter and test the dishwasher to see if the issue is resolved.

Check the Drain Hose

Another potential cause of a dishwasher not draining properly is a kinked or clogged drain hose. The drain hose is responsible for carrying the water from the dishwasher to the drain. If it is bent or clogged, it can prevent proper drainage.

Inspect the drain hose for any kinks or blockages. Straighten out any bends or obstructions and ensure that the hose is securely attached to the dishwasher and drain. Run a test cycle to see if the dishwasher is now draining properly.

Possible Cause Solution
Clogged or dirty filter Clean the filter
Kinked or clogged drain hose Check and straighten the drain hose

If cleaning the filter and checking the drain hose do not resolve the issue, there may be a more serious problem with the dishwasher’s pump or motor. In this case, it is best to consult a professional for further diagnosis and repair.

By addressing common causes of a dishwasher not draining properly, you can save time and money by avoiding a service call. However, if the problem persists or you are unsure of how to proceed, it is always recommended to seek professional assistance to avoid causing further damage.

Dishwasher Not Cleaning Dishes Well

If your dishwasher is not effectively cleaning your dishes, there are a few possible culprits to consider.

1. Clogged Spray Arm

A common reason for poor cleaning performance is a clogged spray arm. Take a look at the spray arms located at the bottom and top of your dishwasher. If they are blocked with debris or mineral deposits, they may not be able to spray water onto your dishes effectively. Remove any obstructions and run water through the spray arms to ensure they are clear.

2. Improper Loading

The way you load your dishwasher can also affect its cleaning performance. Make sure that you are not overcrowding the dishwasher with dishes, as this can prevent water from reaching all the surfaces. Additionally, avoid placing large items or cookware in front of the spray arms, as this can obstruct their movement and result in uneven cleaning.

  1. Dirty Filters

Dirty filters can restrict water flow and lead to poor cleaning results. Check the dishwasher’s filters, usually located at the bottom of the tub, and clean or replace them as necessary. Regularly cleaning the filters can help improve the dishwasher’s performance and prevent debris from being redeposited onto your dishes.

  1. Hard Water Buildup

If you have hard water, mineral deposits can accumulate in your dishwasher and affect its cleaning abilities. Consider using a dishwasher cleaner specifically designed to remove hard water deposits. You may also want to use a rinse aid to prevent the formation of spots and film on your dishes.

By addressing these common issues, you can improve your dishwasher’s cleaning performance and ensure that your dishes come out sparkling clean every time.

Dishwasher Leaking Water

If you notice that your dishwasher is leaking water, it is important to address the issue as soon as possible to prevent any further damage. There are a few common causes for a dishwasher leaking water, and here are some solutions you can try:

1. Check the door gasket

The door gasket is the rubber seal that runs around the edge of the dishwasher door. Over time, this gasket can become worn or damaged, leading to leaks. Inspect the gasket for any signs of damage, such as cracks or tears. If you find any issues, you can replace the gasket to fix the leak.

2. Inspect the water inlet valve

The water inlet valve is responsible for controlling the flow of water into the dishwasher. If it becomes clogged or damaged, it can cause leaks. Inspect the valve for any signs of damage or blockage. If necessary, you can try cleaning it or replacing it to stop the leak.

Remember to always turn off the power and water supply to the dishwasher before performing any repairs or inspections. If you are unsure about how to address the issue, it is best to seek professional help.

By addressing the cause of the leak and taking appropriate action, you can get your dishwasher running smoothly again without any water leakage.

Dishwasher Not Starting

If your dishwasher isn’t starting, there could be a variety of reasons for this issue. Here are some troubleshooting steps you can take to get your dishwasher up and running again:

Possible Cause Solution
No Power Check if the dishwasher is plugged in properly and if the circuit breaker hasn’t tripped. If needed, reset the circuit breaker or replace any blown fuses.
Door Not Latched Make sure the dishwasher door is fully closed and latched. Some dishwashers have a safety interlock that prevents the dishwasher from starting if the door isn’t properly closed.
Control Panel Issues Inspect the control panel for any signs of damage or wear. If you notice any problems, such as buttons not responding or lights not turning on, you may need to replace the control panel.
Timer or Electronic Control Board Malfunction If the dishwasher’s timer or electronic control board is faulty, it may prevent the dishwasher from starting. Consider consulting a professional technician for diagnostics and repairs.
Motor Problems A malfunctioning motor can also cause the dishwasher to not start. If you suspect a motor issue, it’s best to seek professional assistance for proper diagnosis and repair.

If none of these troubleshooting steps resolve the issue, it’s recommended to contact a qualified dishwasher repair technician. They will have the expertise to diagnose and fix the problem efficiently.

Dishwasher Not Dispensing Detergent

One common problem with dishwashers is that they may not dispense detergent properly. This can be frustrating, as it can leave your dishes dirty and unwashed. Fortunately, there are a few steps you can take to troubleshoot this issue.

The first thing to check is if the detergent dispenser is clogged. Remove any debris or buildup that may be blocking the dispenser. You can use a toothbrush or a small brush to gently scrub the dispenser and remove any residue.

Next, make sure you are using the correct type and amount of detergent. Some dishwashers require specific types of detergent, so check your dishwasher’s manual for recommendations. Additionally, using too much detergent can cause issues with dispensing. Follow the manufacturer’s instructions for the correct detergent amount.

If you’ve checked the dispenser and confirmed that you’re using the correct detergent, the next step is to inspect the dispenser mechanism. The dispenser may be faulty or worn out and may need to be replaced. Consult your dishwasher’s manual for guidance on how to replace the dispenser.

In some cases, the issue may not be with the dispenser itself, but with the water temperature. If the water entering the dishwasher is not hot enough, it may affect the detergent’s ability to dissolve and dispense. Check your dishwasher’s settings to ensure that the water is heating properly.

If none of these steps resolve the issue, it may be time to call a professional dishwasher repair service. They will have the expertise to diagnose and fix the problem, whether it’s an issue with the dispenser or another component of the dishwasher.

Remember, it’s important to address the issue of a dishwasher not dispensing detergent promptly. Dirty dishes can accumulate and create an unsanitary environment in your kitchen. By following these troubleshooting steps or seeking professional help, you can get your dishwasher running smoothly again and ensure your dishes are left sparkling clean.

Dishwasher Making Strange Noises

If your dishwasher is making strange noises, it can be a sign that there is a problem with your appliance. Here are some common dishwasher noises and what they might indicate:

  • Grinding noise: If your dishwasher is making a grinding noise, it could indicate that there is debris stuck in the dishwasher’s motor or pump. This can be caused by food particles or foreign objects getting caught in the blades. To fix this issue, you will need to remove the debris from the motor or pump.
  • Loud humming noise: A loud humming noise can be a sign of a faulty motor or a worn-out pump. If you hear this noise, it is recommended to call a professional technician to inspect and repair your dishwasher.
  • Rattling noise: If your dishwasher is making a rattling noise, it could indicate that there is something loose inside the appliance. This can be caused by loose cutlery or utensils that are hitting against the dishwasher’s interior. To solve this issue, check the dishwasher’s interior and remove any loose items.
  • High-pitched squealing noise: A high-pitched squealing noise can be a sign that the dishwasher’s motor bearings are worn out. This noise can also be caused by a faulty pump. To fix this issue, it is advisable to call a professional technician to replace the worn-out bearings or repair the pump.
  • Gurgling noise: If your dishwasher is making a gurgling noise, it could indicate that there is a problem with the drain system. This can be caused by a clog in the drain hose or a faulty drain pump. To resolve this issue, check the drain hose for clogs and ensure proper installation of the drain pump.

If your dishwasher is making any of these strange noises, it is important to diagnose and fix the problem as soon as possible. Ignoring these noises can lead to more significant issues and potentially costly repairs. If you are unsure about how to fix the problem or if the noise persists after attempting to fix it, it is recommended to contact a professional technician to inspect and repair your dishwasher.

Dishwasher Not Heating Water

If your dishwasher is not heating the water, there may be several reasons for this issue. Here are a few things you can check to troubleshoot the problem:

  1. Check the heating element:The heating element in your dishwasher is responsible for heating up the water. Over time, it can become damaged or faulty, preventing it from heating the water. Inspect the heating element for any signs of damage, such as cracks or breaks. If you notice any issues, you may need to replace it.
  2. Check the thermostat:The thermostat regulates the temperature of the water in your dishwasher. If it is not functioning properly, it may not signal the heating element to start heating the water. Test the thermostat using a multimeter to ensure that it is working correctly. If the thermostat is faulty, it will need to be replaced.
  3. Check the control board:The control board controls the various functions of your dishwasher, including the heating element. If the control board is not working correctly, it may not send the signal to the heating element to start heating the water. Inspect the control board for any visible signs of damage or corrosion. If you suspect that the control board is faulty, it may need to be replaced.
  4. Check the water inlet valve:The water inlet valve supplies hot water to your dishwasher. If it is not opening properly, the dishwasher may not receive hot water, resulting in a failure to heat the water. Make sure the water inlet valve is clean and free from any obstructions. If it is not functioning correctly, it will need to be replaced.
  5. Check the wiring:Faulty or loose wiring can prevent the heating element from receiving power, causing it to fail to heat the water. Inspect the wiring connections and ensure that they are secure and properly connected. If you find any damaged or loose wiring, it will need to be repaired or replaced.

If you have checked all of these potential causes and your dishwasher is still not heating the water, it may be best to contact a professional dishwasher repair technician. They will have the expertise and knowledge to diagnose the problem accurately and recommend the appropriate solution to get your dishwasher running smoothly again.

Note: Before attempting any repairs or troubleshooting, ensure that the dishwasher is unplugged and disconnected from the power source to prevent any potential accidents or injuries.

Dishwasher Not Completing Cycle

If your dishwasher is not completing its cycle, there could be a few potential issues to look into. Start by checking the water supply and ensure that it is turned on and flowing properly. If the water supply is fine, the next step is to clean the filter. A clogged or dirty filter can prevent the dishwasher from completing its cycle.

Next, check the spray arms to make sure they are free of any debris or obstructions. Clogged spray arms can disrupt the water flow and prevent the dishwasher from properly cleaning the dishes. Use a small cleaning brush or toothpick to remove any buildup or blockages.

It is also important to make sure that the dishwasher door is latched securely. An improperly closed door can interrupt the cycle and leave the dishwasher unable to complete its task. Check the door latch and ensure that it is properly aligned and functioning correctly.

If none of these steps resolve the issue, it may be time to call a professional technician. There could be a problem with the motor, heating element, or other components that require expert diagnosis and repair. A technician will be able to identify the underlying issue and provide the necessary solutions to get your dishwasher running smoothly again.

Conclusion:

When your dishwasher is not completing its cycle, it can be frustrating and inconvenient. By checking the water supply, cleaning the filter, and ensuring that the spray arms and door are working properly, you can often resolve the problem on your own. If these steps do not solve the issue, it is best to seek professional help to identify and fix the problem.

FAQ: Solutions to Dishwasher Issues

My dishwasher is not turning on. What could be the problem?

There are several possible causes for a dishwasher not turning on. First, check to make sure that it is securely plugged into an electrical outlet and that the outlet is working properly. If the outlet is fine, then check the circuit breaker to make sure it has not tripped. If neither of these are the issue, there may be a problem with the dishwasher’s control board or door latch, and it may need to be inspected by a professional.

Why is my dishwasher not cleaning my dishes properly?

There are a few common reasons why a dishwasher may not be cleaning dishes properly. First, check the spray arms and make sure that they are not clogged with debris. If they are, remove the spray arms and clean them thoroughly. Next, check the dishwasher’s filter and clean it if necessary. Additionally, make sure that you are using the correct amount of detergent and that it is being dispensed properly. If these steps do not solve the problem, there may be an issue with the dishwasher’s pump or motor, and it may require professional repair.

My dishwasher is making a loud noise during the wash cycle. What could be causing this?

A loud noise during the wash cycle can be caused by a few different things. First, check the spray arms to make sure that they are not hitting any dishes or other objects. If they are, rearrange the dishes to prevent this from happening. If the spray arms are not the issue, the dishwasher’s motor or pump may be failing, and it may need to be replaced. Another possible cause is a worn or broken dishwasher seal, which can also be replaced to solve the noise problem.

My dishwasher is leaking water. How can I fix this problem?

If your dishwasher is leaking water, there are a few potential causes. First, check the door gasket to make sure that it is properly sealed. If it is damaged or worn, replace it to solve the leak. Additionally, check the dishwasher’s float switch to make sure that it is not stuck in the up position, causing an overflow. If the float switch is working properly, inspect the dishwasher’s hoses and connections for any signs of damage or leaks. Repair or replace any damaged components to stop the leaking.

Why is my dishwasher not draining all the water after the wash cycle?

If your dishwasher is not draining all the water after the wash cycle, there may be a few possible causes. First, check the dishwasher’s drain hose for any clogs or kinks. Clear any obstructions and straighten the hose if necessary. Next, inspect the dishwasher’s drain pump for any debris that may be preventing it from working properly. Clean the pump if needed. If the hose and pump are clear and the problem persists, there may be an issue with the dishwasher’s drain valve or motor, and it may require professional repair.

What are some common dishwasher issues homeowners face, and how can they troubleshoot them?

Common dishwasher issues include leaking, not starting, not draining, and bad smells. Troubleshoot by checking for clogs, ensuring proper detergent use, and cleaning the dishwasher filter.

How can you fix a leaking dishwasher, and what are some potential causes of leaks?

To fix a leaking dishwasher, check for loose connections, damaged seals, or a faulty door latch. Addressing these issues can prevent water from escaping and causing damage.

What should you do if your dishwasher won’t start, and what are some possible reasons for this problem?

If your dishwasher won’t start, check for power supply issues, such as a tripped circuit breaker or a faulty door switch. Repair or replace any faulty components to get your dishwasher running again.

How can you address a smelly dishwasher, and what steps should you take to eliminate unpleasant odors?

To address a smelly dishwasher, clean the interior thoroughly, paying special attention to the drain and filter. Use dishwasher-specific cleaning products or DIY solutions to remove food debris and eliminate odors.

What are some effective methods for cleaning your dishwasher, and how often should this be done?

Clean your dishwasher regularly by running a cleaning cycle with vinegar or specialized dishwasher cleaner. Additionally, wipe down the interior and remove any food debris from the filter at least once a month.

What are the potential causes of water spots on dishes after running the dishwasher, and how can you prevent this issue?

Water spots on dishes may result from hard water or improper rinsing. Use a rinse aid and ensure proper loading techniques to prevent water spots and achieve spotless dishes.

What steps should you take if your dishwasher isn’t draining properly, and how can you troubleshoot this issue?

If your dishwasher isn’t draining, check for clogs in the drain hose or filter. Additionally, inspect the pump for any obstructions and ensure proper installation of the drain hose to resolve drainage problems.

What are some common problems with dishwashers that won’t start, and how can you fix them?

Common issues include power supply problems, such as a tripped circuit breaker or a faulty door latch. To fix, check the power source and replace any faulty components.

How can you troubleshoot a dishwasher that doesn’t drain properly, and what are some potential causes of this problem?

Check for clogs in the drain hose or filter, as well as obstructions in the pump. Ensure proper installation of the drain hose and address any blockages to restore proper drainage.

What steps should you take if your dishwasher is leaking, and how can you fix a leaky dishwasher?

Inspect for loose connections, damaged seals, or a faulty door latch, as these can cause leaks. Tighten connections, replace seals, or repair the latch to prevent water from escaping.

How can you address a dishwasher that smells bad, and what are some effective methods for eliminating odors?

Clean the interior thoroughly, paying special attention to the drain and filter. Use dishwasher-specific cleaning products or DIY solutions to remove food debris and eliminate unpleasant odors.

What should you do if your dishes are still dirty after running the dishwasher, and how can you troubleshoot this issue?

Check for clogs in the spray arms, ensure proper loading techniques, and use the correct amount of detergent. Address any obstructions and adjust settings to improve cleaning performance.