Are you ready to transform your kitchen into a culinary oasis? It’s time to elevate your cooking experience with a state-of-the-art cooktop that combines both style and functionality. Whether you’re an aspiring home chef or simply looking to upgrade your current setup, installing a cooktop is an essential step towards creating the kitchen of your dreams.
Unleash Your Inner Chef
Imagine the thrill of effortlessly preparing your favorite dishes on a sleek, modern cooktop that fits seamlessly into your countertop. Say goodbye to the limitations of your old stove and hello to a world of endless culinary possibilities. With precise temperature control and a variety of cooking options at your disposal, you’ll have the power to unleash your creativity in the kitchen and take your culinary skills to new heights.
Efficiency Meets Elegance
Not only does a cooktop offer superior cooking performance, but it also adds a touch of elegance to your kitchen space. With its seamless design and contemporary finishes, a cooktop becomes a focal point that seamlessly blends with your existing decor. From sleek stainless steel to sophisticated black glass, you can choose a style that best matches your personal taste and enhances the overall aesthetic appeal of your kitchen.
Experience the Ease of Installation
Installing a cooktop may sound like a daunting task, but fear not! With our easy-to-follow installation guide, you’ll be able to navigate through the process with confidence. From gathering the necessary tools to connecting the electrical and gas lines, we’ll provide you with step-by-step instructions that ensure a successful installation. Soon enough, you’ll be enjoying the benefits of your new cooktop and wondering why you didn’t make the switch sooner.
Ready to embark on your journey towards culinary perfection? Let’s dive into the world of cooktop installation and unlock the endless possibilities that await you in your kitchen.
Preparing for Installation
Before you begin the process of installing a cooktop, it is important to properly prepare for the task at hand. This involves gathering the necessary tools, ensuring the area is clean and free of any obstructions, and familiarizing yourself with the installation instructions provided by the manufacturer.
Gathering the necessary tools:
First and foremost, you will need to gather all the tools and materials required for the installation. This may include a screwdriver, wire cutters, a level, measuring tape, and any specific tools mentioned in the manufacturer’s instructions. It is essential to have these tools readily accessible to avoid delays or interruptions during the installation process.
Ensuring the area is clean and free of obstructions:
Next, it is crucial to thoroughly clean the area where the cooktop will be installed. Remove any debris, dust, or objects that may hinder the installation process. Additionally, make sure there are no flammable materials or substances nearby, as this can pose a safety risk. Taking the time to properly clean and prepare the installation area will help ensure a smooth and successful installation.
Familiarizing yourself with the manufacturer’s instructions:
Finally, carefully read and familiarize yourself with the installation instructions provided by the manufacturer. Pay close attention to any specific requirements or guidelines mentioned, as each cooktop may have its own unique installation process. Understanding the instructions beforehand will allow you to anticipate any challenges or potential issues and make the installation process more efficient and effective.
By properly preparing for the installation of a cooktop, you can ensure a safer and more successful installation process. Taking the time to gather the necessary tools, clean the installation area, and familiarize yourself with the instructions will help minimize any potential risks or complications. This preparation is an important step towards enjoying the benefits of your new cooktop for years to come.
Gathering the Necessary Tools and Materials
Before you begin the installation process for your new cooktop, it is important to ensure that you have all the tools and materials you will need. This section will outline the essential items you should gather before proceeding further.
Firstly, you will need a set of basic hand tools, such as a screwdriver, a adjustable wrench, and pliers. These tools will be necessary for removing any existing screws or bolts, as well as connecting the cooktop to the power source.
In addition to hand tools, you should also have a level and a tape measure. The level will ensure that the cooktop is installed correctly and level with the countertop surface. The tape measure will be useful for taking accurate measurements of the space and ensuring that the cooktop will fit properly.
Furthermore, you will need electrical wiring materials, such as wire nuts and electrical tape, for properly connecting the cooktop to the power source. It is important to follow all safety guidelines and local electrical codes when working with electricity.
Lastly, it is recommended to have some cleaning supplies on hand, such as a sponge, dish soap, and a non-abrasive cleaner. These will be useful for cleaning the cooktop and surrounding area before and after the installation process.
Gathering all the necessary tools and materials before starting the installation will ensure a smooth and efficient process. Once you have everything ready, you can proceed to the next step of the guide.
Turning Off the Power Supply
Ensuring the safety of yourself and your home is of utmost importance when installing a cooktop. Before any work begins, it is crucial to turn off the power supply to prevent any potential electrical hazards. This section will provide you with a step-by-step guide on how to safely turn off the power supply for the installation process.
1. Locate the Electrical Panel
The first step is to locate the electrical panel in your home. This is usually found in a basement, utility room, or garage. The electrical panel contains circuit breakers or fuses that control the power supply to different areas of your home.
2. Identify the Proper Circuit Breaker/Fuse
Once you have located the electrical panel, you need to identify the circuit breaker or fuse that controls the power supply to the area where the cooktop will be installed. Look for a label or diagram that indicates which circuit corresponds to the kitchen or cooking area.
| Circuit Breaker/Fuse | Area |
|---|---|
| 1 | Kitchen |
| 2 | Bathroom |
| 3 | Living Room |
If there is no label or diagram, you can try turning off different circuit breakers/fuses one by one and checking which one affects the power supply to the kitchen. Remember to have a flashlight handy and proceed with caution.
Once you have identified the correct circuit breaker or fuse, make sure it is turned off before proceeding with the installation.
Removing the Old Cooktop
In order to successfully install a new cooktop, it is essential to first remove the old one. This crucial step ensures a smooth transition and provides a clean and safe working area for the installation process. By carefully following the necessary steps to remove the old cooktop, you can ensure a successful and hassle-free installation of your new appliance.
1. Disconnect the power: Before beginning the removal process, make sure to disconnect the power supply to the cooktop. This can be done by turning off the circuit breaker or unplugging the appliance.
2. Turn off the gas supply: If your cooktop is gas-powered, it is important to turn off the gas supply before proceeding. Locate the gas shut-off valve and ensure it is securely turned off to prevent any potential leaks.
3. Prepare the workspace: Clear the area around the cooktop and ensure there is enough space to safely work. Place a protective covering over nearby surfaces to prevent any damage during the removal process.
4. Remove the cooktop: Depending on the type of cooktop, it may be secured with screws, clips, or brackets. Use the appropriate tools, such as a screwdriver or wrench, to carefully remove any fasteners holding the cooktop in place. Take caution not to damage any surrounding countertops or cabinets during this process.
5. Disconnect the gas and electric connections: If applicable, disconnect the gas line and electrical connections from the old cooktop. Follow the manufacturer’s instructions to ensure a proper disconnection without causing any damage.
6. Lift and remove the old cooktop: With all connections detached, carefully lift the old cooktop from the countertop. Have a helper assist you if necessary, as cooktops can be heavy and cumbersome. Place the old cooktop aside in a safe location.
By successfully removing the old cooktop, you are now ready to proceed with the installation of your new cooktop. Follow the manufacturer’s instructions for the specific model and refer to the appropriate section of this guide for a detailed step-by-step installation process.
Installing the New Cooktop
As you embark on the final stage of your cooktop installation journey, it’s time to carefully bring in and position the brand-new cooking appliance that will become the centerpiece of your kitchen. Properly installing the new cooktop is crucial in ensuring optimal functionality and safety.
Before you begin this process, make sure you have all the necessary tools and materials at hand. Take the time to read and understand the manufacturer’s instructions for your specific cooktop model, as each may have unique requirements.
To start, carefully unpack the new cooktop, taking care not to damage any components. Place it nearby in a safe and convenient location. Next, inspect the installation area and ensure that it meets all necessary ventilation and clearance requirements.
- Prepare the countertop by measuring and marking the exact dimensions of the cooktop’s cutout area. Use a template, if provided by the manufacturer, for precise accuracy.
- Once the measurements are marked, carefully cut along the lines using a jigsaw or appropriate cutting tool. Take care to avoid any damage to surrounding countertops or cabinets.
- After cutting out the opening, thoroughly clean the countertop surface, removing any debris or dust.
- With the help of an assistant, carefully lower the new cooktop into the prepared cutout area. Verify that it fits snugly and aligns properly.
- Once in position, secure the cooktop by following the manufacturer’s instructions. This may involve tightening screws or bolts, or using brackets or clips provided with the cooktop.
After securing the cooktop, double-check all connections and ensure that they are properly tightened and secure. Take a moment to review the manufacturer’s guidelines for connecting any gas or electrical lines, as accuracy and precision are crucial for safety.
With the installation complete, it’s time for the final step – testing! Before using the new cooktop, carefully read and follow the manufacturer’s instructions for testing the functionality and safety features. This will help ensure a seamless cooking experience moving forward.
By carefully installing your new cooktop, you’re one step closer to having a fully functional and efficient kitchen. Sit back and admire your hard work, knowing that you’ve successfully tackled this essential aspect of your kitchen upgrade!
Testing and Ensuring Proper Operation
Once the installation process is complete, it is crucial to test and ensure the proper operation of the newly installed cooktop. This section will outline the essential steps to be taken to guarantee that the cooktop is functioning correctly, without relying on specific technical terms.
Before testing, it is recommended to carefully inspect the cooktop for any visible damages or irregularities. Look for any loose connections or signs of wear and tear that might affect its performance. Additionally, ensure that all necessary power connections are securely installed.
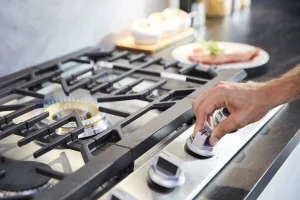
To test the cooktop, begin by turning it on and observing the control panel. Check if the display is functioning correctly, displaying all relevant information clearly. Activate each heating element individually and verify that they can be adjusted to different power levels smoothly.
Next, proceed to test the heat distribution across the cooktop. Place a heat-resistant pan on each heating element and set them to similar power levels. Allow the pans to heat up and carefully ensure that the heat is evenly distributed across the surface of each pan. Any noticeable variations in heating patterns should be addressed to ensure efficient cooking results.
Furthermore, it is essential to test the responsiveness of the cooktop’s controls. Adjust the temperature settings while cooking and monitor how effectively and promptly the cooktop reacts to the changes. Ensure that the controls are intuitive and easy to use, providing a seamless cooking experience.
Finally, test the safety features of the cooktop. This includes features such as automatic shut-off, child lock, and overheating prevention mechanisms. Activate each safety feature individually and ensure that they are functioning correctly to provide peace of mind and prevent accidents.
By following these steps, one can ensure the cooktop’s proper operation, allowing for a seamless cooking experience and promoting safety in the kitchen.
Q&A: How to Install a Cooktop
What tools do I need to install a cooktop?
To install a cooktop, you will need the following tools: a screwdriver, pliers, adjustable wrench, tape measure, level, and a drill with the appropriate drill bits.
Is it necessary to hire a professional for installing a cooktop?
While it is possible to install a cooktop yourself, it is recommended to hire a professional. Cooktop installation involves working with gas or electricity, which can be dangerous if not done correctly. Additionally, hiring a professional ensures that the installation is done properly and meets all safety requirements.
How long does it take to install a cooktop?
The time it takes to install a cooktop can vary depending on various factors such as the type of cooktop, the location, and any additional modifications required. On average, a cooktop installation can take anywhere from 1 to 3 hours.
How do I install a new gas cooktop if I currently have an electric or induction cooktop?
To install a gas cooktop in place of an electric or induction one, first shut off the gas and disconnect the flexible gas hose. Then, remove the existing cooktop and prepare the space for the new gas cooktop.
What steps are involved in replacing an old cooktop with a new gas one?
Begin by turning off the gas line and carefully removing the flexible gas byline with a wrench. Lift the old cooktop out and disconnect any removable parts. Then, place the new gas cooktop into position and connect it to the gas line.
When replacing an electric cooktop with a gas or induction one, what precautions should be taken?
Before installing the new cooktop, ensure the gas line is properly shut off and the power is disconnected at the fuse box. Carefully remove the flexible gas hose and any removable parts from the electric cooktop.
How can I install a gas cooktop if my kitchen already has granite countertops?
To install a gas cooktop on granite countertops, carefully measure the dimensions of the new cooktop and ensure it fits properly. Then, lift the cooktop into place and connect the gas line, checking for any gas leaks.
What should I do if the new gas cooktop comes with a regulator and the old one didn’t?
If the new gas cooktop comes with a regulator and the old one didn’t, simply attach the regulator to the gas line before connecting it to the cooktop. Ensure the regulator matches the amperage of the new cooktop.
What precautions should I take when installing an induction or electric cooktop?
Before installing the induction or electric cooktop, turn off the power at the fuse box to avoid electrical hazards. Carefully remove the flexible gas hose if applicable, and lift the old cooktop out before placing the new one.
How do I connect the gas line to the new cooktop during installation?
Connect the flexible gas line to the underside of the new cooktop, ensuring a tight fit. Use a wrench to secure the connection and check for any gas leaks before using the cooktop.
What should I consider when installing a new cooktop if I’m also installing a wall oven?
Ensure the dimensions of the new cooktop are compatible with the space available, especially if installing it alongside a wall oven. Coordinate power and gas connections to both appliances during installation.
How can I ensure a smooth installation process when replacing a cooktop?
Before installing the new cooktop, carefully measure the dimensions and ensure all necessary connections are prepared. Check for any gas leaks or electrical issues to avoid complications during installation.
What steps should I follow when replacing a gas cooktop with an induction or electric one?
Turn off the gas line and disconnect the flexible gas hose before removing the old gas cooktop. Lift the old cooktop out and install the new induction or electric cooktop, making sure all connections are secure and safe.
How do I determine if the new electric cooktop will connect properly in place of the old one?
Before installing the new electric cooktop, check if the dimensions match the space available and ensure the amperage is compatible with the existing wiring. Also, inspect the underside and edges of the cooktop for any potential issues.
What steps should I take when installing an electric cooktop to ensure a smooth process?
Begin by disconnecting the power at the fuse box and removing any removable parts from the old cooktop. Then, place the new electric cooktop into position and connect it securely to the power source.
How can I install a gas cooktop if my kitchen doesn’t currently have a gas line?
If your kitchen doesn’t have a gas line, you’ll need to arrange for a gas line installation before installing the gas cooktop. Consult a professional to ensure the gas line is properly installed and connected.
What factors should I consider when choosing between a gas or electric cooktop?
Consider your kitchen’s setup and your cooking preferences. Gas cooktops are ideal for precise temperature control, while electric cooktops are easier to clean and may be more suitable for certain kitchen layouts.
What precautions should I take when connecting a gas or electric cooktop to the gas or electrical supply?
Ensure the gas or electrical connections are properly secured and that all safety precautions are followed. Double-check the connections to avoid any potential hazards during use.
How should I handle the removal of the old cooktop before installing a new one?
Carefully remove any removable parts from the old cooktop and disconnect the power or gas supply, depending on the type of cooktop. Lift the old cooktop out and prepare the space for the new one.
What steps should I follow when installing a new cooktop in my kitchen?
Begin by placing the new cooktop into position and ensuring it fits properly. Then, connect the necessary gas or electrical supply, taking care to follow all safety guidelines. Finally, test the cooktop to ensure it’s functioning correctly.